
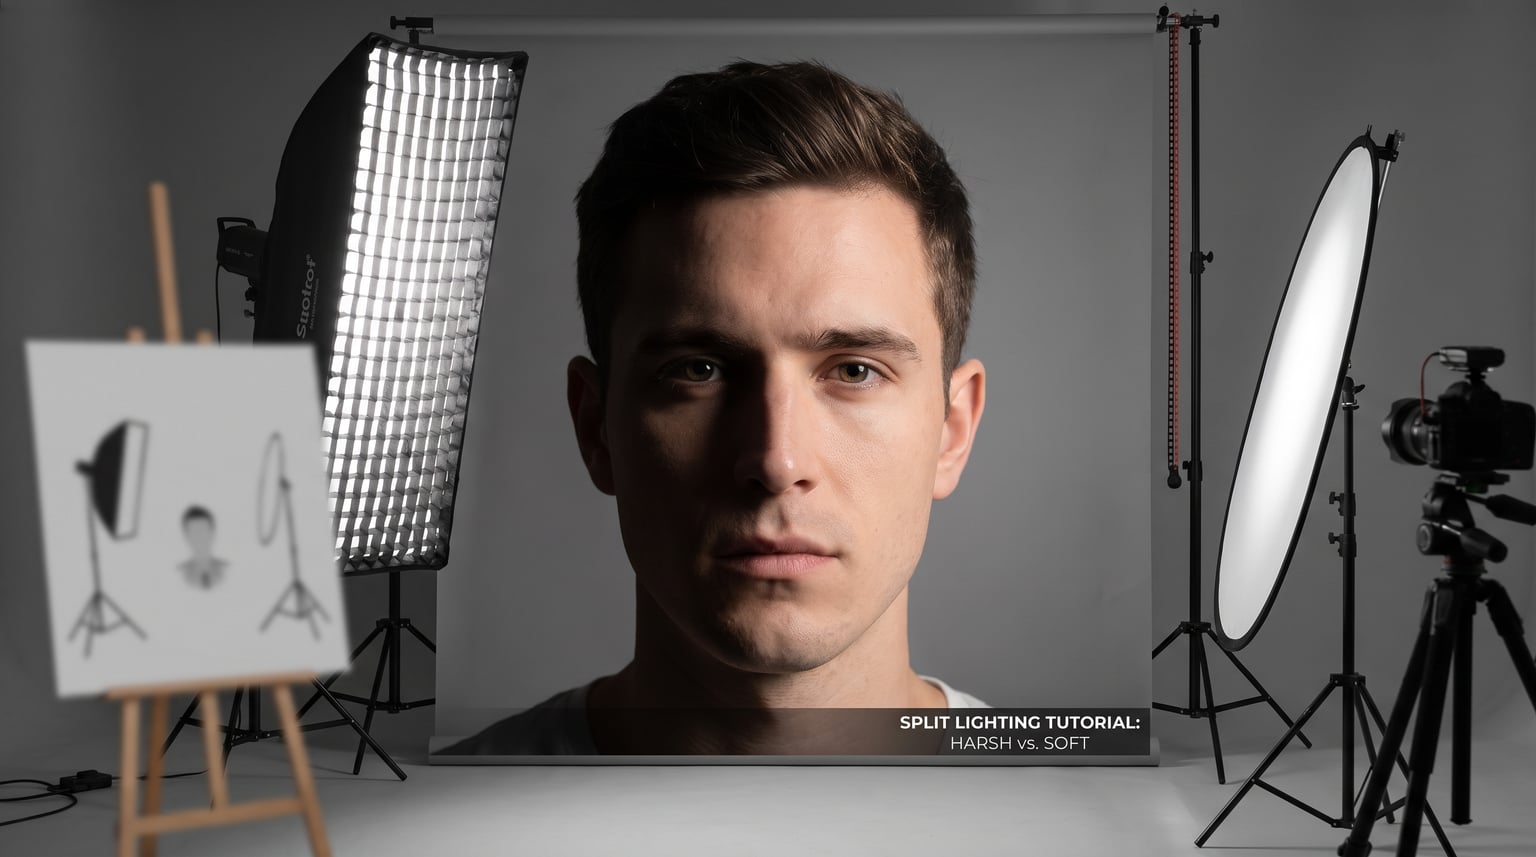
You line up the perfect portrait. The composition is right, your subject is relaxed, and the moment feels genuine. Then you check the back of your camera and see it: deep, ugly shadows carved across their face like someone took a chisel to the image. If you have ever wondered why there are harsh shadows on faces and how to kill them, you are in the right place.
Harsh shadows on faces are one of the most common problems in portrait photography. They show up in midday sun, under overhead indoor lights, and even next to windows when the angle is wrong. The good news is that almost every shadow problem has a fix, either at the moment of capture or later in editing.
In this guide, our team breaks down exactly what causes facial shadows, how to avoid them before pressing the shutter, and how to soften them in post-processing if they already ruined your shot. We cover outdoor and indoor scenarios, reflector techniques, Lightroom and Photoshop workflows, and even when you might want to keep those shadows on purpose.
Table of Contents
What Causes Harsh Shadows on Faces?
Harsh shadows on faces happen when a small, direct light source hits the face at a sharp angle, creating a hard transition between bright and dark areas. The brow bone blocks light from reaching the eye sockets, the nose casts a dark stripe across the opposite cheek, and the chin throws a shadow onto the neck. Every facial feature that sticks out becomes a shadow-making machine.
The key concept is hard light versus soft light. A small light source relative to your subject produces hard light, which creates sharp-edged, high-contrast shadows with abrupt transitions. The sun on a clear day at noon is the classic example. A large light source relative to your subject produces soft light, which wraps around facial features and creates gradual, barely-there shadow transitions. An overcast sky acts like a giant softbox, and that is why cloudy days are a portrait photographer’s best friend.
Distance also matters. A light source that is small but very close to the subject behaves more like soft light because its apparent size increases. This is why a bare speedlight held two inches from someone’s face produces softer shadows than the same flash fired from across the room.
Here is a quick comparison to keep in mind:
Hard light sources: Direct midday sun, bare bulbs, on-camera flash, single overhead lights, clear-sky golden hour when the sun is still high
Soft light sources: Overcast sky, open shade under a tree or building, north-facing windows, diffused flash, large reflectors bouncing light back toward the subject
Hard shadow characteristics: Sharp edges, deep blacks, high contrast, accentuates skin texture, emphasizes every bump and pore
Soft shadow characteristics: Gradual transitions, lighter shadow density, lower contrast, flatters skin, smooths facial features
Understanding this difference is the foundation for every fix in this guide. When people on photography forums say “harsh shadows are a symptom of harsh light,” they mean that the shadow is not the root problem. The light quality is. Fix the light and the shadows disappear on their own.
Finding Soft Light Solutions Outdoors
The single fastest way to kill harsh shadows on faces is to move your subject into softer light. You do not always need gear or editing tricks. Sometimes the solution is as simple as walking ten feet to the left.
Use Open Shade
Open shade is the soft, even light found just inside the shadow of a building, wall, or large tree with a thick canopy. The subject stands in the shade but faces the brightly lit open sky, which acts as a massive, diffused light source. Open shade wraps light gently around the face, fills in eye socket shadows, and eliminates the hard nose shadow entirely.
To find good open shade, look for the edge of a shadow cast by a tall building or solid structure. Position your subject so they are fully in the shade but looking toward the open sky, not toward a dark wall. Avoid the deep shade under trees with sparse canopies, because that creates dappled light, which is one of the worst shadow problems to deal with.
Shoot on Overcast Days
An overcast sky turns the entire sky into a natural softbox. Clouds scatter sunlight in every direction, eliminating the harsh directional quality of direct sun. Skin tones look smoother, eye sockets fill in naturally, and you get beautiful catchlights from the sky reflection. Many professional portrait photographers actually prefer cloudy days over sunny ones for exactly this reason.
Time It for Golden Hour
The golden hour, the first hour after sunrise and the last hour before sunset, produces warm, directional light that is low enough to rake across the face horizontally rather than from above. This eliminates the top-down shadows that midday sun creates under the brow, nose, and chin. The light is also naturally softer because it travels through more atmosphere, scattering and warming as it goes.
For golden hour portraits, position your subject so the sun is behind them or to their side at roughly 45 degrees. Backlighting creates a flattering rim of light around the hair while the face stays in soft, even illumination from the ambient sky.
Avoid Dappled Light
Dappled light is the patchwork of sun and shade created when sunlight filters through tree leaves. It might look pretty in person, but it is a nightmare for portraits. You end up with bright spots on one cheek, dark spots on the other, and irregular bright patches across the forehead and nose. Forum users on Reddit repeatedly cite tree dappled light as one of the hardest problems to fix in post-processing.
If you must shoot near trees, either move your subject fully into solid shade or fully into open sun and handle the shadows with fill light.
Positioning Techniques to Kill Shadows
Sometimes you cannot change the light, but you can always change how your subject stands in it. The direction from which light hits the face determines where shadows fall, and small adjustments make a massive difference.
The Position Protocol
Our team uses a simple step-by-step protocol whenever we shoot portraits in challenging light:
Identify the light direction first. Before posing your subject, look at where the light is coming from. Have your assistant or even your subject hold up a hand and watch which side catches the brightest light.
Turn the subject’s face toward the light source. If the sun is hitting from the right, turn the subject’s face slightly to the right so the light fills the broader side of the face. This pushes any remaining shadow to the far side of the nose, creating a shorter, softer shadow.
Adjust the chin angle. If the light is overhead, ask your subject to lift their chin slightly and turn toward the light. This lifts the brow shadow off the eye sockets and lets light reach under the nose.
Check the catchlights. Look for small reflections of the light source in your subject’s eyes. If you see catchlights, light is reaching the eyes. If the eyes are in shadow, adjust the face angle until catchlights appear.
Rotate the body separately from the face. Body position does not have to match face position. Turn the body away from the light for a more dynamic pose, then rotate just the face back toward the light.
This protocol takes about thirty seconds once you get used to it, and it prevents the most common facial shadow problems before they happen.
Front Light Versus Side Light Versus Back Light
Front lighting, where the light source is behind the camera hitting the face directly, produces the fewest shadows but can look flat. Side lighting at 45 to 90 degrees creates dimension but casts longer nose shadows. Backlighting, where the sun or main light is behind the subject, wraps the face in soft ambient light and creates a glowing rim effect.
For the cleanest shadow-free look, aim for front-to-45-degree lighting. For more dramatic results, use side lighting but fill the shadow side with a reflector.
Using Fill Light and Reflectors
When you cannot avoid hard light, the next best solution is to fill the shadows with additional light. Fill light does not replace the main light. It lifts the dark areas so the contrast between highlight and shadow is less extreme.
Reflector Basics
A reflector is a surface that bounces existing light back onto your subject’s shadow side. A 5-in-1 reflector gives you white, silver, gold, and translucent surfaces plus a blackout option, and they fold down small enough to carry anywhere. White provides a soft, natural fill. Silver gives a brighter, punchier reflection. Gold adds warmth, which pairs well with golden hour light.
To use a reflector for facial shadows, place it on the opposite side of the main light source, angled toward the shadow side of the face. Move it closer to increase the fill intensity or farther away to reduce it. The goal is to lift the shadows to a visible but not flat level. You still want some shadow for dimension, just not the harsh, deep black kind.
Fill Flash
A speedlight or on-camera flash used as fill can rescue shots in harsh midday sun. The trick is to set the flash output one to two stops below the ambient exposure so it gently fills shadows without overpowering the natural light. This technique is called fill flash, and it is especially useful for outdoor event photography where you cannot control the sun or move subjects into shade.
Bounce the flash off a ceiling or wall when shooting indoors for a softer effect. Direct bare flash creates its own hard shadows and makes the problem worse, not better.
DIY Fill Options
You do not need expensive gear to create fill light. A white poster board, a light-colored wall, a white shirt on the photographer, or even a car sunshade can bounce light into shadow areas. One forum photographer mentioned using a white takeaway container lid as an emergency reflector. It worked because the principle is the same: any light-colored surface that catches and redirects light will reduce shadow density.
Indoor Shadow Solutions
Indoor photography presents its own shadow challenges. Overhead ceiling lights are the biggest offender, casting dark shadows into eye sockets and under the chin that make people look tired or unwell. Here is how to fix it.
Window Light Technique
A window with indirect sunlight is one of the best portrait light sources available, and it is free. Position your subject parallel to the window, about two to three feet away, with the window to their side. The window becomes a large, soft, directional light source that wraps around one side of the face and creates a gentle shadow gradient on the opposite side.
For even softer results, hang a thin white curtain over the window. This diffuses the light further and mimics the quality of a professional softbox. North-facing windows provide consistent, cool-toned soft light all day long.
Kill the Overhead Lights
If you are shooting indoors with natural window light, turn off every overhead light in the room. Mixing window light with tungsten ceiling lights creates two competing color temperatures and adds top-down shadows that fight your beautiful side light. The cleaner your light source, the cleaner your shadows.
Use Indoor Reflectors
The same reflector you use outdoors works indoors. Place a white reflector on the shadow side of the subject, opposite the window, to bounce light back into the darker areas of the face. This reduces contrast and fills eye socket shadows without introducing a second visible light source.
A large white foam board is ideal for indoor portraits because it stands on its own and covers a wide area. Position it close enough to fill the shadows but far enough that the effect looks natural.
Fixing Harsh Shadows in Post-Processing
Sometimes you capture the shot and only realize the shadow problem later. Maybe the shoot was time-sensitive, or you had no control over the lighting. Post-processing cannot perform miracles on clipped shadow detail that contains no data, but it can significantly reduce the appearance of moderate harsh shadows.
Lightroom Shadow Recovery
Lightroom has a dedicated Shadows slider in the Develop module under the Basic panel. Pulling the Shadows slider to the right brightens only the darkest areas of the image while leaving highlights and midtones untouched. Start with a moderate adjustment of plus 30 to plus 50, then evaluate.
The Shadows slider alone is often not enough, as forum users on Reddit frequently point out. Combining it with other adjustments produces better results:
Lift Shadows by 30 to 50. This opens up the dark facial areas without affecting the rest of the image.
Reduce Highlights by 20 to 40. This brings back detail in the brightest areas, balancing the overall contrast.
Drop Contrast slightly, by minus 10 to minus 20. This softens the hard transition between light and dark that makes shadows look jarring.
Use the Adjustment Brush. Paint over just the shadow areas on the face and lift exposure by 0.3 to 0.7 stops locally, without brightening the entire image.
Apply noise reduction. Lifting shadows reveals digital noise, especially in the underexposed areas. Apply luminance noise reduction of 15 to 30 to keep skin looking clean.
The key is subtlety. Push the Shadows slider too far and the image starts to look flat and artificial. Aim for a natural appearance where shadow detail is visible but the three-dimensional quality of the face is preserved.
Photoshop Dodge and Burn Technique
For more targeted control, Photoshop’s dodge and burn technique lets you lighten specific shadow areas while darkening highlights to rebalance the face. Here is the workflow:
Create a new blank layer above your image and set the blending mode to Soft Light.
Fill the layer with 50% gray. This neutral starting point means nothing changes until you paint on it.
Select the Brush tool with a soft round brush at low opacity, around 10 to 15 percent.
Set your foreground color to white and paint gently over the shadow areas on the face. Each stroke lightens the shadow slightly. Build up the effect gradually with multiple passes rather than one heavy stroke.
Switch to black paint to burn, or darken, any blown highlights that need toning down.
Reduce the layer opacity if the effect looks too strong. A layer opacity of 50 to 70 percent usually produces a natural result.
This technique gives you surgical precision. You can lighten the shadow under the nose without affecting the cheekbone highlight, or open up the eye sockets without washing out the forehead.
Soft Contrast Technique
A more advanced Photoshop method involves creating a blurred duplicate of your image to add soft contrast correction. The process goes like this:
Duplicate your background layer.
Apply a Gaussian Blur with a large radius, around 40 to 60 pixels depending on image resolution.
Set the blurred layer blending mode to Soft Light or Overlay.
Reduce the layer opacity to 20 to 40 percent.
This adds a soft global contrast adjustment that can help balance harsh shadow transitions.
This technique works because the blurred layer averages light and dark areas, and the blending mode uses those averages to gently push shadows and highlights toward a middle tone.
Managing Noise After Shadow Recovery
One pain point that comes up repeatedly in forum discussions is the noise that appears when you lift dark shadows. Underexposed shadow areas contain less signal and more noise, so brightening them reveals grainy, colored specks that ruin skin texture.
To manage this, always shoot in RAW format rather than JPEG. RAW files contain significantly more shadow data and tolerate aggressive recovery much better. Apply noise reduction after lifting shadows but before sharpening, since sharpening amplifies noise. Use luminance noise reduction in Lightroom or the Reduce Noise filter in Photoshop, and consider a dedicated noise reduction tool like Topaz Denoise AI or DxO PureRAW for severely underexposed images.
When Harsh Shadows Are Intentional?
Not every shadow needs to be killed. Harsh shadows can be a powerful creative tool when used deliberately. The classic technique is chiaroscuro, an Italian term meaning light-dark, which uses strong contrast between light and shadow to create drama and dimension.
Split lighting, where one half of the face is lit and the other half falls into deep shadow, is a staple of moody portraits, film noir styling, and character-driven headshots. It conveys intensity, mystery, and strength. Rembrandt lighting, named after the Dutch painter, creates a small triangle of light on the shadow side of the face under the eye, producing a natural yet dramatic look that flatters most faces.
The difference between a bad shadow and an intentional one comes down to control. Bad shadows happen by accident, in unflattering patterns, from the wrong angle. Intentional shadows are placed with purpose, follow classical lighting patterns, and serve the emotional tone of the image. Learn to kill accidental shadows first, then learn to create intentional ones when the creative vision calls for them.
Quick Reference Checklist for Killing Harsh Shadows
Here is a fast-reference checklist you can use on every portrait shoot to prevent and fix harsh shadows on faces:
Check the light direction before posing your subject
Seek open shade or overcast conditions whenever possible
Schedule outdoor shoots for golden hour, not midday
Avoid dappled light under sparse trees at all costs
Turn the subject’s face toward the main light source
Lift the chin slightly to fill eye socket shadows
Look for catchlights in the eyes as proof the light is working
Carry a 5-in-1 reflector and place it on the shadow side
Use fill flash set one to two stops below ambient for outdoor sun
Turn off overhead indoor lights and use window light instead
Shoot in RAW for maximum shadow recovery flexibility
In Lightroom, combine Shadows up with Highlights down and slight Contrast reduction
In Photoshop, use a Soft Light layer with white brush for targeted dodging
Apply noise reduction after lifting shadows, before sharpening
Print this list, save it to your phone, or tape it inside your camera bag. These fourteen steps cover the vast majority of shadow problems you will encounter.
FAQs
How to get rid of facial shadows?
Move your subject into softer light first: open shade, overcast sky, or a north-facing window. If you cannot move, use a reflector on the shadow side of the face to bounce fill light into dark areas. Turn the subject’s face toward the light source and lift the chin slightly. For shadows already captured, lift the Shadows slider in Lightroom by 30 to 50 points and use a local Adjustment Brush on the darkest facial areas.
What causes face shadows in photos?
Face shadows are caused by hard, directional light hitting facial features at sharp angles. The brow bone blocks light from the eye sockets, the nose casts a shadow across the opposite cheek, and the chin creates a shadow on the neck. Small light sources like the midday sun or bare bulbs produce the harshest shadows because they create abrupt transitions between light and dark.
Is it possible to get rid of shadows completely?
You can minimize facial shadows to the point where they are barely visible, but you cannot eliminate them entirely without making the image look flat and unnatural. Some shadow is needed to show the three-dimensional shape of the face. The goal is soft, gradual shadows rather than hard, deep ones. Open shade and overcast conditions come closest to shadow-free lighting.
How to soften harsh shadows during post processing?
In Lightroom, lift the Shadows slider by 30 to 50, reduce Highlights by 20 to 40, and lower Contrast slightly. Use the Adjustment Brush to paint over facial shadows and raise exposure locally. In Photoshop, create a Soft Light layer filled with 50% gray and paint with a soft white brush at 10 to 15 percent opacity over the shadow areas. Always apply noise reduction after lifting shadows since brightening dark areas reveals grain.
How to get rid of harsh shadows on face in Lightroom?
Open the Develop module and pull the Shadows slider under the Basic panel to the right by 30 to 50 points. Reduce the Highlights slider by 20 to 40 to balance contrast. Drop Contrast by 10 to 20 points to soften hard shadow transitions. For targeted control, select the Adjustment Brush, paint over the shadowed areas of the face, and increase Exposure by 0.3 to 0.7 stops. Finish with Luminance Noise Reduction set to 15 to 30.
What makes a shadow go away in photography?
Shadows disappear when the light source becomes larger, closer, or more diffused relative to the subject. Moving from direct sun into open shade, waiting for clouds to cover the sun, or placing a diffuser between the light and subject all soften or eliminate harsh shadows. Adding fill light from a reflector or flash lifts existing shadows from the opposite side.
Conclusion
Harsh shadows on faces are not a mystery once you understand that they are simply the product of hard light hitting facial features at the wrong angle. The best fix is always prevention: find soft light, position your subject correctly, and use fill from a reflector or flash. When prevention fails, Lightroom and Photoshop offer powerful recovery tools that can rescue most moderately shadowed images.
The photographers who consistently produce clean, flattering portraits are not the ones with the most expensive gear. They are the ones who read the light before they press the shutter. Master the principles in this guide and why there are harsh shadows on faces will never confuse you again, because you will know exactly how to kill them.