
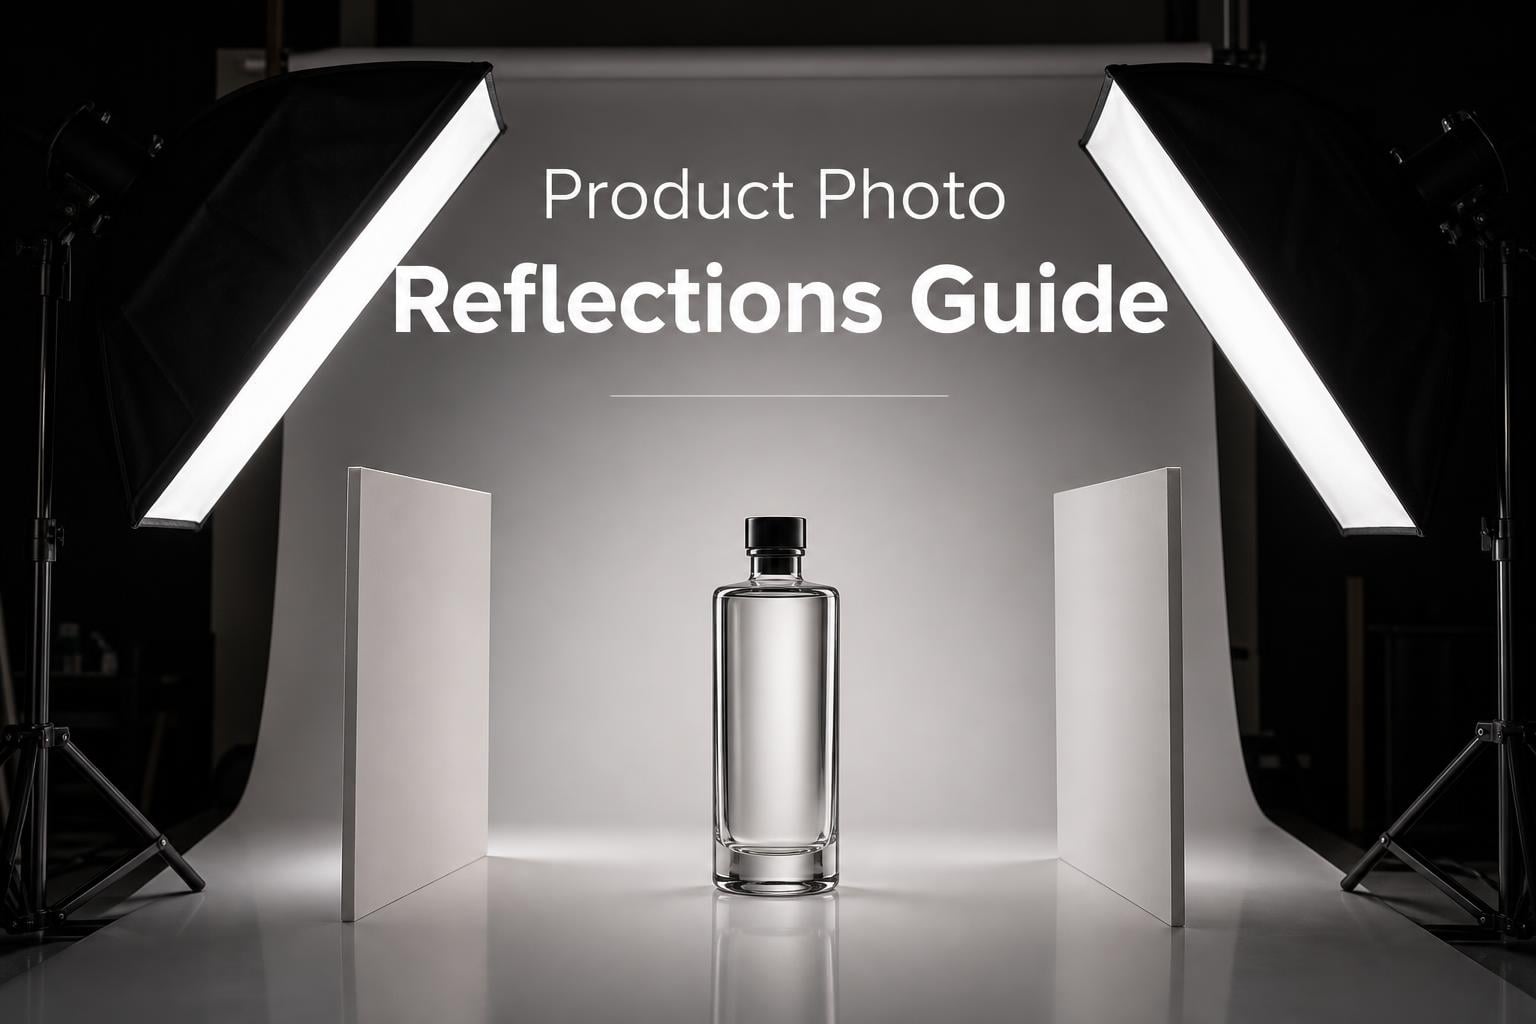
Quick answer: Your product photos have distracting reflections because shiny surfaces like glass, metal, and polished plastic act like mirrors. They bounce light from your light source, your camera body, and your studio environment directly into the lens. The fix comes down to three things: using large, diffused light sources instead of small harsh ones, positioning your lights and camera so reflections bounce away from the lens, and controlling what appears in front of the product.
The main causes are:
Small, harsh light sources that create concentrated hot spots
Camera angle positioned in the reflection path of the product
Uncontrolled ambient light from windows, ceiling lights, or nearby walls
Reflective surfaces on the product itself bouncing light in multiple directions
Environmental reflections from your clothing, background, or studio walls
I have spent years shooting reflective products, and I can tell you that nearly every reflection problem traces back to one of those five causes. Once you understand why reflections happen, fixing them becomes a systematic process rather than guesswork.
If you have ever asked yourself “why do my product photos have distracting reflections?” you are not alone. This is one of the most common frustrations in product photography, and it affects everyone from beginners shooting in their kitchen to professionals in a dedicated studio. Reflections are the number one reason product photos look amateur, and they directly hurt sales on platforms like Amazon, Etsy, and Shopify where customers rely entirely on images.
The good news is that reflections are entirely predictable. They follow the laws of physics, which means once you understand how light behaves on different surfaces, you can control it. This guide breaks down every cause, every solution, and every tool you need to eliminate reflections for good. I will walk you through the science behind reflections, diagnostic techniques to identify your specific problem, and step-by-step setups for every type of reflective product from glassware to jewelry.
Whether you are shooting with a professional DSLR setup or a smartphone on your kitchen table, the principles in this guide apply. Reflections do not care about your camera. They care about light, angles, and surfaces. So let us start there.
Table of Contents
Why Do My Product Photos Have Distracting Reflections? The Science Explained
Reflections happen because of a fundamental law of physics: the angle of incidence equals the angle of reflection. When light hits a surface, it bounces off at the exact same angle it arrived. On a matte surface like paper or fabric, light scatters in every direction, creating what photographers call diffuse reflection. On a shiny surface like glass, metal, or glossy plastic, light bounces off cleanly and predictably, creating what we call specular reflection.
Think of a specular reflection like a billiard ball bouncing off a cushion. If you shoot the ball at a 45-degree angle, it bounces off at 45 degrees in the other direction. Light works the same way. The problem is that your product surface is not just reflecting your light source. It is reflecting everything in front of it: your camera, your lens, your face, the ceiling, the walls, your clothing, and any other objects nearby.
This is why simply adding more light does not fix reflections. In fact, it often makes them worse. What you need to do is control what the surface sees. Every reflective product is essentially a mirror showing you a picture of its surroundings. If the surroundings are dark and controlled, the product looks clean. If the surroundings are chaotic, you get distracting reflections everywhere.
There is also an important distinction between different types of reflections. Specular reflections are those sharp, mirror-like hot spots you see on glass and chrome. These are the most distracting type. Diffuse reflections scatter light evenly and actually help a product look natural and dimensional. Your goal is not to eliminate all reflections, because some reflections give products shape and form. Your goal is to eliminate the distracting, uncontrolled specular reflections while keeping the soft, pleasing ones that show texture and depth.
One more concept worth understanding: the size of your light source relative to the product matters enormously. A small light source, like a bare flash or a sunny window, creates small hard reflections that look like hot spots. A large light source, like a big softbox or an overcast sky, creates large soft reflections that wrap around the product smoothly. This single principle explains why professional product photos look so clean. The photographers are using massive light sources relative to their products.
The 5 Main Causes of Distracting Reflections in Product Photos
Understanding the causes of reflections in product photography is the first step toward eliminating them. Here are the five main culprits, ranked by how commonly they ruin product shots.
1. Small, Harsh Light Sources
The number one cause of distracting reflections is using a light source that is too small relative to your product. A bare speedlight, a direct flash, a bare light bulb, or even sunlight coming through a window all create concentrated hot spots on reflective surfaces. These hot spots blow out detail and create harsh transitions between light and shadow.
I see this mistake constantly on photography forums. A beginner sets up a single strobe pointing directly at a shiny product and wonders why there is a bright white spot obscuring half the product. The light is reflecting off that surface at a very specific angle, and because the source is small, the reflection is small and intense. Think of it like a laser beam versus a flashlight. The laser concentrates energy into a tiny point, while the flashlight spreads it out.
The fix is to increase the apparent size of your light source. A softbox, a shoot-through umbrella, a diffusion panel, or even a sheet of white tracing paper placed between your light and the product will spread the light over a much larger area. The reflection on the product becomes large, soft, and gradual instead of small, hard, and blown out.
2. Camera Angle in the Reflection Path
Here is a problem that catches almost every photographer at some point. The law of reflection says light bounces off a surface at the same angle it hits. If your light is positioned to one side of the product and your camera is on the other side at the mirror-image angle, you are sitting right in the path of the reflected light. The camera itself becomes visible in the reflection.
This is especially common when shooting straight down at a product from above. The ceiling light bounces off the product and straight up into the lens. Or your light is at a 45-degree angle to the left, and your camera is at 45 degrees to the right. You are in the bounce zone.
The solution is to map out your reflection angles before shooting. Imagine a line from your light source to the product, then continue that line at the same angle past the product. Whatever is on that line will be reflected into the camera. If your camera is on that line, move it. If a white wall is on that line, cover it with dark fabric.
3. Uncontrolled Ambient Light
Ambient light is any light in your shooting space that you are not actively controlling. This includes overhead ceiling lights, windows, lamps, and even light spilling under a door. Every ambient light source creates its own reflection on shiny products, and since you are not controlling these sources, the reflections appear random and chaotic.
One Reddit user described this exact problem: they set up studio strobes but could not figure out why there were still weird reflections on their product. The culprit was the overhead fluorescent kitchen light they forgot to turn off. Another photographer struggled with reflections that changed position every few minutes. That turned out to be sunlight shifting through a window as the day progressed.
The fix is to eliminate or control every light source in your shooting space. Turn off overhead lights. Cover windows with blackout curtains or shoot at night. If you cannot eliminate ambient light completely, use a light tent, which surrounds the product and blocks external light from reaching the surface.
4. The Product Surface Itself
Different materials reflect light differently, and some products are simply harder to photograph than others. Highly polished metal, chrome, glass, lacquered wood, and glossy plastic are the worst offenders. These surfaces have what physicists call high surface reflectivity, meaning a large percentage of incoming light bounces off rather than being absorbed.
Within these categories, there is further variation. Brushed metal scatters light more than polished chrome, so it creates softer reflections. Clear glass transmits most light but creates reflections on its surface. Colored glass adds the complication of color shifts. Matte plastic absorbs most light and rarely causes problems. Understanding your product material helps you predict where reflections will appear and how to control them.
This is also where product preparation matters. Fingerprints, dust, and smudges become highly visible under studio lighting on reflective surfaces. A single fingerprint on a glass bottle can create a reflection hotspot that ruins the shot. Always clean products thoroughly with a microfiber cloth and consider wearing cotton gloves when handling them.
5. Environmental Reflections
Even with perfect lighting and camera positioning, environmental reflections can sneak into your shots. The most commonly overlooked environmental reflections include the photographer’s own body, nearby walls, the ceiling, light stands, and even the background sweep itself.
Here is a scenario from a photography forum that perfectly illustrates this issue. A photographer was getting mysterious colored reflections on silver jewelry. After hours of troubleshooting, they realized the reflections were coming from their own bright blue shirt. The silver surface was acting as a mirror, capturing everything in the room including the photographer.
Walls painted in warm tones add color casts to reflective products. White walls create bright reflections that look like overexposed highlights. Even a white infinity sweep background can create reflections if it curves up behind the product and catches your main light. The solution is to dress in dark, neutral clothing, paint or cover walls in dark fabric, and use negative fill (black foam boards) to block unwanted reflections from the environment.
Common Beginner Mistakes That Make Reflections Worse
After reading hundreds of forum posts and Reddit threads about product photography reflections, I have identified the mistakes that trip up beginners most often. These go beyond the five main causes above and dig into specific situations where well-meaning photographers accidentally create worse reflections than they started with.
Shooting Straight Down With the Camera in the Light Path
This is the single most common mistake I see. You want a nice overhead product shot, so you point your camera straight down. You position your light to the side at an angle. The light bounces off the product surface and straight up into your lens. The result is a bright reflection streak running across your image.
The fix: either move your camera off-axis slightly, or position your light so its reflection bounces away from the camera rather than toward it. Many pros solve this by using a horizontal camera boom arm that keeps the camera out of the reflection path entirely. Alternatively, shoot through a hole in a black foam board placed above the product. The foam board blocks reflections while the hole lets the lens see through.
Ignoring the Camera Body as a Reflection Source
Not a single competitor article I reviewed mentions this, but it is a real problem that comes up constantly on Reddit. When you photograph highly reflective products, the camera body and lens barrel show up in the reflection. On chrome, glass, and polished metal, you can literally see the shape of your camera in the product.
The solutions are simple but require some setup. First, wear dark clothing so at least your body blends in. Second, wrap your camera and lens in black matte material. Some photographers use black gaffer tape on shiny camera parts. Third, maximize the distance between the camera and product by using a longer lens. A 100mm macro lens shot from further away creates a smaller camera reflection than a 50mm lens shot close up.
Using Bare Flash or Direct Strobe
A bare flash is the harshest possible light source for product photography. It creates tiny, intense reflections that blow out to pure white with no recoverable detail. Beginners often use bare flash because they do not own modifiers yet, but this is the one situation where investing in a modifier makes an immediate and dramatic difference.
Even a cheap shoot-through umbrella or a piece of white fabric held in front of the flash transforms the light quality. The modifier does not reduce the amount of light hitting the product. It simply spreads that light over a larger area, creating a larger and softer reflection that wraps around curves smoothly rather than creating a hot spot.
Forgetting to Clean the Product
This sounds obvious, but you would be amazed how many photographers skip this step. Dust particles, fingerprints, and smudges are invisible under normal room light but become glaringly obvious under studio lighting. On a glossy product surface, every speck of dust becomes a tiny reflection point.
Use a microfiber cloth and lens cleaning solution before every shoot. For glass and chrome, use a dedicated glass cleaner. Wear cotton or nitrile gloves when handling reflective products. Check the surface through your camera viewfinder or on your monitor before you start shooting, because the camera magnifies imperfections you cannot see with the naked eye.
Leaving Room Lights and Windows Uncovered
I mentioned ambient light as a main cause, but it deserves special attention here because it is such a common beginner trap. You set up your studio strobes, dial in your settings, and everything looks great. Then you notice strange reflections that do not match your lighting setup. The overhead room light is adding its own reflection.
The fix is to create a controlled lighting environment. Turn off every light in the room except your studio lights. Cover windows completely. If possible, shoot in a room with no windows or cover them with blackout material. Remember that even a small amount of ambient light will create a reflection on a highly polished surface.
How to Eliminate Reflections: Lighting Setups That Work
Now that you understand why reflections happen and what causes them, let us get into the practical solutions. The key principle behind every successful reflective product photography setup is this: control what the product surface sees. If the surface sees only large, soft, controlled light, you get clean, professional results. If it sees chaos, you get reflections.
Here are proven lighting setups organized by product type. Each one addresses the specific reflective challenges of that material.
How to Photograph Glass Without Glare
Glass products like bottles, glassware, and transparent containers present a unique challenge. The surface is reflective, but light also passes through the glass, creating complex internal reflections. Traditional front lighting creates harsh hot spots on glass surfaces that obscure the product entirely.
The solution is backlighting. Position your main light behind the glass product, shining through it. This illuminates the liquid or contents while creating a clean silhouette. To add definition to the edges, place white foam boards on either side of the product. The glass surface picks up the white boards as soft, graduated reflections that outline the product shape without creating hot spots.
For colored glass, add a fill light from the front at a low power setting, diffused through a softbox. This brings out the glass color without overpowering the backlight. Avoid pointing any light directly at the front surface of the glass, as this creates immediate hot spots. If you need front detail, bounce light off a white card positioned at an angle rather than lighting directly.
How to Photograph Metal Without Glare?
Metal is the hardest material to photograph without reflections. Polished chrome, stainless steel, and brass surfaces reflect like mirrors, showing every light source and every object in the room. The approach for metal is fundamentally different from glass.
For metal products, you do not light the product directly. You light what the metal sees. Set up a large white surface (a softbox, a white foam board, or a white wall) opposite your shooting position. This white surface becomes the reflection that the metal surface captures. Instead of a harsh hot spot, you get a large, smooth gradient of light across the metal surface.
This technique is called image-forming reflection control. You are literally designing the reflection by controlling what appears in front of the metal. For brushed or satin metal finishes, you still want large light sources, but you have slightly more tolerance because the brushed texture scatters light somewhat.
Important note about polarizing filters: a circular polarizing filter works wonders on glass, water, and lacquered surfaces. However, it has almost no effect on bare metal. This is a common misconception that trips up beginners. Forum users consistently report that polarizers do nothing for chrome or polished steel. For metal, you must control reflections through lighting and environment, not filters.
How to Photograph Plastic and Lacquered Products?
Plastic products range from matte finishes that rarely cause reflection problems to high-gloss lacquered surfaces that behave like mirrors. For glossy plastic, the approach is similar to metal: use large, diffused light sources and control the environment.
A light tent works exceptionally well for plastic products. The translucent walls of the tent surround the product with soft, even light from every direction, eliminating harsh reflections. Position your lights outside the tent, shining through the walls. The product sees nothing but smooth white light from all angles.
For plastic products that need more dimensional lighting, use two softboxes positioned at 45-degree angles on either side. Adjust the angle until the reflections on the product surface form a pleasing gradient rather than a hot spot. A polarizing filter can also help reduce surface reflections on glossy plastic.
How to Photograph Jewelry Without Reflections?
Jewelry is the ultimate challenge because it combines multiple reflective materials in a single product. You have polished metal, faceted gemstones that reflect light in multiple directions, and often enamel or lacquer surfaces. Each material requires a slightly different approach.
For jewelry, use a combination of diffused lighting and precise flagging. Set up two softboxes at 45-degree angles for even illumination. Add white foam boards close to the product for fill light on gemstones, which need light entering from multiple angles to sparkle. Use black flags (small pieces of black foam board) positioned to block specific reflections that are too bright.
Focus stacking is often necessary for jewelry because the depth of field at macro distances is extremely shallow. Take multiple shots at different focus points and blend them in post-production. This ensures the entire piece is sharp, which matters enormously for e-commerce jewelry photos where customers need to see fine detail.
For rings and small items, a light tent or a macro studio box with built-in diffusers can simplify the process significantly. These enclosed environments eliminate environmental reflections and provide consistent, repeatable lighting.
How to Photograph Electronics Without Screen Glare?
Electronics present a dual challenge: reflective product casings and reflective screens. The casing follows the same rules as plastic and metal above. The screen, however, requires special handling because it emits its own light.
For the product body, use standard diffused lighting at 45-degree angles. For the screen, the trick is to eliminate ambient reflections while letting the screen display show through. Turn the screen on and set it to maximum brightness. Use a low ISO and adjust your exposure so the screen content is properly exposed. Then add just enough fill light on the product body to match.
If the screen has an anti-glare coating, you can get away with some front lighting. For glossy screens (like those on many smartphones and tablets), position your lights so they do not reflect directly off the screen into the camera. A polarizing filter can help reduce screen reflections on glossy displays.
Essential Tools and Equipment for Controlling Reflections
You do not need every piece of equipment on this list to get started. But understanding what each tool does helps you choose the right one for your specific reflection problem. I have organized these by category and explained exactly what reflection issue each tool addresses.
Light Modifiers
Softboxes are the workhorse of product photography. They create a large, evenly diffused light source that produces soft reflections instead of hot spots. A medium softbox (24 to 36 inches) works for most small to medium products. For larger products, go bigger. The larger the softbox relative to the product, the softer and more wrapping the reflection.
Diffusers are translucent panels placed between your light source and the product. They spread harsh light into soft, even illumination. A simple white sheet or a piece of tracing paper can serve as an effective diffuser on a budget. Professional diffusion panels come in various densities for different levels of light softening.
Shoot-through umbrellas are an affordable alternative to softboxes. They spread light widely but offer less directional control. Good for products inside a light tent where you want light coming from multiple angles simultaneously.
Reflection Control Tools
Foam boards (also called bounce cards or fill cards) are inexpensive white boards used to bounce light back onto the shadow side of a product. They also appear as clean white reflections on shiny surfaces. Black foam boards serve the opposite purpose: they absorb light and create dark reflections, which define edges and add dimension to metal and glass products.
Black flags (also called negative fill) are black panels positioned to block unwanted light from reaching the product. They are essential for metal photography where you need to control exactly what appears in the reflection. A black flag placed strategically can eliminate a bright reflection streak while leaving the rest of the lighting intact.
Light tents (also called light cubes or photo tents) are translucent fabric enclosures that surround the product with diffused light from all angles. They are the simplest solution for highly reflective small products. Place your lights outside the tent, and the product sees nothing but soft, even light. Light tents are especially popular for jewelry, coins, and small electronics.
Filters
Circular polarizing filters (CPL) attach to your lens and reduce reflections from non-metallic surfaces like glass, water, and glossy plastic. You rotate the filter to adjust the amount of reflection reduction. They are extremely effective for glass and lacquer but, as mentioned earlier, have almost no effect on bare metal.
Lens hoods are not directly for product reflections, but they prevent stray light from entering the lens and reducing contrast. High contrast helps reflections appear cleaner and more defined, which actually helps you identify and fix them.
Support Equipment
A tripod is mandatory for product photography. It allows you to use low ISO settings and small apertures for maximum image quality and depth of field. It also keeps your camera in a fixed position so you can adjust lighting and product placement without losing your composition.
A cable release or remote shutter prevents camera shake during long exposures. Even the slight movement from pressing the shutter button can soften images at macro distances.
Best Camera Settings for Reflective Product Photography
Camera settings matter for reflective product photography because they affect how reflections are captured and how much flexibility you have in post-production. Here are the settings I recommend for different product types.
Aperture: Use f/8 to f/11 for most products. This provides enough depth of field to keep the entire product sharp while maintaining lens sharpness. For flat lay shots where the product is on a single plane, f/8 is usually sufficient. For products with significant depth (like a bottle or a watch), stop down to f/11 or f/16. For jewelry at macro distances, you may need f/16 or smaller, combined with focus stacking.
ISO: Always shoot at ISO 100 for maximum image quality and minimum noise. Reflections on shiny surfaces reveal every bit of noise in your image. Since you are using a tripod and controlled lighting, there is no reason to raise the ISO.
Shutter speed: Set your shutter speed to sync with your strobes (typically 1/125 to 1/200 second). If you are using continuous lighting, use whatever shutter speed gives you proper exposure at ISO 100 and your chosen aperture. Long exposures are fine since you are on a tripod.
White balance: Set a custom white balance using a gray card for accurate color representation. This is critical for reflective products because color casts from reflections can shift the apparent color of the entire product. If your light source has a color tint, it will show up in every reflection on the product surface.
Shooting mode: Always shoot in manual mode. Product photography requires consistent, repeatable exposures. Auto modes will change settings between shots as reflections brighten or darken the scene, making post-production much harder.
File format: Shoot in RAW. Reflections often create high-contrast areas that need recovery in post-production. RAW files contain significantly more highlight and shadow detail than JPEG, giving you the flexibility to recover blown-out reflections or bring up shadow detail.
Smartphone Product Photography: Reducing Reflections Without a DSLR
Not everyone has a DSLR or studio strobes. Smartphone product photography is a growing use case, and the reflection principles are exactly the same. The difference is in the tools and techniques you use to control light with minimal equipment.
The biggest challenge with smartphones is that the flash is tiny and positioned right next to the lens. This creates the worst possible reflection scenario: a small, harsh light source whose reflection bounces almost directly back into the lens. Always turn off the flash for product photography.
Instead, use natural window light diffused through a white curtain. Position the product so the window is to the side, creating directional light. Use a white piece of poster board on the opposite side as a fill card to soften shadows. This simple two-element setup creates clean, professional-looking light that rivals studio results.
For smartphone users who want to step up, a small clip-on LED light with a diffuser can replace studio strobes. Position it off-camera using a small stand or even a stack of books. The key is to make the light source as large as possible relative to the product. A small LED panel held close to the product is effectively a larger light source than a bare flash held far away.
Smartphone polarizing filter clips are available and work the same way as CPL filters on DSLR lenses. They reduce reflections on glass and glossy plastic surfaces. For metal surfaces, you still need to rely on lighting control rather than filters.
Clean your phone lens before every shoot. Phone lenses accumulate fingerprints and oils that create their own haze and flare, which compounds reflection problems. Use a microfiber lens cloth.
How to Fix Reflections in Post-Production?
Prevention is always better than correction, but sometimes you cannot avoid a reflection and need to fix it in editing. Post-production should be your backup plan, not your primary strategy. The less you rely on editing tools, the more natural and professional your product photos will look.
Clone Stamp Tool
The clone stamp is your primary weapon for removing reflections. It lets you copy pixels from one area of the image and paint them over the reflection. The key to natural-looking results is to sample from areas with similar lighting and texture. Work at a high zoom level and use a soft-edged brush for seamless blending.
For small reflection hot spots, set your clone stamp to a low opacity (around 30 percent) and build up the correction gradually. This avoids the flat, painted look that gives away obvious retouching.
Healing Brush and Spot Healing
The healing brush automatically blends the sampled area with the surrounding pixels, matching texture and lighting. It is faster than the clone stamp for small corrections and works well for removing dust spots and minor reflections. For larger areas, the healing brush can sometimes create smudgy artifacts, so use the clone stamp for anything bigger than a small spot.
Dodge and Burn
Dodge and burn techniques let you selectively lighten or darken areas of the image. Use dodging to bring back detail in reflection shadows and burning to tame overly bright reflection hot spots. Work on a separate layer with low exposure settings (5 to 10 percent) for subtle, natural adjustments.
This technique is especially useful for metal products where you want to smooth out the gradient of a reflection without removing it entirely. The goal is to make reflections look natural and gradual rather than eliminating them completely.
Focus Stacking
Focus stacking solves a different problem: depth of field. When shooting reflective products at macro distances (especially jewelry), you need small apertures for depth of field, but even f/16 may not be enough to keep everything sharp. Focus stacking solves this by taking multiple images at different focus points and blending them.
Take 5 to 15 shots, each focused on a slightly different part of the product. Use focus stacking software (Photoshop has a built-in feature, or dedicated tools like Helicon Focus) to blend the sharp areas of each image into a single, fully sharp composite. This technique is essential for professional jewelry photography.
Color Correction for Reflection Casts
If environmental reflections introduced a color cast (like a warm tint from a nearby wooden table or a blue tint from a window), use color correction tools to neutralize it. The white balance tool in Lightroom or Camera Raw can target specific areas. For localized color casts, use a selective color adjustment layer or a hue/saturation layer masked to the affected area.
Always check your corrected images on multiple devices and in different lighting conditions. Color casts that look fixed on your monitor may still be visible on other screens.
Studio Environment Checklist
Your shooting environment plays as big a role in reflections as your lighting setup. Use this checklist to prepare your space before any reflective product shoot.
Room lighting: Turn off all overhead lights, lamps, and ambient sources. Cover windows with blackout material or shoot after dark. The only light in the room should be your controlled studio lighting.
Wall color: White walls create bright reflections. If possible, shoot in a room with dark or neutral-colored walls. If your walls are white, hang dark fabric or use a light tent to block wall reflections from reaching the product.
Photographer clothing: Wear dark, solid-colored clothing with no logos or patterns. Bright clothing reflects in shiny products and creates color casts. Black or dark gray is ideal. This sounds excessive, but it makes a visible difference on chrome and glass products.
Background: Use a paper sweep or fabric backdrop that curves smoothly from horizontal to vertical. Avoid seams or transitions that create their own reflections. For highly reflective products, a dark background often works better than white because it creates fewer reflections to manage.
Floor surface: If your light or product is low to the ground, the floor surface can create reflections. A dark cloth or mat under your shooting area eliminates this source.
Air quality: Dust in the air settles on products during long shoots. Consider an air purifier in your shooting space. Let dust settle for 10 to 15 minutes after setting up before placing your product.
Temperature: Glass and metal products can fog when moved from a cold environment to a warm studio. Allow products to reach room temperature before shooting to avoid condensation, which creates its own haze and reflection issues.
Frequently Asked Questions
How to avoid reflection in product photography?
To avoid reflections in product photography, use large diffused light sources instead of small bare flashes, position lights at 45-degree angles so reflections bounce away from the camera, use foam boards and black flags to control what the product surface sees, and eliminate all ambient light from the room. For glass and plastic surfaces, a polarizing filter can further reduce reflections.
How to stop reflection in photos?
Stop reflections by controlling your light source size (use softboxes or diffusers to enlarge it), adjusting your camera angle away from the bounce path of your lights, using polarizing filters on glass and lacquered surfaces, wearing dark clothing to prevent body reflections, and turning off all ambient light sources in your shooting space.
What are the common mistakes to avoid in product photography?
Common mistakes include using a single small light source, shooting directly overhead with the camera in the reflection path, not cleaning dust and fingerprints from the product, leaving ambient room lights on, wearing bright clothing that reflects in shiny products, using bare flash without diffusion, and ignoring background and wall reflections that contaminate the product surface.
What is the 80/20 rule in photography?
The 80/20 rule in photography suggests that 80 percent of your image quality comes from 20 percent of your effort, primarily lighting and composition. For reflective product photography, this means mastering your light source size, position, and diffusion will solve the majority of reflection problems before you ever reach for post-production tools.
Does a polarizing filter work on metal surfaces?
No, a circular polarizing filter has almost no effect on bare metal or polished chrome. Polarizers work by filtering light waves that have been reflected off non-metallic surfaces like glass, water, and glossy plastic. For metal products, you must control reflections entirely through lighting position, diffusion, and environmental control rather than filters.
Why do I see myself reflected in my product photos?
You see yourself because shiny product surfaces act like mirrors, reflecting everything in front of them including the photographer. To prevent this, wear dark neutral clothing, maximize distance between yourself and the product by using a longer lens, and position black foam boards between yourself and the product so the surface sees dark panels instead of your body and camera.
Can I fix reflections after taking the photo?
Yes, but with limitations. Small reflection hot spots can be removed using the clone stamp or healing brush in Photoshop. Color casts from reflections can be corrected with white balance and selective color adjustments. However, large blown-out reflections with no detail cannot be recovered, which is why preventing reflections in-camera is always preferable to fixing them in post-production.
Understanding why your product photos have distracting reflections transforms product photography from a frustrating guessing game into a systematic, repeatable process. The core principle is simple: reflective surfaces show you a picture of their surroundings. Control the surroundings, and you control the reflections.
Start with the basics. Enlarge your light source with a diffuser or softbox. Turn off every ambient light in the room. Wear dark clothing and position your camera outside the reflection bounce path. These three changes alone will eliminate the majority of reflection problems most photographers face.
From there, refine your approach based on the product material. Glass needs backlighting. Metal needs image-forming reflection control with large white surfaces. Plastic responds well to light tents and polarizing filters. Jewelry requires careful flagging and often focus stacking. Each material has its own playbook, and the setups in this guide give you a proven starting point for each one.
Remember that preventing reflections in-camera always produces better results than fixing them in post-production. Post-production tools are your backup plan for reflections you could not fully control, not a substitute for proper lighting technique. Master the lighting first, and the editing becomes minimal.
If you take one thing from this guide, let it be this: reflections are not random. They follow predictable physical laws. The angle of incidence equals the angle of reflection. Large light sources create soft reflections. Small light sources create harsh ones. Everything in front of a shiny product appears in its surface. Once you internalize these principles, you will never wonder why your product photos have distracting reflections again. You will know exactly where they came from and exactly how to fix them.