
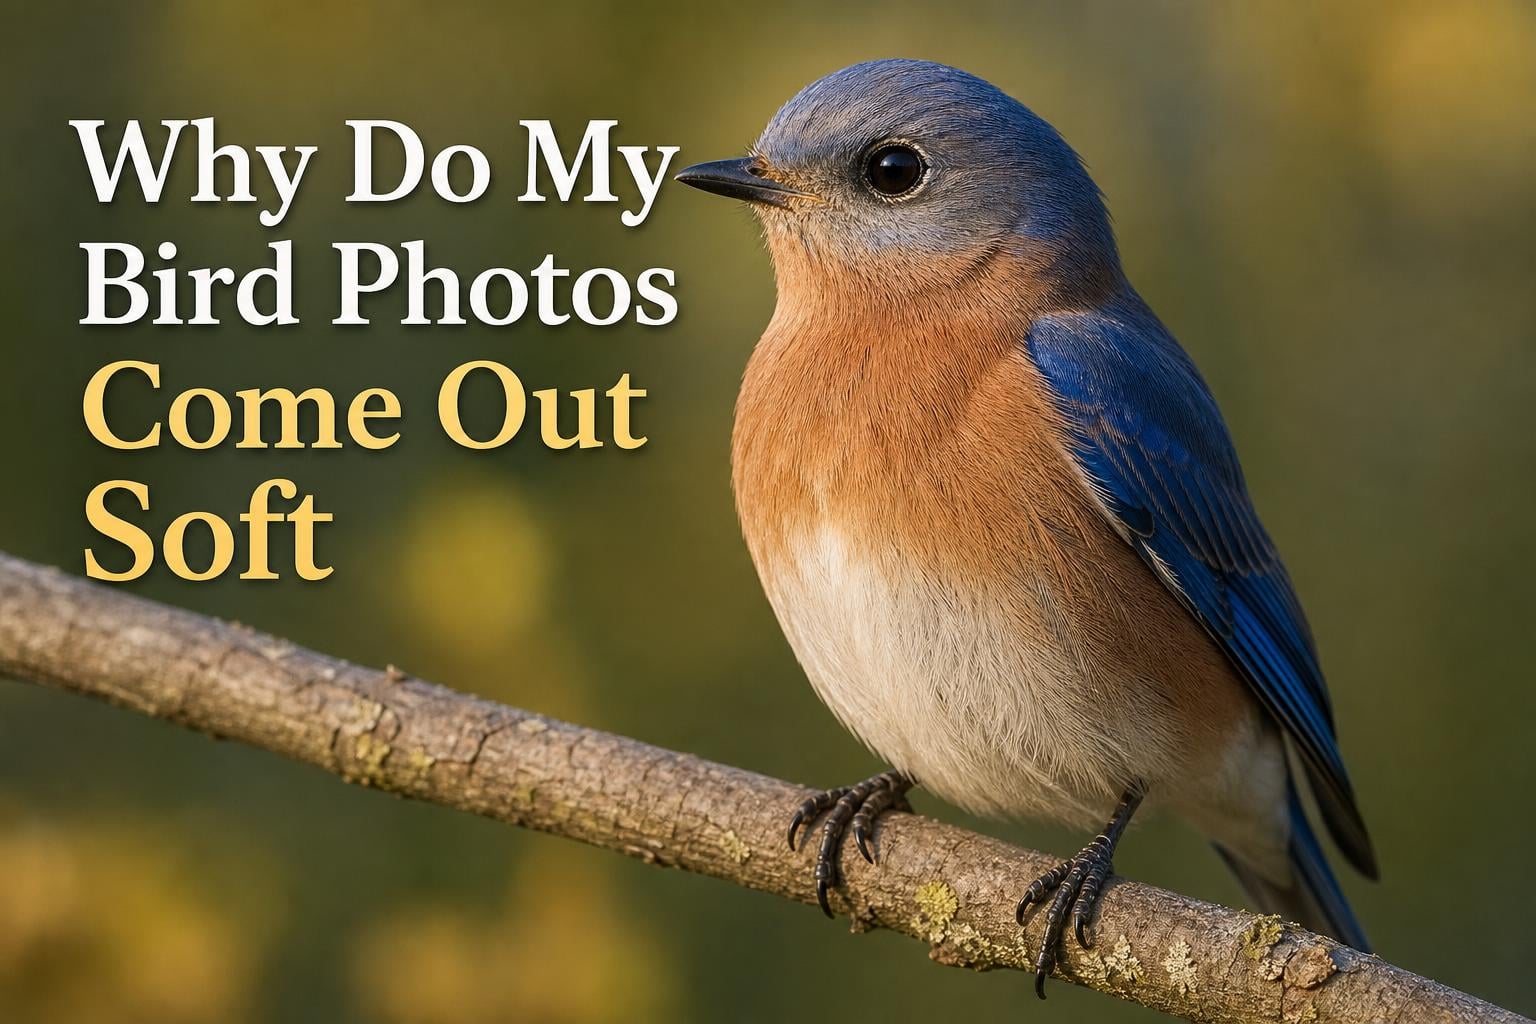
You bought a long telephoto lens, spent good money on it, and headed out to photograph birds. The results? Soft, mushy images that look like they were taken through a foggy window. If you are wondering why your bird photos come out soft even with a long lens, you are not alone. This is one of the most common frustrations in wildlife photography, and the answer is rarely what most photographers expect.
The most common reasons your bird photos come out soft even with a long lens are: (1) camera shake amplified by long focal length, (2) heat haze and atmospheric distortion over distance, (3) shooting at your lens’s maximum zoom where sharpness drops off, (4) shutter speed too slow to freeze bird movement, and (5) autofocus missing the bird’s eye. A long lens magnifies your subject, but it also magnifies every imperfection in your technique and environment.
I have spent years photographing birds with everything from budget 55-250mm kit lenses to professional 600mm primes. Along the way, I learned that sharp bird photos are less about owning expensive glass and more about understanding how distance, atmosphere, and settings interact. This guide breaks down every cause of soft bird photos and gives you actionable fixes you can apply on your next shoot.
Whether you are shooting with a Canon 100-400mm, a Nikon 200-500mm, a Sigma 150-600mm, or an Olympus 75-300mm, the principles here apply to every system. Let us fix those soft bird photos for good.
Table of Contents
Quick Checklist: 7 Steps to Sharper Bird Photos
Before we get into the details, here is a quick-action checklist you can reference on your next outing. Each item addresses one of the main causes of soft bird photos:
- Check your shutter speed: Use at least 1/focal length x 2 for perched birds, and 1/2000s or faster for birds in flight.
- Find your lens sweet spot: Stop down 1-2 stops from maximum aperture and avoid shooting at your absolute maximum zoom.
- Lock focus on the eye: Use single-point AF or eye-detection AF, never wide-area or auto-select for birds.
- Shoot in the right light: Early morning and late afternoon provide the best combination of light quality and cooler air.
- Watch for heat haze: If the ground between you and the bird is heating up, your photos will be soft regardless of settings.
- Get closer: Distance is the number one enemy of sharpness. Every meter closer improves detail exponentially.
- Support your gear: Use a tripod, monopod, or beanbag whenever possible, even with image stabilization.
Why Do My Bird Photos Come Out Soft Even With a Long Lens? The Core Problem
Here is the fundamental misunderstanding that trips up most photographers: a longer lens does not automatically produce sharper images. A telephoto lens magnifies everything in the frame, including camera shake, focus errors, atmospheric turbulence, and motion blur. The longer the focal length, the more these imperfections get amplified.
Think of it like looking through binoculars. When you zoom in on a distant bird, you see more detail, but you also see every wobble in your hands and every ripple of heat between you and the subject. The same principle applies to your camera sensor. A 600mm lens captures incredible reach, but it also captures every tiny vibration and distortion that a 50mm lens would never reveal.
Photographers on forums like Reddit’s r/AskPhotography and dpreview frequently report this exact frustration. They invest in a longer lens expecting instant sharpness improvement, only to find their images look softer than before. The lens is not the problem. The problem is that the longer focal length exposed weaknesses in their technique that were invisible at shorter focal lengths.
Throughout this guide, we will address each cause of softness individually so you can diagnose and fix your specific issue.
Reason 1: Distance Is Destroying Your Detail (Not Your Lens)
This is the most overlooked cause of soft bird photos, and almost no one talks about it. The physics of distance and resolution mean that no matter how sharp your lens is, a bird at 40 meters will never look as crisp as the same bird at 10 meters. Here is why.
Every lens has a finite resolving power, measured in line pairs per millimeter. At close distances, those line pairs capture fine feather detail. But as distance increases, the same amount of detail gets spread across fewer pixels on your sensor. The bird occupies a smaller portion of the frame, so each pixel represents a larger physical area of the bird. Less detail per pixel means softer-looking images.
On top of that, the light traveling from a distant bird passes through more air. More air means more atmospheric particles, more turbulence, and more scattering. A bird at 5 meters might have light traveling through 5 meters of air. A bird at 50 meters has light traveling through 50 meters of air, and that air is almost never still.
This is why photographers on StackExchange consistently report that closer subjects always look sharper, regardless of lens quality. One user with a Canon 55-250mm noticed that a dove photographed at 30 meters looked noticeably softer than a smaller bird photographed at 8 meters with the same lens and settings. The lens did not change. The distance did.
The Cropping Trap: Why Cropping Makes Softness Worse
When a bird is far away, the natural instinct is to crop heavily in post-processing to fill the frame. This is where softness becomes painfully obvious. Cropping magnifies the image at the pixel level, and any softness that was barely visible in the full frame becomes glaring.
If you crop a 24-megapixel image by 50 percent, you are left with 6 megapixels of actual subject data. Those 6 megapixels get stretched to fill your screen, and the lack of fine detail becomes immediately apparent. The image was not sharp to begin with, but the crop exposed the softness that was hidden by the surrounding pixels.
This is why getting closer physically will always beat cropping. A full-frame image of a bird at 10 meters contains far more usable detail than a heavily cropped image of a bird at 40 meters, even if the bird appears the same size in the final photo.
Reason 2: Your Shutter Speed Is Too Slow for the Focal Length
Shutter speed is the second most common cause of soft bird photos, and it is the easiest to fix. The problem is that most photographers underestimate how fast their shutter needs to be when using a long lens.
The Reciprocal Rule (And Why It Is Not Enough for Birds)
The traditional reciprocal rule of photography states that your shutter speed should be at least the reciprocal of your focal length to avoid camera shake. For a 400mm lens, that means 1/400s. For a 600mm lens, that means 1/600s.
This rule was designed for static subjects and full-frame cameras. Birds are not static. They twitch, turn their heads, ruffle feathers, and shift position constantly. Even a perched bird can move enough between 1/400s and 1/1000s to produce visible motion blur at long focal lengths.
If you are using a crop-sensor camera, the reciprocal rule needs to account for the crop factor. A 400mm lens on an APS-C sensor with a 1.5x crop factor has an effective focal length of 600mm. Your minimum shutter speed should be 1/600s, not 1/400s.
Recommended Shutter Speeds by Focal Length
Based on real-world testing and community consensus from wildlife photography forums, here are practical minimum shutter speeds for sharp bird photos:
- 200mm lens: 1/800s for perched birds, 1/1600s for birds in flight
- 400mm lens: 1/1000s for perched birds, 1/2000s for birds in flight
- 500mm lens: 1/1250s for perched birds, 1/2500s for birds in flight
- 600mm lens: 1/1600s for perched birds, 1/3200s for birds in flight
- 800mm+ lens: 1/2000s for perched birds, 1/4000s for birds in flight
One dpreview user with an OM System OM-3 and 100-400mm lens found that even with Sync IS enabled, their sharpest static bird shots needed 1/1500s or above. At 1/1000s, a small percentage of shots still showed motion blur when viewed at 100 percent.
Remember that these are minimums. When light allows, go faster. You can always raise ISO and deal with noise in post-processing, but you cannot fix motion blur after the fact.
Reason 3: Autofocus Misses the Eye
Here is a concept that many bird photographers struggle with: an image can be in focus but still look soft. Focus means the lens is focused at the correct distance. Sharpness means fine detail is rendered crisply. A photo that is focused on the bird’s body but not its eye will look soft because the eye is what viewers expect to see sharply.
In bird photography, the eye is everything. If the eye is sharp, the entire image looks sharp to the viewer. If the eye is soft, the entire image looks soft, even if the feathers and branches around it are razor-sharp.
Choose the Right AF Mode
For perched birds, use single-point AF placed directly on the bird’s eye. This gives you maximum control over exactly where focus lands. Avoid wide-area AF or auto-select modes, because they tend to lock onto the closest object, which is often a branch or leaf in front of the bird.
For birds in flight, use AF-C (continuous autofocus) with expandable flexible spot or a small zone. This allows the camera to track the bird as it moves while keeping the focus point tight enough to stay on the subject.
If your camera has eye-detection AF for animals, use it. Modern cameras from Canon, Sony, Nikon, and OM System have remarkably effective bird eye-detection that can track an eye even as the bird moves. This feature alone has transformed bird photography in 2026, and many photographers report significantly higher keeper rates since switching to eye-detection AF.
Back Button Focus: Why You Should Try It
Back button focus separates the autofocus function from the shutter button. Instead of half-pressing the shutter to focus, you use a dedicated button on the back of the camera (usually AF-ON). This lets you focus once, then recompose without the camera trying to refocus when you press the shutter.
For perched birds, this technique is extremely useful. Focus on the eye with your back button, release it, and then you can take as many shots as you want without the focus shifting. If the bird moves slightly, just tap the back button again.
Many wildlife photographers on photography forums swear by back button focus, and it is one of the first techniques recommended to photographers struggling with focus consistency.
Focus Drift in Continuous AF Mode
One issue that dpreview forum users identified is focus drift in continuous AF mode. When shooting bursts with AF-C, the camera refocuses between each frame. Sometimes it hits the eye perfectly, and sometimes it drifts to the wing, branch, or background. This is why you will notice that some shots in a burst look sharp and others look soft, even though the settings are identical.
The solution is to shoot in high-speed burst mode and accept that not every frame will be sharp. With modern cameras shooting 10-30 frames per second, you will get enough keepers even with focus drift. Review your bursts carefully and delete the soft ones.
AF Fine-Tune: Is Your Lens Front or Back Focusing?
Sometimes your lens is focusing slightly in front of or behind where you aim. This is called front-focus or back-focus, and it is caused by minor calibration differences between your lens and camera body. The result is images that look almost sharp but have a soft, slightly-off quality.
Most DSLRs and some mirrorless cameras have an AF fine-tune (or AF micro-adjustment) feature that lets you correct this. Run a simple focus test using a ruler or focus chart at 45 degrees, and check whether the sharpest point matches where you focused. If it does not, adjust the fine-tune setting until it does.
This one adjustment has rescued many lenses that photographers thought were permanently soft. It takes 15 minutes and can dramatically improve sharpness across all your photos.
Reason 4: You Are Shooting at Your Lens’s Weakest Focal Length
Every zoom lens has a sweet spot, a focal length and aperture combination where it produces its sharpest results. For most consumer and prosumer telephoto zooms, the sweet spot is not at the maximum focal length or the widest aperture. It is usually 10-20 percent shorter than maximum zoom and stopped down 1-2 stops from wide open.
What does this mean in practice? If you have a 150-600mm lens, your sharpest results might come at 500mm and f/8 rather than 600mm and f/6.3. At 600mm wide open, the lens is stretching its optical design to the limit, and sharpness drops noticeably.
What Is a Lens Sweet Spot?
A lens sweet spot is the aperture and focal length where the lens resolves the most detail. Most lenses are softest at their maximum aperture because the lens elements are at the edge of their correction range. Stopping down 1-2 stops brings the aperture into a range where aberrations are better controlled.
For a lens that is f/5.6 at the long end, try f/8. For a lens that is f/6.3, try f/8 or f/9. The trade-off is that you need more light or higher ISO to maintain shutter speed, but the sharpness improvement is usually worth it.
Why Maximum Zoom Produces the Softest Results
Multiple dpreview users have reported that lenses like the Olympus 75-300mm are at their optical limit beyond 200-250mm. At 300mm, the image quality degrades noticeably compared to 200mm. This is not a defect; it is a physical limitation of the lens design at that price point.
Even high-end lenses can show this behavior. The Canon 100-400mm f/4.5-5.6L IS II is slightly softer at 400mm than at 350mm. The Nikon 200-500mm f/5.6 is slightly softer at 500mm than at 450mm. The effect is smaller with premium glass, but it is still there.
The practical advice from one StackExchange answer is to never use a lens at its absolute maximum zoom. Limit it to about 80 percent of maximum focal length or less. If you need more reach, get closer rather than zooming all the way.
Lens Copy Variation
Two copies of the same lens model can produce different sharpness results. This is called copy variation, and it affects lenses at every price point. One copy of a Sigma 150-600mm might be razor-sharp at 600mm, while another copy is noticeably soft.
If you suspect your lens is softer than it should be, compare your results with other photographers using the same model. If their images are consistently sharper at the same settings, you may have a bad copy. In that case, consider returning it for exchange or sending it to the manufacturer for service.
Reason 5: Heat Haze and Atmospheric Distortion
This is the silent killer of sharp bird photos. Heat haze, also called atmospheric distortion or thermal turbulence, occurs when sunlight heats the ground and creates rising columns of warm air. These air currents bend light in random directions, and the result is images that look soft, wavy, or slightly out of focus, even when everything else is perfect.
Wildlife photographer Brent Hall and the team at Fstoppers have highlighted heat haze as one of the most underdiagnosed causes of soft wildlife photos. You can have the best lens money can buy, nail your focus, use a fast shutter speed, and still get soft images because the air between you and the bird is turbulent.
Heat haze is nearly invisible to the naked eye. You will not see it when looking through your viewfinder. It only becomes apparent when you zoom to 100 percent on your computer and notice that fine details look wavy or smeared. By then, it is too late to fix.
Why Heat Haze Affects Long-Distance Shots More
The longer the distance between you and your subject, the more air the light passes through. More air means more opportunities for turbulence to bend the light. A bird at 10 meters might be unaffected by heat haze, while the same bird at 40 meters through the same conditions looks noticeably soft.
This is why many photographers are confused when their close-up bird photos look sharp but their distant bird photos look soft with the same lens and settings. The lens is fine. The air is the problem.
5 Ways to Reduce Heat Haze in Your Bird Photos
- Shoot early in the morning: The ground has not heated up yet, and air is typically calmer before sunrise through mid-morning. This is also when birds are most active.
- Avoid midday sun: Between 11 AM and 3 PM, the ground is hottest and heat haze is at its worst. This is the worst time for bird photography for multiple reasons.
- Shoot after rain: Rain cools the ground and settles the air. The hour after a rainstorm can produce remarkably sharp images.
- Get lower: If you are shooting downward at a bird below you, the light passes through more heated ground air. Getting at eye level with the bird reduces the amount of heated air between you.
- Reduce your distance: The most effective solution. Less air between you and the subject means less turbulence and sharper images.
Overcast days can also help, not because they reduce heat haze directly, but because the diffused light prevents hot spots on the ground that create localized turbulence. Cloud cover also provides soft, even light that is ideal for capturing feather detail.
Image Stabilization: When It Helps and When It Hurts
Image stabilization (IS, VR for Nikon, OIS for other brands) is designed to counteract camera shake by moving internal lens elements or the sensor itself. When used correctly, it can give you 2-4 stops of additional handheld stability. But it is not a magic fix, and in some situations, it can actually make your photos softer.
When IS Helps
Image stabilization helps most when you are handholding a long lens at relatively slow shutter speeds. If you are shooting a perched bird at 500mm and 1/500s, IS can make the difference between a sharp photo and a blurred one. It counteracts the small movements of your body that would otherwise show up as softness.
In-body image stabilization (IBIS) combined with lens stabilization (like Olympus Sync IS) can provide up to 7-8 stops of stabilization. This is incredibly useful for static subjects in low light.
When IS Hurts
When you are using a fast shutter speed (1/2000s or above), image stabilization provides no benefit. At those speeds, camera shake is already eliminated by the fast exposure. Leaving IS on can actually introduce a small amount of blur because the stabilization system is making micro-adjustments that are unnecessary.
When you are shooting on a sturdy tripod, image stabilization should generally be turned off (unless your lens has a specific tripod mode). The stabilization system can detect the lack of movement and start hunting for corrections that do not exist, creating a feedback loop that softens the image. Some modern lenses detect tripod use automatically, but many do not.
For birds in flight, IS can help smooth out panning movements, but it should be set to panning mode (Mode 2 on most lenses) rather than full stabilization (Mode 1). Mode 2 ignores horizontal movement and only stabilizes vertical shake, which is ideal for tracking moving subjects.
The Myth of IS Fixing Everything
Image stabilization compensates for camera shake. It does nothing for subject motion, focus errors, heat haze, or lens softness. Many photographers treat IS as a crutch that lets them use slower shutter speeds, but this only works for static subjects. A bird that is moving its head or about to take off will still be blurry at 1/250s, regardless of how effective your IS is.
The best approach is to use IS as a supplement to good technique, not a replacement for it. Use fast shutter speeds whenever possible, and let IS help you when light conditions force you to slow down.
How to Test Whether Your Lens Is Actually Sharp
Before you blame your technique, you need to know whether your lens is capable of producing sharp images at all. Here is an 8-step test you can run at home to determine your lens’s maximum sharpness and identify any issues.
What You Need
- A sturdy tripod
- Your camera and lens
- A flat target with fine detail (a newspaper taped to a wall works perfectly, or you can print a lens test chart)
- A remote shutter release or your camera’s self-timer
- Good, even lighting on the target
The 8-Step Lens Sharpness Test
Step 1: Tape your newspaper or test chart flat against a wall at eye level. Make sure it is perfectly flat with no wrinkles or waves.
Step 2: Set up your camera on the tripod about 5 meters away (or at the distance you typically shoot birds). Level the camera so it faces the target straight-on.
Step 3: Set your camera to aperture priority mode and base ISO (100 or 200). Use a remote shutter release or the 2-second self-timer to eliminate any camera shake from pressing the button.
Step 4: Turn off image stabilization. You are on a tripod, and IS can interfere with sharpness in this situation.
Step 5: Focus manually using live view at maximum magnification. Take your time here. Nailing focus is critical for an accurate test.
Step 6: Take a series of photos at different apertures. Start wide open (f/5.6 or whatever your maximum is), then shoot at f/6.3, f/7.1, f/8, f/9, f/11, and f/14. Keep everything else constant.
Step 7: If you have a zoom lens, repeat this test at different focal lengths. Test at maximum zoom, 80 percent of maximum, and 50 percent of maximum.
Step 8: Load the images on your computer and compare them at 100 percent magnification. Look at the center and corners of each image. The aperture and focal length that produce the sharpest center and most even corners across the frame is your lens sweet spot.
Interpreting Your Results
If your test images are sharp, your lens is fine, and the softness in your bird photos is caused by technique, atmosphere, or settings. If your test images are soft even at the sweet spot with a tripod and manual focus, your lens may have an optical issue or calibration problem.
In that case, try AF fine-tune adjustment first. If that does not resolve the issue, consider sending the lens to the manufacturer for service or returning it if it is still under warranty. A genuinely soft lens will not improve no matter what settings or techniques you use.
Post-Processing Sharpening: What Works and What Destroys Photos
Post-processing sharpening can enhance the detail in a sharp photo, but it cannot create detail that was not captured. Understanding the limits of sharpening is essential for managing expectations and avoiding the over-sharpened, crunchy look that ruins more photos than it saves.
Three Types of Sharpening
Capture sharpening: Applied when you open a RAW file to compensate for the slight softening introduced by the camera’s anti-aliasing filter and demosaicing process. This is light, general sharpening applied to the entire image. In Lightroom, the default sharpening amount of 40 is a reasonable starting point for capture sharpening.
Creative sharpening: Selective sharpening applied to specific areas of the image, usually the bird’s eye and feather details. This is where you enhance the perception of sharpness without affecting the entire frame. Use a adjustment brush or radial filter in Lightroom to target the eye and head area.
Output sharpening: Applied when exporting the final image for print or web. This compensates for the resizing and output medium. Lightroom handles this automatically based on your export settings.
Lightroom and Photoshop Techniques
In Lightroom, start with the Detail panel. Set Amount to 40-50, Radius to 1.0, and Detail to 30-40 for bird photos. Hold down the Alt key (Option on Mac) while adjusting the Masking slider to see which parts of the image will be sharpened. Slide it up to 60-80 so that sharpening only affects edges, not smooth areas like the sky or out-of-focus background.
For targeted sharpening, use the adjustment brush on the bird’s eye. Set the Sharpness slider to +50 to +75 and paint over just the eye and immediate surrounding area. This draws the viewer’s attention to the eye and makes the entire image feel sharper.
In Photoshop, the High Pass filter is excellent for bird photos. Duplicate your layer, apply Filter > Other > High Pass with a radius of 1-3 pixels, and set the blending mode to Overlay or Soft Light. This enhances edge contrast without affecting smooth areas.
DXO PhotoLab DeepPRIME for Noise and Sharpness
One tool that dpreview users have praised is DXO PhotoLab with DeepPRIME technology. DeepPRIME uses machine learning to simultaneously reduce noise and enhance detail in RAW files. For high-ISO bird photos where noise is masking fine detail, DeepPRIME can produce noticeably cleaner and sharper results than Lightroom’s default processing.
This is not a solution for out-of-focus images. DeepPRIME enhances existing detail, it does not create detail that was not captured. But for images that are slightly soft due to high ISO or slight motion blur, it can make a meaningful difference.
Why You Cannot Sharpen an Out-of-Focus Image
This is the hard truth that every photographer needs to accept. If an image is out of focus, no amount of sharpening in any software will make it sharp. Sharpening works by increasing edge contrast, which makes in-focus details appear crisper. When detail was never captured because the lens was focused on the wrong point, there are no edges to enhance.
Over-sharpening an out-of-focus image produces a crunchy, noisy, artificial look that is worse than the original softness. If your image is out of focus, delete it and try again. Spend your post-processing time on images that are already sharp and just need enhancement.
Practical Tips: Getting Closer Without Disturbing Birds
Since distance is the number one cause of soft bird photos, getting closer is the most effective solution. But birds are easily spooked, and approaching too quickly or too directly will send them flying. Here are proven techniques for closing the distance without disturbing your subjects.
Move Slowly and Indirectly
Never walk directly toward a bird. Approach at an angle, moving slowly and pausing frequently. If the bird looks alert or starts to shift position, stop and wait. Let the bird get comfortable with your presence before moving again. This takes patience, but it is the difference between a full-frame sharp image and a tiny, soft subject in the frame.
Wear muted colors. You do not need full camouflage for most bird photography, but avoid bright whites, reds, and yellows. Earth tones blend into most natural environments and make you less conspicuous.
Use a Blind or Hide
A photography blind or hide lets you conceal yourself while birds approach you. You can purchase portable pop-up blinds that set up in minutes, or build a simple hide using natural materials at your shooting location. Once birds become accustomed to the blind’s presence, they will approach closely without alarm.
Even sitting still in one spot for 20-30 minutes can be enough for birds to forget you are there and return to their natural behavior. Patience is your most valuable tool as a bird photographer.
Shoot From Your Car
Birds are remarkably tolerant of vehicles. A car acts as a mobile blind, and many birds will allow you to approach much closer in a car than on foot. Park near a good spot, turn off the engine, rest your lens on a beanbag on the window frame, and wait.
This technique is especially effective at wildlife refuges, nature reserves, and rural roads where birds are accustomed to traffic. Some of the sharpest bird photos I have taken were from my car window with a beanbag support.
Understand Bird Behavior
Different species have different comfort distances and behavior patterns. Study the birds you want to photograph. Learn when they feed, where they perch, and what their alarm signals look like. A bird that is feeding is more focused on food than on you. A bird that is preening is relaxed and less likely to fly.
Visit the same location repeatedly. Birds become habituated to regular human presence in areas like parks and gardens. The more time you spend in a location, the more the local birds will accept you as part of the landscape.
7 Common Mistakes That Make Bird Photos Look Soft
Here is a summary of the most common mistakes I see bird photographers make, based on years of forum discussions and personal experience:
- Shooting wide open: Using maximum aperture instead of stopping down 1-2 stops. Your lens is almost always softer wide open.
- Using maximum zoom: Zooming all the way to the longest focal length where the lens is at its weakest optically.
- Trusting IS instead of shutter speed: Relying on image stabilization to compensate for shutter speeds that are too slow for subject motion.
- Ignoring the eye: Focusing on the body or wing instead of the eye. If the eye is soft, the photo is soft.
- Heavy cropping: Cropping dramatically to compensate for distance, which magnifies every flaw in the original image.
- Shooting at midday: Ignoring heat haze and harsh light that degrade image quality at long distances.
- Skip reviewing at 100 percent: Not checking images at full magnification in the field, so you discover softness only when you get home.
Camera Settings Cheat Sheet for Sharp Bird Photos
Here is a quick reference for camera settings that produce the sharpest bird photos across different scenarios. These are starting points based on real-world use, and you should adjust based on your specific gear and conditions.
Perched birds, good light: 1/1000s or faster, f/8, ISO 400-800, single-point AF on the eye, IS on.
Perched birds, low light: 1/800s minimum, f/5.6-6.3, ISO 1600-3200, single-point AF on the eye, IS on.
Birds in flight, good light: 1/2000s or faster, f/7.1-8, ISO 800-1600, AF-C with expanded spot or zone, IS in panning mode.
Birds in flight, low light: 1/1600s minimum, f/5.6-6.3, ISO 3200-6400, AF-C with expanded spot or zone, IS in panning mode.
Small birds at close range (feeders, gardens): 1/1250s or faster, f/6.3-8, ISO 400-1600, single-point AF or eye-detection AF, IS on.
Shooting from a blind or hide: Same as perched birds, but you may be able to use lower ISO if you have time to wait for good light.
Frequently Asked Questions
Why are my bird photos soft?
Your bird photos are likely soft due to one or more of these causes: shutter speed too slow for your focal length, autofocus missing the bird’s eye, shooting at your lens’s maximum zoom where it is optically weakest, heat haze distorting light over long distances, or excessive cropping that magnifies softness. Start by checking your shutter speed and focus point.
What is the best lens for long distance bird photography?
For long-distance bird photography, the most popular sharp lenses include the Canon EF 100-400mm f/4.5-5.6L IS II, Nikon AF-S 200-500mm f/5.6E ED VR, Sigma 150-600mm Sports or Contemporary, and Tamron SP 150-600mm G2. Prime lenses like a 500mm f/4 or 600mm f/4 produce the sharpest results but are significantly more expensive and heavier.
What are common bird photography mistakes?
The most common mistakes include shooting at maximum aperture instead of stopping down, using maximum zoom where the lens is softest, relying on image stabilization instead of fast shutter speeds, focusing on the body instead of the eye, heavy cropping to compensate for distance, shooting during midday heat haze, and not reviewing images at 100 percent magnification in the field.
Why are my photos coming out soft?
Photos come out soft for several reasons: camera shake from handheld shooting at slow shutter speeds, missed autofocus, lens softness at maximum aperture or focal length, atmospheric distortion from heat haze, subject motion blur, or high ISO noise masking fine detail. Run a controlled lens test on a tripod to isolate whether the issue is your lens or your technique.
Does cropping make bird photos look softer?
Yes. Cropping magnifies the image at the pixel level, which makes any softness that was hidden in the full frame immediately obvious. A heavily cropped image has fewer pixels of actual subject data, and stretching those pixels to fill the screen reveals the lack of fine detail. Getting physically closer always produces sharper results than cropping.
Is heat haze making my bird photos soft?
Heat haze is a major cause of softness in wildlife photos that most photographers overlook. When sunlight heats the ground, rising warm air bends light in random directions, creating wavy, soft details. It is invisible to the naked eye and only appears when you zoom to 100 percent on your computer. Shoot early morning or after rain to minimize heat haze effects.
Can post-processing fix soft bird photos?
Post-processing can enhance sharpness in photos that are already reasonably sharp, but it cannot fix out-of-focus images or severe motion blur. Capture sharpening, selective eye sharpening, and tools like DXO PhotoLab DeepPRIME can improve perceived sharpness. However, if the detail was never captured by the sensor, no software can create it.
Should I upgrade my lens or improve my technique?
Improve your technique first. Most soft bird photos are caused by shutter speed, focus, or distance issues rather than lens limitations. Once you consistently produce sharp images with your current gear, you will know whether a lens upgrade will genuinely improve your results. Many photographers see dramatic improvement simply by stopping down, getting closer, and nailing focus on the eye.
Conclusion: Fixing Soft Bird Photos Is About Understanding, Not Just Gear
Understanding why your bird photos come out soft even with a long lens comes down to recognizing that a telephoto lens amplifies everything, not just your subject. Distance, shutter speed, autofocus accuracy, lens sweet spots, atmospheric conditions, and post-processing all play interconnected roles in determining whether your final image is crisp or mushy.
The photographers who consistently produce sharp bird images are not the ones with the most expensive gear. They are the ones who understand these principles and apply them every time they go out. Get closer, use faster shutter speeds, find your lens sweet spot, focus on the eye, shoot in good light, and sharpen with restraint in post-processing.
Start by running the 8-step lens sharpness test to confirm your gear is capable of sharp results. Then work through each cause of softness one at a time. Your next bird photography outing could be the one where everything clicks and you finally get the sharp, detailed images you have been chasing.