
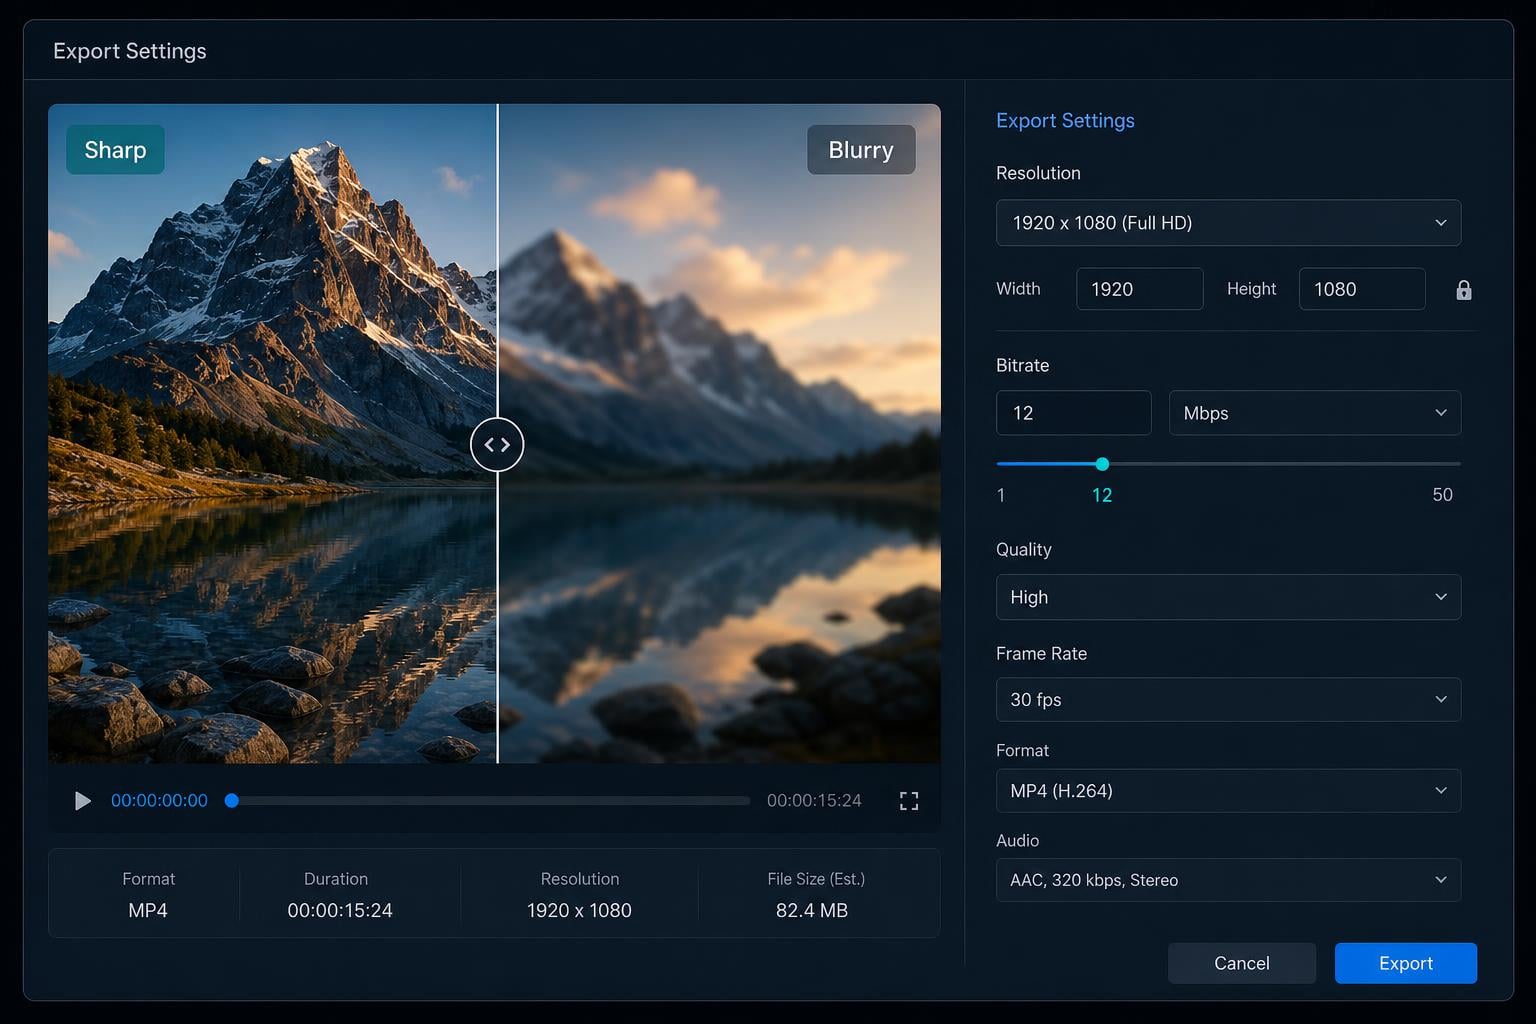
You just spent hours editing a video. The footage looked crystal clear in your timeline. You hit export, waited patiently, and then opened the final file only to find it looks soft, fuzzy, or downright blurry. If you are wondering why is my exported video blurry when the original looks sharp, you are not alone.
This is one of the most common complaints from video creators using Premiere Pro, DaVinci Resolve, Final Cut Pro, and CapCut. A Reddit user with a Canon R6 Mark II and professional L-series lens recently posted that their DaVinci Resolve export looked noticeably blurry compared to their razor-sharp original 4K footage. An Adobe Community thread about this exact problem has over 136,000 views. Clearly, this issue affects everyone from hobbyists to professionals with high-end gear.
The good news is that blurry exports are almost always fixable. The problem comes down to a handful of settings that control how your video gets encoded into its final format. Once you understand what those settings do and how to match them to your source footage, you can produce crisp exports every single time.
In this guide, our team breaks down every common cause of blurry video exports, walks you through step-by-step fixes for each major editing program, and gives you a platform-by-platform cheat sheet for the best export settings in 2026. Whether you are uploading to YouTube, Instagram, TikTok, or Vimeo, these solutions will help your final video match the quality you see in your editor.
Table of Contents
Quick Answer: Why Your Exported Video Looks Blurry?
Your exported video looks blurry because your export settings do not match your source footage quality. The three most common culprits are a resolution mismatch between your sequence and output, a bitrate that is set too low, or a codec that compresses too aggressively. Fix these three things and your export quality will immediately improve.
Here is your quick-fix checklist:
Match your export resolution to your sequence resolution. If your timeline is 4K but you export at 1080p without proper downscaling, the result will look soft.
Increase your bitrate. For 1080p video targeting YouTube, aim for 10 to 16 Mbps. For 4K, aim for 35 to 50 Mbps using H.264.
Use the right codec. H.264 is the safest choice for web delivery. H.265 offers better compression but can cause playback issues on some devices.
If you only have time to check one thing, check your export resolution first. That single setting causes more blurry exports than every other factor combined.
Why Is My Exported Video Blurry When the Original Looks Sharp? The Most Common Cause
The number one reason your exported video looks blurry when the original footage looks sharp is an export settings mismatch. Specifically, your output resolution is set lower than your sequence or timeline resolution. When this happens, your editing software compresses your footage down to a smaller frame size, and the resulting video loses detail.
An Adobe Community Expert explained this perfectly in a thread that has helped over 136,000 viewers. The user was exporting at a resolution of 298×168 pixels from a standard 1080p sequence. The export looked terrible because it was being blown up far beyond its actual resolution. The fix was simple: make the output settings match the sequence settings.
This problem is incredibly easy to miss because most editors default to showing you a high-quality preview in the timeline. You see your footage at full resolution, sometimes even playing back through proxies that look sharp. But the export dialog has its own separate resolution setting, and if that setting is wrong, your final file will not reflect what you saw during editing.
Think of it this way. Your sequence settings define the canvas you are editing on. Your export settings define the size of the painting you produce. If you paint on a large canvas but print the result on a small piece of paper, you lose detail. The same principle applies to video resolution.
DaVinci Resolve users experience this frequently on the Deliver page. The resolution dropdown defaults to settings that may not match your timeline. Premiere Pro users encounter it when they select a preset that does not correspond to their sequence. Final Cut Pro users see it when they choose a sharing destination with the wrong resolution. In every case, the fix starts with verifying that your export resolution matches your timeline resolution exactly.
Every Common Cause of Blurry Video Exports
While resolution mismatch is the most common culprit, several other factors can make your exported video look blurry. Let us walk through each one so you can diagnose your specific situation.
1. Resolution Mismatch Between Source, Sequence, and Export
This is the big one. Your footage might be 4K, your sequence might be set to 1080p, and your export might be set to 720p. Each step down in resolution strips away detail. If any of these three do not match, you will see quality loss.
Even when you intentionally downscale from 4K to 1080p, the result can look softer than expected if your software is not using high-quality scaling algorithms. Premiere Pro users should enable Maximum Render Quality for better downscaling. DaVinci Resolve users should check their scaling algorithm setting in project preferences.
2. Bitrate Set Too Low
Bitrate determines how much data is allocated to each second of video. A low bitrate forces the encoder to throw away fine details to fit within the data budget. The result is a soft, blocky, or muddy-looking image, especially in scenes with motion or fine textures like grass, hair, or text.
Many creators use default export presets that have conservative bitrate settings. The YouTube 1080p preset in Premiere Pro, for instance, uses around 8 Mbps. That is often not enough for detailed footage. Bumping it to 12 to 16 Mbps can make a visible difference.
3. Wrong Codec Selection
Codec choice affects how your video is compressed. H.264 is the standard for web video and offers excellent compatibility. H.265 (also called HEVC) achieves better quality at lower bitrates but may not play correctly on all devices. Older codecs like QuickTime Animation produce massive files with no compression artifacts but are impractical for sharing.
If you select a highly compressed codec or use the wrong codec preset, you can introduce blur even when your resolution and bitrate are correct. Always double-check which codec your export preset uses.
4. Frame Rate Mismatch
When your source footage is recorded at 30 fps but your export is set to 24 fps, the software must blend or drop frames to compensate. This can introduce motion blur and a general softness to the image. Always match your export frame rate to your sequence and source frame rate.
This issue is particularly common when mixing footage from different cameras. A wedding videographer might shoot with a 60 fps camera and a 24 fps camera. If the export frame rate does not account for both, quality suffers.
5. Proxy Workflow Left Enabled
Proxies are lower-resolution copies of your footage used to improve editing performance on slower machines. They are a fantastic tool. But if you forget to switch back to full-resolution media before exporting, your final video will be rendered from the proxy files, which are intentionally lower quality.
In Premiere Pro, check your Program Monitor and toggle off the Proxy toggle button. In DaVinci Resolve, go to Playback and disable Proxy mode. Always verify you are working with original media before exporting.
6. Color Space and Gamma Mismatch
This is one of the most overlooked causes. If your timeline is set to a wide color space like Rec. 2020 but your export is tagged as Rec. 709, the colors and brightness levels shift. This can make your video look washed out, which many people perceive as blurriness even though it is technically a color rendering issue.
Similarly, gamma mismatches between your editor and your media player can make shadows look milky and highlights look flat. This is especially common when exporting log footage without applying the correct LUT or color transform.
7. Hardware Acceleration Issues
GPU acceleration speeds up exports significantly. But in some cases, hardware-accelerated encoding can produce lower-quality results than software encoding. This is particularly true for older GPUs or when the hardware encoder prioritizes speed over quality.
If you have tried everything else and your exports still look slightly soft, try switching from hardware-accelerated encoding to software encoding. The export will take longer, but the quality may improve.
How to Fix Blurry Video Exports: Step-by-Step Guide
Now that you understand the causes, here is a step-by-step process to fix blurry exports regardless of which editing software you use.
Step 1: Check Your Sequence Settings
Open your project and find your sequence or timeline settings. In Premiere Pro, right-click the sequence in the Project panel and select Sequence Settings. In DaVinci Resolve, go to Project Settings under the File menu. In Final Cut Pro, select the timeline and check the Info inspector.
Note down your sequence resolution (such as 3840×2160 for 4K or 1920×1080 for 1080p), your frame rate (such as 23.976, 24, 30, or 60 fps), and your pixel aspect ratio (should be square pixels for digital video).
Step 2: Match Your Export Resolution Exactly
When you open the export dialog, verify that the output resolution matches your sequence resolution. Do not rely on presets blindly. Even presets labeled as 1080p can have non-standard dimensions.
If you are intentionally downscaling from 4K to 1080p, enable high-quality scaling. In Premiere Pro, check the box for Maximum Render Quality in the Video tab of the export settings. In DaVinci Resolve, set the Resize Filter to Sharp or Lanczos in the Deliver page.
Step 3: Set Your Bitrate High Enough
This is where most creators underdeliver. For H.264 exports, use these minimum bitrate values as a starting point:
720p: 5 to 8 Mbps
1080p: 10 to 16 Mbps (use VBR 2-pass for best results)
4K: 35 to 50 Mbps
4K for YouTube specifically: Upload at 4K even if your footage is 1080p, because YouTube assigns a better bitrate allocation to 4K uploads
Use Variable Bitrate (VBR) with two passes when available. Two-pass encoding analyzes the video first and allocates bitrate more efficiently, producing better quality at the same file size.
Step 4: Choose the Right Codec
For web delivery and social media, H.264 is your safest choice. It is universally supported and produces good quality at reasonable file sizes. If you need higher quality at smaller file sizes and your target platform supports it, H.265 (HEVC) is an excellent alternative.
For intermediate or archive exports where quality is paramount and file size is not a concern, use ProRes (on Mac) or DNxHD (on Windows). These are minimally compressed formats that preserve maximum detail.
Step 5: Enable Maximum Render Quality
In Premiere Pro, this checkbox is in the Video tab of the export settings. It forces the encoder to use higher-quality scaling algorithms when resizing footage. The export takes longer, but the quality improvement is noticeable, especially when downscaling from 4K to 1080p.
In DaVinci Resolve, the equivalent setting is the Resize Filter on the Deliver page. Set it to Sharp for downscaling or Lanczos for the highest quality.
Step 6: Disable Proxies and Render Previews
Before exporting, make sure you are not exporting from proxy media. In Premiere Pro, toggle off proxies in the Program Monitor. In DaVinci Resolve, go to the Playback menu and disable Proxy mode. In Final Cut Pro, select Original or Optimized media in the Viewer.
Also consider whether you want to use rendered preview files in your export. Using previews can speed up exports but may introduce quality loss if your preview codec is heavily compressed. For maximum quality, always render from the original source media.
Step 7: Test and Compare
After making these changes, export a short 10-second clip and compare it side by side with your original footage. Look at fine details like hair, text, textures, and edges. If the export still looks soft, increase your bitrate by 25 percent and try again.
This iterative approach saves time because you do not need to export the entire video each time you adjust a setting.
Export Settings Explained: Resolution, Bitrate, and Codec
To truly fix blurry exports, you need to understand what each export setting actually does. Let us break down the three settings that matter most.
Resolution: The Foundation of Image Detail
Resolution is the number of pixels in your video frame. More pixels means more detail. Common resolutions include 1280×720 (720p), 1920×1080 (1080p), and 3840×2160 (4K). Your export resolution should match your delivery target. If you are uploading to YouTube, 1080p is the minimum acceptable resolution for most content. For professional work, 4K is increasingly the standard.
One important concept is that not all 1080p is created equal. A video downscaled from 4K to 1080p using high-quality scaling often looks sharper than video shot natively at 1080p. This is because the downscaling process effectively oversamples the image, preserving fine detail. But if the downscaling algorithm is low quality, the result looks blurry.
Bitrate: The Quality Budget
Bitrate is the amount of data used per second of video, measured in megabits per second (Mbps). Higher bitrate means more data, which means more detail is preserved. Think of bitrate as your quality budget. With a low budget, the encoder has to cut corners, and fine details get blurred or blocked.
Here are the key things to understand about bitrate:
Constant Bitrate (CBR): Uses the same data rate throughout. Good for live streaming but less efficient for file-based video.
Variable Bitrate (VBR): Allocates more data to complex scenes and less to simple scenes. More efficient and produces better quality at the same average bitrate.
VBR 2-Pass: The encoder scans the video twice, first to analyze complexity and then to encode. This produces the best quality but takes longer.
For most projects, VBR 2-pass is the right choice. The extra encoding time is worth the quality improvement.
The relationship between resolution and bitrate is important. A 1080p video at 8 Mbps will look softer than the same video at 16 Mbps. But a 4K video at 8 Mbps will look terrible because the higher resolution frame has four times as many pixels to encode with the same data budget.
Codec: The Compression Method
Codec stands for coder-decoder. It is the algorithm used to compress and decompress your video. Different codecs use different compression strategies, and each has strengths and weaknesses.
Here is how the most common codecs compare:
H.264 (AVC): The universal standard for web video. Excellent compatibility across all devices and platforms. Good quality at moderate bitrates. This is the safest choice for 90 percent of projects.
H.265 (HEVC): Newer and more efficient than H.264. Achieves the same quality at roughly half the bitrate. However, not all platforms and devices support it, and encoding is slower.
ProRes: Apple’s professional codec. Extremely high quality with minimal compression. Files are very large. Best for intermediate renders, archiving, or delivery to professional clients. Available only on Mac.
DNxHD: Avid’s professional codec, similar to ProRes. High quality with large file sizes. Best for Windows-based professional workflows.
VP9: Google’s open-source codec used by YouTube. Efficient but primarily relevant for platform-side encoding, not creator-side exports.
For most creators exporting for social media or YouTube, H.264 at a high bitrate is the best combination of quality, compatibility, and encoding speed.
Keyframe Interval: The Hidden Setting
Keyframe interval (also called GOP length) controls how often the encoder creates a full frame of video versus a delta frame that only records changes. A shorter keyframe interval means better quality during fast motion but larger file sizes. A longer interval means smaller files but potential quality loss during motion.
For web video, a keyframe interval of 2 seconds (which equals every 48 frames at 24 fps or every 60 frames at 30 fps) is a good default. Most export presets handle this automatically, but if you are manually configuring settings, do not overlook it.
Recommended Export Settings by Platform
Different platforms have different requirements and recommendations. Here is a quick-reference guide for the most popular destinations for your videos.
YouTube Export Settings
YouTube re-encodes everything you upload. Your goal is to give YouTube a high-quality file so that its re-encoding does not degrade quality further.
Resolution: Match your source footage (1080p or 4K)
Codec: H.264
Bitrate (1080p): 12 to 16 Mbps
Bitrate (4K): 35 to 50 Mbps
Frame rate: Match source
Audio: AAC, 320 kbps, 48 kHz
A pro tip from YouTube creators: even if your footage is 1080p, exporting on a 4K timeline and uploading a 4K file tricks YouTube into assigning a higher bitrate tier to your video. The result is visibly better quality after YouTube’s compression.
Instagram Export Settings
Instagram compresses video aggressively. Counterintuitively, exporting at a slightly higher bitrate than necessary can help because the extra data gives Instagram more to work with during its compression.
Resolution: 1080×1920 (vertical) or 1080×1080 (square)
Codec: H.264
Bitrate: 16 to 25 Mbps (higher than YouTube because Instagram compresses harder)
Frame rate: 30 fps maximum
File size: Keep under 50 MB for Reels to minimize re-compression
TikTok Export Settings
TikTok applies some of the heaviest compression of any platform. Focus on giving the app a clean, high-bitrate file.
Resolution: 1080×1920 (vertical)
Codec: H.264
Bitrate: 15 to 20 Mbps
Frame rate: 30 fps
Tip: Avoid exporting at 4K for TikTok. The platform downscales it and can introduce additional artifacts.
Vimeo Export Settings
Vimeo is the most forgiving platform for creators. It preserves more of your original quality than YouTube or social media.
Resolution: 1080p or 4K
Codec: H.264 or H.265
Bitrate (1080p): 10 to 20 Mbps
Bitrate (4K): 30 to 60 Mbps
Frame rate: Match source
Software-Specific Fixes for Blurry Exports
Each editing application has its own export workflow and its own common pitfalls. Here are the specific fixes for the four most popular video editors.
Premiere Pro: Fixing Blurry Exports
Premiere Pro is the most common source of blurry export complaints. The good news is that the fixes are straightforward once you know where to look.
First, open the Export tab (or select File then Export then Media in older versions). Check the Video tab and verify that your Width and Height match your sequence. If you see a resolution like 720×480 or something unexpected, you found the problem.
Next, scroll down to Bitrate Settings. Set Bitrate Encoding to VBR 2-pass. Set your target bitrate to at least 15 Mbps for 1080p or 40 Mbps for 4K. The maximum bitrate should be about 1.5 times your target.
Check the box at the bottom of the Video tab that says Maximum Render Quality. This setting is critical when your footage resolution differs from your export resolution. Without it, Premiere uses a fast but lower-quality scaling method.
If you still see quality loss, go to Edit then Preferences then Media in Premiere Pro and check your Media Cache settings. A corrupted cache can cause preview rendering issues that carry over to exports. Clear the cache and restart Premiere.
Finally, if you are using hardware-accelerated encoding (NVIDIA or Intel Quick Sync), try switching to software encoding. Some GPU drivers produce lower-quality H.264 encodes. The export will be slower, but the quality difference can be significant on some systems.
DaVinci Resolve: Fixing Blurry Exports
DaVinci Resolve users frequently report blurry exports from the Deliver page. The most common cause is a mismatch between the Deliver page settings and the timeline resolution.
On the Deliver page, check the Resolution field at the top. It should match your timeline resolution exactly. If you shot 4K footage but your timeline is set to 1080p, decide whether you want to export at 1080p or change your timeline to 4K first.
Under Video settings on the Deliver page, set the Codec to H.264 or H.265. For Quality, do not use the Custom quality slider set to a low value. Instead, check Restrict to and manually enter your target bitrate (15000 to 50000 Kb/s depending on resolution).
Check the Encoding Mode. Set it to High Quality rather than Fast. The difference in encoding time is minimal, but the quality improvement is measurable.
DaVinci Resolve free version users should be aware that some advanced encoding options are only available in the Studio version. If you are consistently getting lower-quality exports than expected, upgrading to Resolve Studio may resolve the issue.
For the scaling algorithm, go to Project Settings then Image Scaling. Set the Resize Filter to Sharp or Lanczos. The default setting may be set to Bilinear, which is fast but produces softer results when downscaling.
Final Cut Pro: Fixing Blurry Exports
Final Cut Pro users experience fewer blurry export issues than Premiere or DaVinci users, but problems still occur. The most common cause in Final Cut is selecting the wrong Share destination.
When you go to File then Share, look at the destination settings. Do not just click the default option. Click the Settings tab and verify that Resolution is set to match your timeline. Format should be H.264 or HEVC for web delivery.
Under Video Codec settings, check the data rate. If you see a dropdown with quality levels like High or Medium, always choose High. The Medium setting produces noticeably softer video.
Final Cut Pro also has a setting called Better Quality versus Better Performance in the Playback menu. This affects your timeline preview but not your export. However, if your timeline previews look blurry due to the Better Performance setting, you may mistakenly think your export is also degraded. Always evaluate quality based on the actual exported file, not the preview.
If you are using proxy media in Final Cut Pro, go to the Viewer and select Original or Optimized from the View menu before exporting. The Proxy/Original toggle is easy to miss.
CapCut: Fixing Blurry Exports
CapCut is increasingly popular for social media content creation, and blurry exports are a common complaint among its users. The app’s export settings are simpler than desktop editors, which means you have fewer options to get wrong but also fewer controls for fine-tuning.
When exporting from CapCut, always select the highest resolution available. If your footage is 1080p, export at 1080p. CapCut may default to 720p in some export flows to reduce file size.
Set the frame rate to match your source footage. If you recorded at 30 fps, export at 30 fps, not 24 or 60.
CapCut users have reported that quality degradation sometimes occurs at import rather than export. If your footage looks soft in the timeline itself, the app may have created low-quality proxies during import. There is no manual proxy toggle in CapCut’s free version, so this can be a limitation. The desktop version of CapCut offers more control over import quality settings.
For the best results with CapCut, export at 1080p with a high bitrate setting and avoid applying multiple filters or effects that each add a layer of compression. Each effect pass can slightly degrade quality, and the cumulative effect becomes visible in the final export.
Advanced Causes: Color Space, Gamma Mismatch, and Hardware Acceleration
If you have tried all the standard fixes and your exports still look off, the problem may be in one of these advanced areas that most guides do not cover.
Color Space Mismatch
Color space defines the range of colors and brightness levels your video can represent. Rec. 709 is the standard for web and broadcast video. Rec. 2020 is used for HDR content. sRGB is common for computer displays. If your editing timeline uses one color space but your export is tagged with a different one, the result can look washed out or muted, which many viewers interpret as blurriness.
This problem is especially common when working with log footage. Log is a flat, low-contrast recording profile used by professional cameras to capture maximum dynamic range. If you export log footage without applying the correct conversion LUT, your video will look gray and hazy. The fix is to apply the correct camera LUT on your timeline before exporting, or to set up a proper color space transform in your editor’s color management system.
Gamma Shift After Export
Gamma controls the brightness curve of your video. A common issue is that exports look slightly brighter or darker than the editor preview. This gamma shift can make an image appear less sharp because the midtones shift, reducing perceived contrast.
This issue is frequently reported by Mac users editing in Premiere Pro. The problem stems from Mac displays using a different gamma (approximately 2.2 for sRGB in macOS) versus the standard video gamma of 2.4. When you view your export on the same Mac screen, the gamma difference can make the video look slightly washed out.
To check whether you have a real gamma issue or just a display rendering difference, view your exported video on multiple devices. If it looks correct on some and washed out on others, it is a display gamma difference rather than an export problem.
Hardware Acceleration and Quality
GPU-accelerated encoding is a double-edged sword. It makes exports dramatically faster, sometimes 5 to 10 times faster than software encoding. But some hardware encoders prioritize speed over quality, producing exports with more compression artifacts and softer detail.
NVIDIA NVENC encoders have improved significantly in recent generations. If you are using a GTX 10-series card or older, the hardware encoder may produce visibly lower quality than software encoding. RTX 20-series and newer cards produce quality that is nearly indistinguishable from software encoding for most content.
Intel Quick Sync Video (QSV) is another hardware encoding option available on Intel integrated and discrete GPUs. Its quality varies by generation, with newer versions performing well and older ones producing softer output.
If you suspect hardware acceleration is causing quality issues, do a side-by-side test. Export the same short clip once with hardware encoding and once with software encoding. Compare the two at 100 percent zoom. If the hardware-encoded version looks noticeably softer, switch to software encoding for final exports.
Preventing Blurry Exports Through Better Workflow
The best fix is prevention. Here are some workflow habits that will help you avoid blurry exports from the start.
Start with the Right Sequence Settings
When you create a new project, set your sequence or timeline settings to match your source footage before you start editing. Drag your first clip onto the timeline and let the editor prompt you to match sequence settings to the clip. This ensures your editing canvas matches your footage from the beginning.
If you are mixing footage from multiple cameras with different resolutions, set your sequence to match the highest resolution source. You can always downscale during export, but starting with a larger timeline gives you more flexibility.
Record with Compression in Mind
The quality of your original footage sets the ceiling for your export quality. Well-exposed, well-lit footage compresses better than noisy, underexposed footage. This is because compression algorithms struggle with noise, allocating precious bitrate to encoding grain rather than actual image detail.
Use the lowest practical ISO setting. Light your scenes properly. Keep your camera stable, as motion increases the bitrate demand on the encoder. These shooting habits directly impact how crisp your final export will look after compression.
Create and Save Export Presets
Once you find the export settings that produce crisp results for your typical projects, save them as a preset. Every major editor supports custom presets. This saves you from having to remember all the correct settings every time you export and prevents accidental settings changes.
Create separate presets for different platforms. Your YouTube preset should have different bitrate and resolution settings than your Instagram preset. Label them clearly so you always select the right one.
Always Do a Test Export
Before exporting a full project that took hours to edit, export a short 5 to 10 second segment first. Check it on the device or platform where it will be viewed. If it looks good, proceed with the full export. This 60-second test can save you from discovering quality issues after a 45-minute render completes.
Frequently Asked Questions
Why is my video exporting blurry?
Your video is exporting blurry because your export settings do not match your source footage quality. The most common causes are an export resolution set lower than your sequence resolution, a bitrate that is too low for your content, or using the wrong codec preset. Check that your export resolution matches your timeline, increase your bitrate to at least 10 Mbps for 1080p, and use H.264 with VBR 2-pass encoding.
How to sharpen up a blurry video?
To sharpen a blurry exported video, re-export with corrected settings: match export resolution to sequence resolution, increase bitrate by 25 to 50 percent, enable Maximum Render Quality in Premiere Pro or set the Resize Filter to Sharp in DaVinci Resolve, and switch from hardware to software encoding. You can also apply a mild sharpening effect (10 to 20 percent) on your timeline before exporting, but fixing the root cause is always better than adding sharpening.
Why does 1080p not look like 1080p?
1080p video may not look like 1080p for several reasons: the export bitrate is too low for the amount of detail in the footage, the video was upscaled from a lower resolution rather than natively shot or rendered at 1080p, the pixel aspect ratio is set incorrectly, or platform compression (YouTube, Instagram) has degraded the quality further after upload. Videos downscaled from 4K to 1080p using high-quality scaling typically look sharper than natively 1080p footage.
How to export video without losing quality?
To export video without losing quality, match your export resolution to your sequence resolution, use a high bitrate (10 to 16 Mbps for 1080p, 35 to 50 Mbps for 4K), select H.264 with VBR 2-pass encoding, enable maximum render quality or high-quality scaling, disable proxy media before exporting, and use software encoding if hardware encoding produces soft results. For zero quality loss, export using ProRes or DNxHD, though file sizes will be very large.
Conclusion: Getting Crisp Exports Every Time
If you have been asking yourself why is my exported video blurry when the original looks sharp, the answer almost always comes down to a small number of settings that need adjusting. Match your export resolution to your sequence. Use a bitrate high enough for your content. Choose the right codec. Enable maximum render quality for better scaling. And always disable proxies before exporting.
The fixes in this guide work across Premiere Pro, DaVinci Resolve, Final Cut Pro, and CapCut. Start with the quick-fix checklist at the top of this article, then work through the detailed steps if the problem persists. Remember that platform compression on YouTube, Instagram, and TikTok adds another layer of quality loss, so give those platforms the highest quality file you can.
Take five minutes to create and save custom export presets for each platform you publish to. That small investment of time will ensure every future export is crisp, sharp, and worthy of the effort you put into your editing.