
You set up the perfect shot. The lighting is ideal, your subject is ready, and you hit record. Then you play back the footage and hear nothing but a violent, rumbling roar drowning out every word. If this sounds familiar, you are not alone. Wind is the number one reason outdoor video audio ends up unusable, and it affects everyone from weekend vloggers to professional documentary crews.
In this guide, I will walk you through exactly why wind ruins outdoor video audio and how to prevent it. We will cover the science behind wind noise, the best physical wind protection options, microphone placement techniques that actually work, and what you can do in post-production when prevention is not enough. By the end, you will have a complete toolkit for capturing clean audio outdoors.
Whether you are filming interviews, nature documentaries, wedding videos, or YouTube content, these strategies will save your footage from the wind noise that plagues so many outdoor shoots.
Table of Contents
Why Does Wind Ruin Outdoor Video Audio?
Wind ruins outdoor video audio because microphones contain extremely sensitive diaphragms that vibrate when air molecules strike them. When you speak into a microphone, your voice creates gentle pressure waves that move the diaphragm in a controlled way. Wind, on the other hand, slams the diaphragm with chaotic bursts of air pressure that overwhelm the capsule entirely.
Here is the key detail most guides skip: wind energy is concentrated heavily in low frequencies, typically between 20Hz and 250Hz. This is why wind noise sounds like a deep, rumbling roar rather than a hiss or whistle. The diaphragm gets pushed around so violently by these low-frequency pressure changes that it produces massive amounts of low-end energy in your recording.
This low-frequency rumble is especially damaging because it sits right in the frequency range where human speech lives. When wind noise floods the 20Hz to 250Hz range, it masks the fundamental frequencies of voices and makes dialogue nearly impossible to understand. Even moderate wind can add 20 to 30 decibels of unwanted low-frequency energy to your recording.
Not all microphones suffer equally. Directional microphones, particularly shotgun mics, are far more susceptible to wind noise than omnidirectional ones. This is because shotgun microphones use interference tubes that rely on sound arriving from a specific direction. When wind hits the sides of that interference tube, it creates turbulence that the microphone interprets as sound.
Omnidirectional microphones, by contrast, have sealed pressure capsules that respond only to pressure changes at a single small opening. This makes them naturally more resistant to wind because there is less surface area for wind to act upon. Many professional sound recordists switch to omnidirectional mics specifically for windy outdoor conditions.
Built-in camera microphones are the worst offenders of all. They are typically small, unprotected omnidirectional capsules sitting exposed on top of your camera body. The camera body itself creates turbulence as wind flows around it, and that turbulence goes straight into those tiny exposed mics with zero protection. This is why even a gentle breeze can make on-camera audio sound terrible.
Types of Microphone Wind Protection
The most effective way to prevent wind from ruining your audio is physical wind protection. There are three main types, each designed for different wind conditions and recording scenarios. Understanding the differences will help you choose the right tool for your specific shooting situation.
Foam Windshields
Foam windshields are the thin, open-cell foam slipcovers that come with most microphones. They provide the most basic level of wind protection available. A foam windshield can handle gentle breezes and indoor air conditioning drafts, but it will not protect you in any real outdoor wind scenario.
Think of foam windshields as your first line of defense for light indoor use or calm outdoor conditions with wind speeds below roughly 5 mph. They are inexpensive, lightweight, and easy to keep on your mic at all times. However, relying on foam alone for outdoor filming is one of the most common mistakes I see from beginner videographers.
Foam windshields also serve an important secondary purpose: they protect against plosives, which are the sharp bursts of air from consonant sounds like P and B. For interview situations, keeping a foam windscreen on your mic is always a good idea as a baseline, even when you add additional protection.
Deadcat and Furry Wind Covers
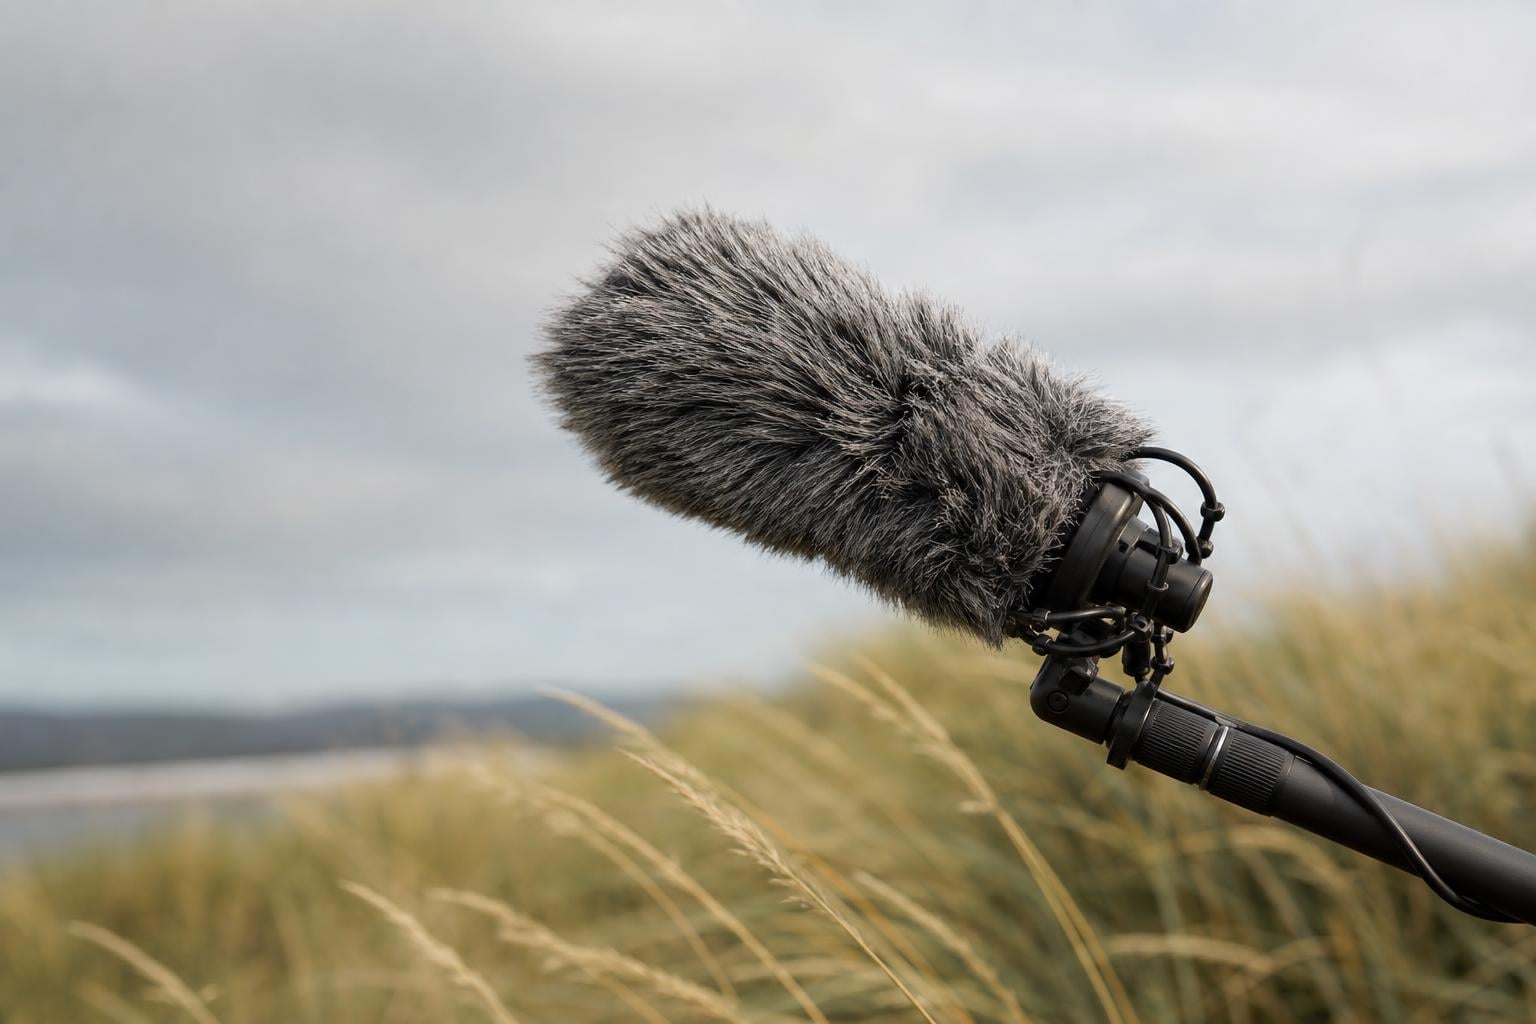
The deadcat, also called a furry windshield or windjammer, is the most popular wind protection solution for outdoor video work. It is a synthetic fur cover that slips over your microphone or existing foam windshield. The long fibers break up wind turbulence before it reaches the microphone capsule, dramatically reducing wind noise.
Deadcats are effective in moderate to fairly strong wind conditions, typically handling gusts up to about 20 mph with good results. They are the go-to choice for run-and-gun shooting, vlogging setups, documentary work, and most general outdoor filming scenarios. Most professional on-camera microphones and shotgun mics come with or offer compatible furry covers.
One common question from our community forums: do deadcats affect audio quality? The answer is minimally. High-quality furry covers have very little impact on high frequencies and transparency. Cheap knockoffs can muffle your audio slightly, so investing in a well-made version from a reputable manufacturer is worth it.
For lavalier microphones, smaller furry covers called mini-jammers are available. These slip over the tiny capsule of a lapel mic and provide surprisingly effective protection. They are essential for outdoor interview recording where the subject cannot be fully sheltered from the wind.
Blimps and Zeppelin Windshields
Blimps, also called zeppelin windshields, are the heavy-duty solution for professional wind protection. A blimp is a rigid cage that surrounds the microphone completely, creating a large volume of still air around the capsule. Most blimps also come with a fitted furry cover for maximum protection in extreme conditions.
Blimps are designed for serious wind. They can handle gusts of 30 mph or more and are the standard equipment for professional film and television production sound. The large air cavity inside the blimp dissipates wind energy before it reaches the mic, making them far more effective than a simple furry cover alone.
The trade-off is size, weight, and cost. Blimps are bulky, require a shock mount and boom pole for practical use, and cost significantly more than foam or furry options. However, if you are recording dialogue for a film, documentary, or professional video production in windy conditions, a blimp is non-negotiable. It is what professional sound mixers use on every set.
For those on a budget, some blimp-style windshields are available at lower price points and offer a good middle ground. Even a budget blimp will outperform a furry cover alone in heavy wind conditions.
Microphone Placement Techniques for Windy Conditions
Physical wind protection is only half the battle. Where and how you position your microphone relative to the wind can make just as much difference as what you cover it with. These placement techniques come straight from working professionals and forum discussions with field-tested experience.
The single most effective placement trick is to position your subject with their back to the wind. The human body is an excellent windbreak, and placing talent so their body blocks the wind from hitting the microphone can reduce wind noise dramatically. Forum users consistently report this as one of the most reliable techniques for outdoor interviews.
You can also use your own body as a windbreak when operating a boom pole. Standing so that your body shields the microphone from the prevailing wind direction can cut turbulence significantly. This takes some practice to do while maintaining proper mic-to-source distance, but it works remarkably well.
For lavalier microphones, hiding the mic under a layer of clothing provides natural wind protection. Placing a lav under a shirt collar, inside a jacket, or behind a lapel creates a fabric barrier that blocks wind while still capturing usable dialogue. The trade-off is some reduction in high-frequency clarity, but in windy conditions, this is almost always an acceptable compromise.
Angling your microphone slightly off-axis from the wind direction also helps. Instead of pointing a shotgun mic directly into the wind, try positioning it at a 45-degree angle or even parallel to the wind flow. This reduces the amount of air hitting the interference tube directly and can noticeably cut turbulence noise.
Finally, take advantage of natural and man-made structures. Filming near walls, fences, vehicles, or dense foliage creates wind shadows that can dramatically reduce wind speed at your microphone position. A spot that is sheltered behind a building corner may have calm air even when open areas nearby are windy.
How to Prevent Wind Noise When Shooting Outdoors
Beyond wind protection and placement, there are several broader strategies you can use to minimize wind noise before you ever hit record. These approaches focus on planning, equipment selection, and shooting technique.
One of the most overlooked prevention strategies is simple weather planning. Checking wind forecasts before your shoot lets you schedule filming during calmer periods or choose more sheltered locations. Wind speeds are typically lowest in the early morning and late evening, and apps like Windy, Weather Underground, and local aviation weather reports provide detailed, hour-by-hour wind data for any location.
No competitor in the current search results covers weather app planning, which is surprising because it is one of the simplest and most effective strategies. Knowing that wind will pick up at 2 PM lets you schedule your important dialogue scenes for the morning and save B-roll for the afternoon. This kind of planning costs nothing and saves hours of frustration.
Most cameras and audio recorders include a built-in wind noise reduction or low-cut filter feature. This is usually a simple switch or menu option that engages a high-pass filter, cutting low frequencies below around 80Hz or 100Hz. While this will not eliminate wind noise entirely, it can reduce the worst of the low-frequency rumble and should be enabled whenever you are recording outdoors.
Choosing the right microphone type for the conditions also matters. As mentioned earlier, omnidirectional microphones handle wind better than directional ones because of their sealed pressure design. For extremely windy conditions, consider switching from a shotgun mic to a small-diaphragm omnidirectional mic. Many field recordists carry both and switch based on conditions.
Always record backup audio. This is a tip that comes up repeatedly in professional forums, and for good reason. Running a lavalier mic to a separate recorder hidden on your subject provides a second audio source that is naturally shielded by their body and clothing. If your primary mic gets destroyed by wind, you have a clean backup to save the shoot.
Finally, consider using an external audio recorder instead of recording directly to your camera. External recorders like the Zoom H series or professional field recorders often have better preamps, more filtering options, and higher quality inputs than cameras. They also let you monitor audio with headphones in real-time, which is essential for catching wind noise before it ruins an entire shoot.
Post-Production Wind Noise Reduction
Sometimes despite your best prevention efforts, wind noise still ends up in your recording. Post-production wind noise reduction can help, but it is important to understand its capabilities and limitations. Prevention will always produce better results than trying to fix wind noise after the fact.
High-Pass Filters and Low-Cut EQ
The first tool for post-production wind noise reduction is a high-pass filter, also called a low-cut filter. This is an EQ setting that removes all frequencies below a chosen threshold. Since wind noise is concentrated in the 20Hz to 250Hz range, applying a high-pass filter at around 80Hz to 100Hz can remove a significant amount of wind rumble without damaging speech intelligibility.
Most video editing software, including Adobe Premiere Pro, DaVinci Resolve, and Final Cut Pro, includes built-in high-pass filter effects. For dialogue recorded outdoors, starting with a gentle 12 dB per octave cut at 100Hz is a good baseline. You can adjust the frequency and slope based on how much wind noise you are dealing with and how much low-end your voice needs.
Be careful not to cut too aggressively. Pushing the filter frequency above 150Hz starts to thin out voices and can make dialogue sound tinny. The goal is to remove wind energy while preserving the warmth and body of natural speech.
Manual EQ Taming
Beyond a simple high-pass filter, you can use a parametric EQ to target specific wind noise frequencies. Wind noise is not always a smooth, consistent rumble. It often has peaks and resonances at particular frequencies that you can identify and reduce individually.
To find these problem frequencies, boost a narrow EQ band and sweep it through the low-frequency range while listening. When you hear the wind noise get louder, you have found a resonance. Then, reverse the EQ to cut that frequency. A few targeted cuts in the 50Hz to 250Hz range can significantly reduce wind noise presence.
Dedicated Noise Reduction Software
For more serious wind noise problems, dedicated noise reduction software offers more powerful tools. Audacity, which is free, includes a noise reduction effect that can help with consistent wind noise. You select a portion of pure wind noise as a noise profile, then apply reduction to the entire track.
Professional tools like iZotope RX offer spectral repair capabilities that can visually identify and remove wind noise. The spectral display lets you see wind noise as distinct energy patterns and paint them out of your recording. This is the most powerful post-production approach available, though it requires some skill to use effectively and represents a significant investment.
AI-Powered Noise Reduction Tools
The newest frontier in post-production wind noise reduction is AI-powered tools. Services like Adobe Podcast AI, Descript Studio Sound, and various AI audio restoration platforms can remove wind noise with surprisingly good results. These tools analyze your audio, identify wind noise patterns, and intelligently remove them while preserving dialogue.
AI tools are getting better rapidly, and they can often salvage recordings that would have been unusable a few years ago. However, they are not perfect. Heavy wind noise that has completely overloaded your microphone capsule may leave artifacts or robotic-sounding dialogue even after AI processing. Think of these tools as a safety net, not a replacement for proper prevention.
The most important thing to understand about post-production wind noise reduction is this: it cannot restore audio that was never captured. If wind completely overloaded your microphone and the diaphragm was pushed to its physical limits, the original speech information is gone. No software can recreate dialogue that was never properly recorded. This is why prevention, physical wind protection, and proper microphone placement will always be more effective than any post-production fix.
FAQs
How to remove wind sound from videos?
You can remove wind sound from videos by applying a high-pass filter at 80-100Hz in your editing software to cut low-frequency rumble, using targeted EQ cuts on specific wind noise frequencies, or using dedicated noise reduction tools like iZotope RX. Free options include Audacity’s noise reduction effect. AI-powered tools like Adobe Podcast AI can also clean wind noise automatically, though results vary depending on how severe the wind damage is.
How to reduce wind noise when recording outside?
To reduce wind noise when recording outside, use a deadcat or furry wind cover on your microphone, position your subject with their back to the wind, and enable your camera or recorder’s built-in wind noise reduction feature. For stronger wind, use a blimp windshield. Recording backup audio on a hidden lavalier mic provides a safety net if your primary mic picks up wind.
How to block out the sound of wind?
You can block wind from your microphone by using physical wind protection like foam windshields for light breeze, deadcat furry covers for moderate wind, and blimp zeppelin windshields for heavy wind. Additional techniques include positioning behind natural structures like walls or trees, using your body as a windbreak, and hiding lavalier mics under clothing layers.
How to reduce wind noise from audio?
Reduce wind noise from audio by first applying a high-pass filter to cut frequencies below 100Hz, then using a parametric EQ to target specific wind noise peaks between 50Hz and 250Hz. For stubborn noise, use noise reduction software like iZotope RX or free tools like Audacity’s noise reduction. AI audio restoration tools can also automatically identify and remove wind noise patterns from your recordings.
Can wind noise be completely removed in post-production?
No, wind noise cannot always be completely removed in post-production. If wind energy overwhelmed the microphone diaphragm and overloaded the recording, the original speech information may be permanently lost. High-pass filters, EQ, and AI tools can reduce mild to moderate wind noise significantly, but severe wind damage often leaves artifacts. Prevention with physical wind protection always produces better results than post-production fixes.
Conclusion
Wind ruins outdoor video audio by overwhelming your microphone’s diaphragm with low-frequency pressure energy, creating rumble in the 20Hz to 250Hz range that masks speech and makes recordings unusable. Understanding why wind ruins outdoor video audio and how to prevent it comes down to combining multiple strategies: physical wind protection, smart microphone placement, weather planning, and post-production cleanup.
The most important takeaway is that prevention always beats correction. A deadcat or blimp windshield, proper placement, and weather-aware planning will save you far more footage than any post-production tool can rescue. Combine several of these techniques on every outdoor shoot, always record backup audio, and you will dramatically reduce the number of takes lost to wind noise.
Start with the basics: get a furry wind cover for your microphone, check the wind forecast before your next shoot, and enable your camera’s low-cut filter. These three steps alone will solve the majority of wind noise problems for most video creators.