
Every photographer has been there. You frame the perfect shot, your subject is exactly where you want it in the composition, and you press the shutter. The camera decides to refocus at the last second. The moment is gone, and the photo is soft.
If you have ever wondered why this happens and how professionals seem to nail focus every single time, the answer might be simpler than you think. Many of them are not relying on the shutter button to focus at all. They use a technique called back-button focus, and it has been quietly transforming how photographers work since 1989.
Back-button focus is a camera setting that moves autofocus activation off the shutter button and onto a dedicated button on the back of the camera. This gives you two independent controls: one thumb to focus, one finger to shoot. It sounds like a small change, but for the photographers who adopt it, there is no going back.
In this guide, I will walk you through exactly what back-button focus is, why so many professional photographers refuse to shoot without it, how to set it up on Canon, Nikon, Sony, and Fujifilm cameras, and whether it is still worth using on modern mirrorless bodies with eye-tracking autofocus. I have spent years shooting with this technique across weddings, wildlife, and landscape work, and I will share what I have learned along the way.
Table of Contents
Quick Answer: What Is Back-Button Focus?
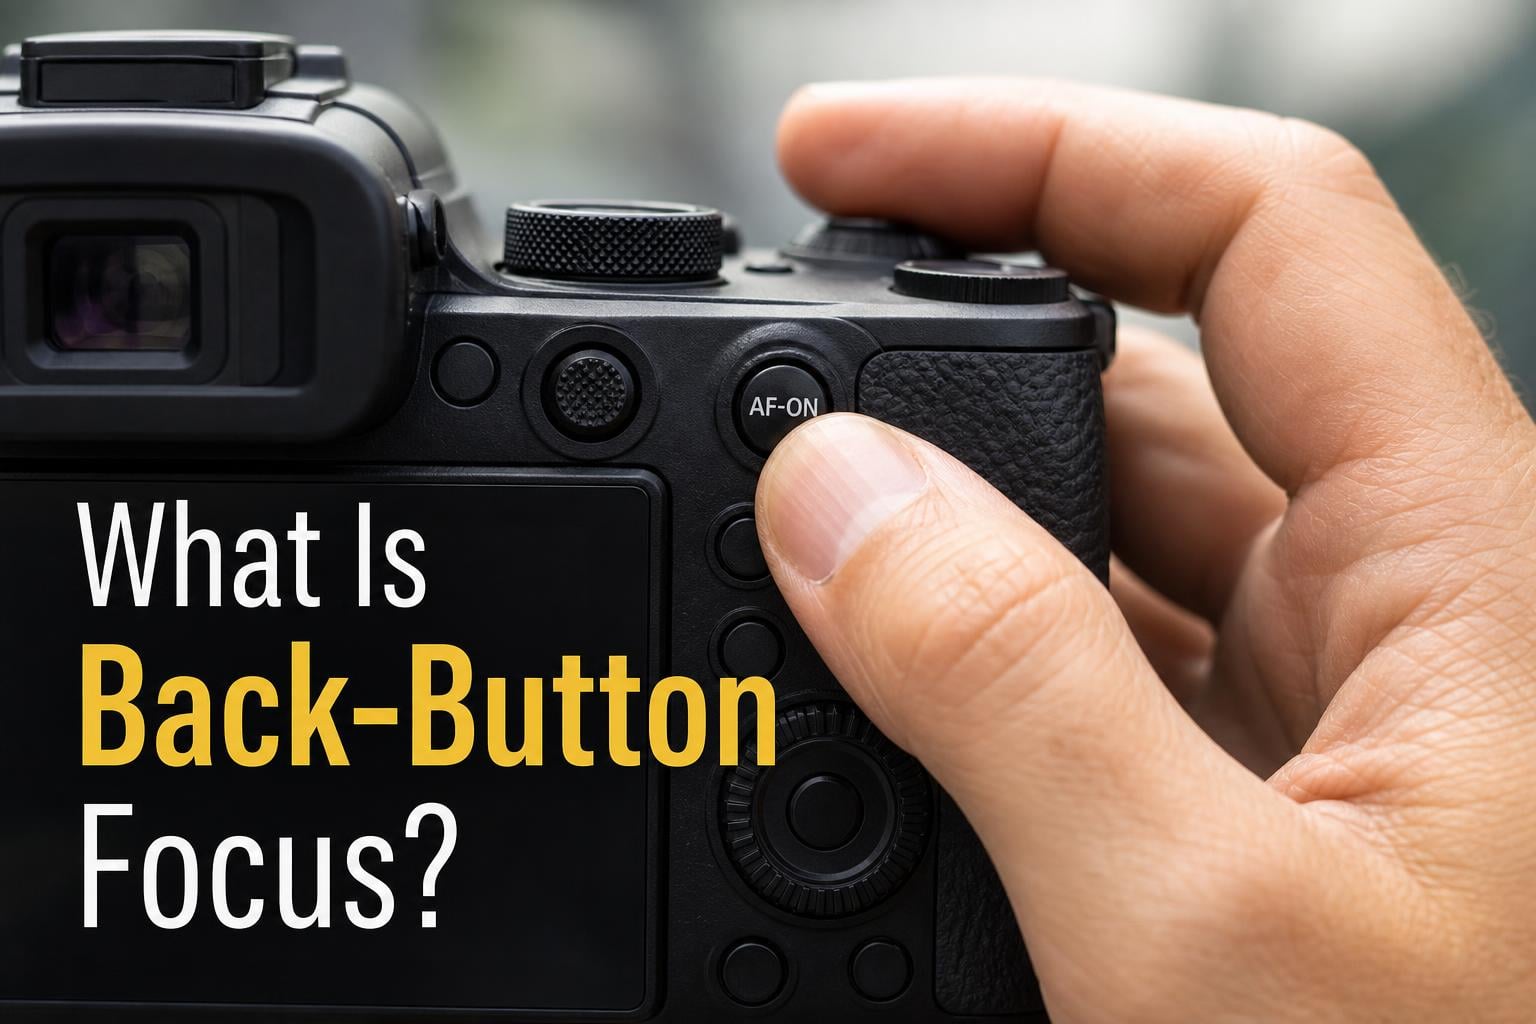
Back-button focus is a camera technique that separates the autofocus function from the shutter release button. Instead of half-pressing the shutter to focus and full-pressing to take the photo, you use a dedicated button on the back of the camera (usually labeled AF-ON) to focus with your thumb, and the shutter button only fires the shot.
This means focusing and shooting become two completely independent actions. You can focus once, lock that focus, and then take as many photos as you want without the camera trying to refocus each time you press the shutter. You can also let the camera continuously track a moving subject with your thumb holding the AF-ON button while your finger is ready to fire at the exact right moment.
One important clarification before we go further: back-button focus is not the same thing as “back focus.” Back focus refers to a lens calibration issue where the focal plane sits behind your intended subject. Back-button focus is a shooting technique. They share a similar name but are entirely different concepts.
What Is Back-Button Focus? (A Deep Dive)
To really understand back-button focus, you need to understand how cameras handle autofocus by default. On virtually every camera out of the box, the shutter button does two things at once. A half-press activates the autofocus system, and a full-press takes the photo. This dual-purpose design has been the standard for decades, and it works fine for casual shooting.
But when you start shooting more demanding subjects like fast-moving wildlife, unpredictable event moments, or portraits where you want to focus and then recompose, that dual-purpose shutter button becomes a liability. Every time you press the shutter to take the photo, the camera tries to focus again. If your subject moved, or if the focus point lands on something else when you recomposed, the camera focuses on the wrong thing.
Back-button focus solves this by splitting the two jobs. The AF-ON button on the back of the camera takes over the focusing duties. The shutter button becomes purely a shutter release. Your thumb controls focus, your index finger controls the shutter, and the two never interfere with each other.
The concept was introduced by Canon in 1989 with the EOS 630, a film camera that featured a dedicated AF-ON button for the first time. Canon recognized that professional photographers needed a way to decouple autofocus from the shutter release, and the feature quickly became a standard offering across their professional and enthusiast camera lines. Nikon, Sony, Fujifilm, Pentax, and Olympus all followed suit, and today virtually every interchangeable-lens camera supports back-button focus in some form.
Most modern cameras have a dedicated button labeled AF-ON right where your right thumb naturally rests. On entry-level cameras that lack a dedicated AF-ON button, you can usually assign the autofocus function to the AE-L or AF-L button instead. The exact button does not matter as much as the concept: one button focuses, the other shoots.
What makes this technique so powerful is how it interacts with different autofocus modes. In continuous AF (AF-C or AI Servo), holding the AF-ON button keeps the camera tracking your subject continuously. Release the button, and focus locks at that distance. In single AF (AF-S or One-Shot), pressing the AF-ON button focuses once and locks. This means you can effectively switch between locked focus and continuous tracking just by choosing whether to hold or release the AF-ON button, without ever diving into menu settings.
Why Pros Swear By It: The Core Benefits?
Ask any working sports, wildlife, or wedding photographer about back-button focus, and you will likely get an earful. Many of them consider it the single most important setting change they have ever made. Here is why.
1. Focus and recompose without losing your focus lock. This is the number one reason photographers switch to back-button focus. You place your focus point on your subject, press the AF-ON button to lock focus, then release the button and recompose the shot however you like. Since the shutter button no longer triggers autofocus, your focus stays locked no matter how you move the camera. This eliminates one of the most common causes of missed focus in portrait and event photography.
2. No more accidental refocusing. With shutter-button AF, every time you press the shutter, the camera refocuses. If your subject is momentarily obscured, or if the focus point drifts to a high-contrast area in the background, the camera will happily focus on the wrong thing. Back-button focus prevents this entirely. Once you have focus locked, you can fire away without the camera second-guessing you.
3. You rarely need to switch between AF-S and AF-C. This is a benefit that catches many photographers by surprise. With back-button focus, you can leave your camera in AF-C (continuous) mode all the time. Want a single focus lock? Tap the AF-ON button once and release. Want continuous tracking for a moving subject? Hold the button down. You get the behavior of both single and continuous AF modes from a single setting, controlled by how you use your thumb.
4. Faster response for action and decisive moments. When you are shooting sports, wildlife, or fast-moving events, pre-focusing becomes possible. You focus on a spot where you know action will happen using the AF-ON button, then release it. When the moment arrives, you just press the shutter. There is zero focus-acquisition delay because the camera is not trying to focus. The shutter fires instantly. This shaves critical milliseconds off your response time and can be the difference between capturing and missing the shot.
5. Better focus control during burst shooting. When you are firing a burst of frames with shutter-button AF, the camera may try to refocus between frames, especially if your subject is moving erratically. With back-button focus, you have precise control over when the camera tracks and when it holds. You can hold AF-ON during the entire burst for continuous tracking, or release it partway through to lock focus at a specific distance.
6. More precise focus for macro and tripod work. Macro photographers and anyone working on a tripod benefit enormously from back-button focus. When your depth of field is razor-thin at close range, you do not want the camera refocusing every time you touch the shutter. With BBF, you can fine-tune focus manually on the lens barrel, then use the AF-ON button only when you want the camera to confirm or adjust focus. The shutter button never interferes.
One Reddit user in the r/photography community put it this way: “I have been using it ever since I attended a weekend workshop taught by pros who all emphasized back-button focus. It does take a little getting used to, but it is second nature now.” This sentiment echoes across photography forums, Facebook groups, and YouTube comments wherever the topic comes up.
Marc Farb, a technical representative at Sigma with 25 years of industry experience, describes the transition candidly: “It is the most unnatural thing to start doing and takes a great deal of practice and patience before it suddenly becomes second nature.” That honesty matters, because the learning curve is real, and I will address it later in this article.
Problems With Shutter-Button Autofocus
To appreciate why back-button focus is such a big deal, it helps to understand the specific problems that come with the default shutter-button autofocus setup. These are not edge-case issues. They are everyday frustrations that plague photographers at every level.
The recompose penalty. This is the most common problem. You want your subject off-center in the frame, but your camera only has one active focus point in the center (or you prefer center-point focusing for accuracy). So you center the subject, half-press to focus, then recompose and full-press. Except the moment you full-press, the camera refocuses on whatever is now under the center point, which is probably your background. Your subject is out of focus. Every photographer has experienced this, and it is maddening.
The hunting problem. You are shooting a concert, a wedding, or a wildlife scene in challenging light. You half-press the shutter, and the lens starts hunting back and forth trying to find focus. While it hunts, you cannot take the photo because pressing the shutter further just keeps telling the camera to focus. With back-button focus, you can let the camera hunt with the AF-ON button, and the moment it locks on, you release the button and fire the shutter freely.
The switching penalty. Without back-button focus, moving between stationary and moving subjects means switching between AF-S and AF-C modes. That might mean pressing a button on the camera, turning a dial, or diving into a menu. In fast-paced situations like wedding ceremonies or sports events, those seconds matter. Back-button focus eliminates this switching because you can handle both behaviors with a single mode setting.
The delay problem. When the shutter button handles both focusing and shooting, there is always a slight delay between pressing the button and capturing the image. The camera needs to confirm focus before it fires. In some cameras, this shutter lag is minimal. In others, particularly in low light or with slower lenses, it can be noticeable enough to cause you to miss a fleeting expression or a decisive action moment.
The focus-point interference. Modern cameras have sophisticated autofocus systems with dozens or even hundreds of focus points. But when the shutter button controls AF, every time you press it, the camera evaluates the entire scene and may choose a different subject than what you intended. This is especially problematic when shooting through branches, fences, or other foreground elements. The camera locks onto the nearest object instead of your actual subject.
Every one of these problems has the same root cause: the shutter button is trying to do two jobs at once. Back-button focus gives each job its own dedicated control, and that simple separation eliminates an entire category of focusing frustrations.
Back-Button Focus vs Shutter-Button Focus: Side-by-Side
No competitor in the current search results provides a clear side-by-side comparison of these two approaches. So let me fix that right now. Here is how back-button focus stacks up against the default shutter-button autofocus across the dimensions that matter most.
Focus Control: With shutter-button AF, focus and shutter release are locked together. Every shutter press triggers AF. With back-button focus, they are completely independent. You focus when you want, shoot when you want.
Focus-and-Recompose: Shutter-button AF forces you to keep the shutter half-pressed while recomposing, which is awkward and unreliable. Back-button focus lets you lock focus, release the AF-ON button, and recompose freely with zero risk of losing focus.
AF Mode Switching: Shutter-button AF requires physically switching between AF-S and AF-C modes when your subject changes from stationary to moving. Back-button focus lets you stay in AF-C permanently and control behavior through how you press the AF-ON button.
Action Response Time: Shutter-button AF always has some focus-acquisition delay when you press the shutter. Back-button focus allows pre-focusing so the shutter fires the instant you press it, with zero AF delay.
Burst Shooting: Shutter-button AF may refocus between frames during a burst, causing inconsistent focus. Back-button focus gives you full control: hold for tracking, release to lock.
Learning Curve: Shutter-button AF requires no setup or learning. Back-button focus requires initial configuration and takes 1 to 2 weeks of practice to build muscle memory.
Shared Camera Issues: Shutter-button AF works for anyone who picks up the camera. Back-button focus confuses anyone who does not know it is enabled, often resulting in out-of-focus photos for second shooters or family members.
The comparison is clear. For most photographers shooting anything beyond casual snapshots, back-button focus offers meaningful advantages. The only real costs are the learning curve and the shared-camera inconvenience.
How to Set Up Back-Button Focus (Step by Step)
The general setup process is similar across all camera brands, even though the specific menu paths differ. Here is the universal workflow before we get into brand-specific instructions.
Step 1: Locate your AF-ON button or an assignable rear button. On mid-range and professional cameras, there is a dedicated button labeled AF-ON right where your right thumb rests. On entry-level cameras, look for a button labeled AE-L, AF-L, or AEL/AF-L. You can reassign this button to handle autofocus activation.
Step 2: Assign autofocus activation to the rear button. Dive into your camera’s custom controls or button assignment menu. Find the option for the AF-ON button (or your chosen rear button) and set it to control autofocus activation. In most systems, this is called “AF-ON” or “AF activation.” Some cameras have this enabled by default on the AF-ON button, so you may only need to do Step 3.
Step 3: Remove autofocus from the shutter button. This is the critical step that many beginners miss. You need to tell the camera that the shutter button should only handle metering and shutter release, not autofocus. In Canon menus, this means disabling AF from the shutter half-press. In Nikon, you set the shutter release button to “AF off.” In Sony, you change the AF with shutter setting to off. In Fujifilm, you set the shutter AF to off.
If you skip Step 3, you end up with both the shutter button and the AF-ON button trying to control autofocus simultaneously, which defeats the entire purpose.
Step 4: Practice and build muscle memory. This is where most people give up. For the first few days, you will forget to press the back button and end up with out-of-focus shots. Your thumb will feel awkward reaching for the button. This is completely normal. Every photographer who uses back-button focus went through this phase. Give it at least one to two weeks of consistent shooting before you decide whether it is right for you.
What if your camera does not have a dedicated AF-ON button? Many entry-level DSLRs and some older mirrorless cameras lack a dedicated AF-ON button. You can still use back-button focus by assigning the AE-L or AF-L button to serve as your AF-ON button. The functionality is identical. The button just has a different label. On some Canon Rebel models, for example, you press the AE-L button for the same effect. On older Nikon bodies, you use the AE-L/AF-L button combined with a custom setting menu change.
The key takeaway: if your camera has any assignable rear button, you can use back-button focus. You do not need a professional-grade body to benefit from this technique.
Brand-Specific Setup Instructions
Every camera brand handles back-button focus setup differently, with different menu structures, terminology, and button names. Here is a detailed guide for the four major brands.
Canon Back-Button Focus Setup
Canon has the longest history with back-button focus since they introduced the concept in 1989. Their setup process is well-documented and straightforward on most models.
On Canon EOS DSLRs (5D, 6D, 7D, 90D, Rebel series), start by pressing the Menu button and navigating to the custom controls or button assignment screen. On higher-end models like the 5D Mark IV, 7D Mark II, and later, go to the orange camera menu tab and look for Custom Controls under the Custom Functions section.
Once in the Custom Controls screen, select the shutter button and change its function from “Metering and AF Start” to “Metering Start.” This removes autofocus from the shutter half-press. Then select the AF-ON button and confirm it is set to “AF Start” or “Metering and AF Start.” On most Canon cameras, the AF-ON button is already assigned to AF Start by default, so you may only need to modify the shutter button.
On Canon Rebel series cameras that lack a dedicated AF-ON button, you will use the AE Lock button (the one marked with an asterisk symbol). In the menu, look for “Shutter Button / AE Lock Button” under Custom Functions. Set the option so that the AE Lock button handles AF Start. This effectively turns the asterisk button into your back-button focus control.
On Canon EOS R series mirrorless cameras (R5, R6, R7, R8, R3, etc.), the process is similar but the menus are more modern. Go to Menu, navigate to the wrench icon tab, and select Customization, then Custom Buttons. Select the shutter button and set it to “Metering Start.” Confirm that the AF-ON button is set to “AF Start.” The R series cameras also allow you to customize what happens when you press and hold versus press and release, which gives advanced users even more control.
Nikon Back-Button Focus Setup
Nikon cameras have supported back-button focus for decades, and the setup is consistent across most models with only minor menu variations.
On Nikon DSLRs (D750, D780, D850, D500, D7500, D5600, etc.), press the Menu button and navigate to the Custom Setting Menu, represented by a pencil icon. Look for the Autofocus section, usually labeled “a” or “Autofocus.” Within that section, find “AF activation” and set it to “AF-ON only.” This tells the camera that autofocus should only activate when the AF-ON button is pressed, not when the shutter is half-pressed.
On higher-end Nikon bodies like the D850 and D500, the AF-ON button is present by default and works immediately once you change the AF activation setting. On the D7500 and some older models, you may also need to confirm that the AE-L/AF-L button is not conflicting with the AF-ON button assignment.
For Nikon entry-level DSLRs (D3000 and D5000 series), there is no dedicated AF-ON button. You will need to reassign the AE-L/AF-L button instead. Go to the Setup Menu, look for “Buttons” or “Assign AE-L/AF-L button,” and set it to “AF-ON.” This repurposes the AE-L/AF-L button as your focus control.
On Nikon Z series mirrorless cameras (Z6, Z7, Z6II, Z7II, Z8, Z9, Zf, Zfc), the process is very similar. Go to the Custom Setting Menu, navigate to the Autofocus section, and set AF activation to “AF-ON only.” The Z series bodies have a dedicated AF-ON button, and on newer models like the Z8 and Z9, you have extensive customization options for what the AF-ON button does in different shooting modes.
Sony Back-Button Focus Setup
Sony’s menu system has evolved significantly over the years, and the setup process varies between older Alpha DSLR-era bodies and modern E-mount mirrorless cameras. I will focus on the current E-mount lineup since that is what most Sony shooters are using today.
On Sony Alpha mirrorless cameras (a7, a7R, a7S, a7 IV, a7R V, a9, a1, etc.), press the Menu button and navigate to the second page of the Setup menu (the toolbox icon). Look for “Operation Customize” or “Custom Key Setting” depending on your firmware version. This screen lets you assign functions to every button on the camera.
First, select the shutter button and confirm it is set to handle metering and shutter release. Then go back and find the setting called “AF with Shutter.” Set this to “AF Off.” This is the critical step that removes autofocus from the shutter half-press on Sony cameras. Without this change, the shutter button will still try to focus.
Next, assign the AF-ON button to “AF On.” On most Sony Alpha cameras, the AF-ON button is already set to this function by default, so you mainly need to disable AF with Shutter. But it is worth double-checking that the AF-ON button is indeed assigned to AF On and not to some other function.
On older Sony models like the original a7 and a7II, you may need to use the AEL button instead of a dedicated AF-ON button. Some of these older bodies do not have a separate AF-ON button. In that case, assign the AEL button to “AF On” in the Custom Key Settings menu.
One Sony-specific tip: Sony cameras have a feature called “Pre-Shoot” or “Pre-Capture” on newer models like the a1 and a9 III. This feature captures images before you fully press the shutter. Back-button focus works with pre-capture, but you need to be holding the AF-ON button for continuous tracking if you want the camera to be focusing during the pre-capture window. Something to keep in mind if you shoot high-speed action.
Fujifilm Back-Button Focus Setup
Fujifilm cameras have a slightly different approach to back-button focus compared to the other three brands, but the concept is the same.
On Fujifilm X series cameras (X-T5, X-T4, X-T3, X-H2, X-H2S, X-Pro3, X-S20, etc.), press the Menu button and navigate to the Set Up section. Look for “Button / Dial Setting” and then select “Shutter AF.” You will see options for both AF-S and AF-C modes. Set both to “Off.” This removes autofocus from the shutter button in both single and continuous AF modes.
Next, confirm that the AF-ON button is assigned to “AF-ON” function. On most Fujifilm cameras, there is a dedicated AF-ON button on the rear. If you have reassigned it previously, go to the Button / Dial Setting menu, select “Function (Fn) Setting,” and make sure one of your rear buttons is handling AF activation.
On Fujifilm entry-level models like the X-A7 or X-T100, you may not have a dedicated AF-ON button. In that case, use the Fn button assignment menu to assign AF-ON to one of the customizable rear buttons. The technique works exactly the same way.
A Fujifilm-specific consideration: some Fujifilm shooters prefer to set the shutter button to “AE Lock Only” rather than fully “Off” for AF. This means the shutter half-press still locks exposure but does not trigger AF. This can be useful if you want the shutter to handle metering while the AF-ON button handles focus. Try both approaches and see which feels more natural.
When Back-Button Focus Helps Most?
Back-button focus is not equally valuable in every photography genre. Some types of photography benefit enormously from the technique, while others see a more modest improvement. Here is a genre-by-genre breakdown.
Sports and Action Photography. This is where back-button focus shines brightest. When you are tracking a fast-moving athlete, a race car, or a bird in flight, you need continuous focus tracking. With BBF, you hold the AF-ON button to keep the camera tracking your subject, and you fire the shutter whenever the moment is right. You can also release the AF-ON button to lock focus at a specific distance if you are pre-focusing on a spot where you know the action will happen, like a finish line or a jump.
The ability to switch between tracking and locked focus without touching a mode dial is invaluable in sports. A basketball player driving to the hoop one moment, then celebrating stationary the next. You handle both with your thumb.
Wildlife and Bird Photography. Wildlife photographers face the same challenges as sports shooters, often in worse lighting and with more erratic subject movement. Birds in flight require continuous tracking with AF-C mode, and back-button focus lets you engage tracking only when the bird is in your frame. If the bird flies behind a tree, you can release the AF-ON button to prevent the camera from locking onto branches, then re-engage tracking when the bird reappears.
For perched birds or resting animals, a quick tap of the AF-ON button locks focus. Then you can recompose for a better composition without the camera refocusing on a twig in the foreground.
Portrait Photography. Portraits are where the focus-and-recompose technique matters most. You want your subject’s eyes sharp, but you rarely want them dead-center in the frame. With shutter-button AF, recomposing after focusing risks the camera refocusing on the background. With back-button focus, you lock focus on the eyes using the AF-ON button, release it, recompose to your heart’s content, and fire away.
This is especially valuable for wedding photographers who shoot receptions and ceremonies in unpredictable lighting. You cannot afford to miss focus on a first dance or a ring exchange because the camera decided to refocus at the wrong moment.
Landscape Photography. Landscape photographers benefit from back-button focus in several ways. First, when shooting on a tripod, you often want to focus at a specific point (like one-third into the scene for hyperfocal distance) and then lock that focus while you adjust composition, exposure, and filters. Back-button focus lets you do this cleanly.
For focus stacking, where you take multiple images at different focus distances and blend them later in software, back-button focus is essential. You need to control exactly when the camera focuses and ensure it does not refocus when you press the shutter between frames. Landscape photographer Dave Morrow covers this extensively in his guide, and it is one of the strongest use cases for BBF in landscape work.
Event and Wedding Photography. Events are unpredictable. One moment you are shooting a stationary group portrait, the next you are chasing a flower girl running down the aisle. Back-button focus lets you handle both situations without switching AF modes. Tap AF-ON for the portrait, hold AF-ON for the running child. This flexibility is why so many wedding photographers consider BBF non-negotiable.
Macro Photography. At macro magnifications, depth of field can be measured in millimeters. Any unintended refocus ruins the shot. Back-button focus lets you carefully position focus, lock it with the AF-ON button, and then make fine manual adjustments on the lens focus ring. The shutter button never triggers an unwanted AF cycle that throws off your careful work.
Street Photography. Street shooters often pre-focus to a known distance and wait for subjects to enter that zone. Back-button focus makes this trivial. Focus once, release AF-ON, and every shutter press fires instantly with no focus delay. This is the modern equivalent of zone focusing on a vintage rangefinder.
Common Mistakes Beginners Make With Back-Button Focus
No competitor in the current search results covers this topic, but it is one of the most frequently asked questions in photography forums. If you are switching to back-button focus, here are the pitfalls to watch for.
Forgetting to press the button. This is the number one mistake. During the first week or two, your muscle memory is still telling you to half-press the shutter to focus. You will take photos that are completely out of focus because you forgot to hit AF-ON first. This is normal and temporary. Keep practicing, and it will become automatic within about two weeks.
Not removing AF from the shutter button. Some photographers assign AF to the AF-ON button but forget to remove it from the shutter button. Both buttons now try to control autofocus, and the result is confusing, inconsistent behavior. The camera focuses when you press the AF-ON button, then refocuses when you press the shutter. Make sure AF is fully removed from the shutter half-press.
Giving up too early. The learning curve is real. I have seen photographers try back-button focus for one shoot, get frustrated, and switch back. If you give it a fair trial of one to two weeks of consistent shooting, the technique becomes second nature. The Reddit threads are full of photographers who almost quit but stuck with it and now refuse to go back.
Confusing AE-L with AF-ON. If you are using the AE-L or AE-L/AF-L button as your focus button on an entry-level camera, remember that this button also handles exposure lock by default. You need to decide whether you want it to do AF only, AE only, or both. Most photographers set it to AF only and use a different method for exposure locking, or simply rely on manual exposure mode.
Not warning shared camera users. If you share your camera with a spouse, a family member, or a second shooter, they will not know back-button focus is enabled. They will press the shutter and get blurry photos because the camera is not focusing from the shutter button. Either warn them, or keep a note on the camera explaining the setup. This is a surprisingly common source of frustration at weddings and family events.
Using the wrong AF mode. Back-button focus is most powerful when combined with AF-C (continuous) mode. If you leave the camera in AF-S and use back-button focus, you are getting some benefits but missing the biggest one: the ability to switch between single and continuous behavior just by how you press the button. Set your camera to AF-C, use BBF, and tap-to-lock or hold-to-track.
Is Back-Button Focus Still Necessary on Mirrorless?
This is the most debated question in the back-button focus conversation right now. Modern mirrorless cameras have dramatically improved autofocus systems with eye tracking, subject detection, and real-time tracking that can lock onto a person, animal, or vehicle and follow it across the frame. Do these advancements make back-button focus obsolete?
The honest answer is: it depends on your shooting style and subject matter.
The mirrorless counterargument goes like this. With eye-tracking AF, the camera automatically detects your subject’s eye and keeps it in focus regardless of where the subject moves in the frame. You no longer need to manually select a focus point, lock focus, and recompose. The camera handles all of that automatically. In this scenario, decoupling AF from the shutter button provides less benefit because the camera is already making smart focusing decisions.
One Reddit commenter captured this perspective: “The chief reason for BBF has been diminished by the completely different sophisticated autofocus system in mirrorless cameras.” And there is truth to this. For straightforward portrait work where eye tracking works reliably, the advantages of BBF are less pronounced than they were on DSLRs.
However, back-button focus still adds meaningful value in several mirrorless scenarios. When eye tracking loses lock momentarily, such as when a subject turns their head or passes behind an obstacle, having the ability to control when the camera hunts for a new subject versus holding its last known focus position is valuable. BBF gives you that control.
For wildlife photographers using subject detection on animals that the camera may struggle to identify, back-button focus lets you override the automated system. You decide when the camera engages tracking, rather than trusting it implicitly. This matters when you are photographing unusual subjects that fall outside the camera’s trained detection categories.
For tripod-based landscape and macro work, nothing changes on mirrorless. The same benefits of focus locking and preventing unwanted refocus apply equally. Eye tracking is irrelevant when your subject is a mountain range or a dewdrop on a leaf.
The bottom line is that back-button focus is no longer mandatory on modern mirrorless cameras for every photographer. If you primarily shoot portraits with reliable eye tracking, you may not feel the need. But for sports, wildlife, macro, event, and landscape photographers, the control and precision that BBF provides remain just as valuable as ever. My recommendation: try both approaches and use whichever one gets you more keepers.
FAQs
What is back button focus?
Back-button focus is a camera technique that moves autofocus activation from the shutter button to a dedicated button on the back of the camera, typically labeled AF-ON. You focus with your thumb and fire the shutter with your index finger, giving you independent control over when the camera focuses and when it takes the photo.
Why do people use back button focus?
Photographers use back-button focus because it lets them lock focus and recompose without losing their focus point, prevents accidental refocusing when pressing the shutter, eliminates the need to switch between AF-S and AF-C modes, reduces shutter lag for action shots, and provides more precise control during burst shooting and macro work.
Do professional photographers use back button focus?
Yes, many professional photographers use back-button focus, especially in sports, wildlife, wedding, and event photography. The technique was introduced by Canon in 1989 and has been adopted widely by working pros who need precise control over focus timing. Most professional-grade cameras from Canon, Nikon, Sony, and Fujifilm include a dedicated AF-ON button specifically for this purpose.
Is back button focus better?
Back-button focus is better for most photographers who shoot anything beyond casual snapshots. It provides independent control over focus and shutter, enables focus-and-recompose without losing focus lock, and lets you switch between single and continuous AF behavior without changing modes. However, it requires a 1 to 2 week learning period and is not necessary for all mirrorless shooters who rely on eye-tracking autofocus.
What does back focus do?
Back focus refers to a lens calibration issue where the actual focal plane lands slightly behind your intended subject. This is a mechanical problem that requires adjusting the lens-to-sensor distance. It is not the same as back-button focus, which is a shooting technique. The two terms are often confused because they sound similar.
How long does it take to learn back button focus?
Most photographers take 1 to 2 weeks of consistent shooting to build the muscle memory needed for back-button focus to feel natural. During this transition period, you will likely miss some shots because you forgot to press the AF-ON button. After about two weeks, the technique becomes second nature and most photographers never switch back.
Conclusion
Back-button focus is one of those rare camera settings that genuinely changes how you shoot. By separating autofocus from the shutter release, you gain independent control over two of the most critical functions in photography. You can lock focus and recompose freely, switch between single and continuous tracking without touching a dial, and fire the shutter with zero focus delay.
The technique is not mandatory on modern mirrorless cameras with eye-tracking autofocus, and it does require a 1 to 2 week adjustment period. But for sports, wildlife, portrait, event, macro, and landscape photographers who want maximum control over their focus, back-button focus remains one of the most impactful settings you can change on your camera.
My advice: set it up, give it two weeks of honest practice, and see for yourself why so many pros swear by it. The worst case is that you switch back. The best case is that you never do.