
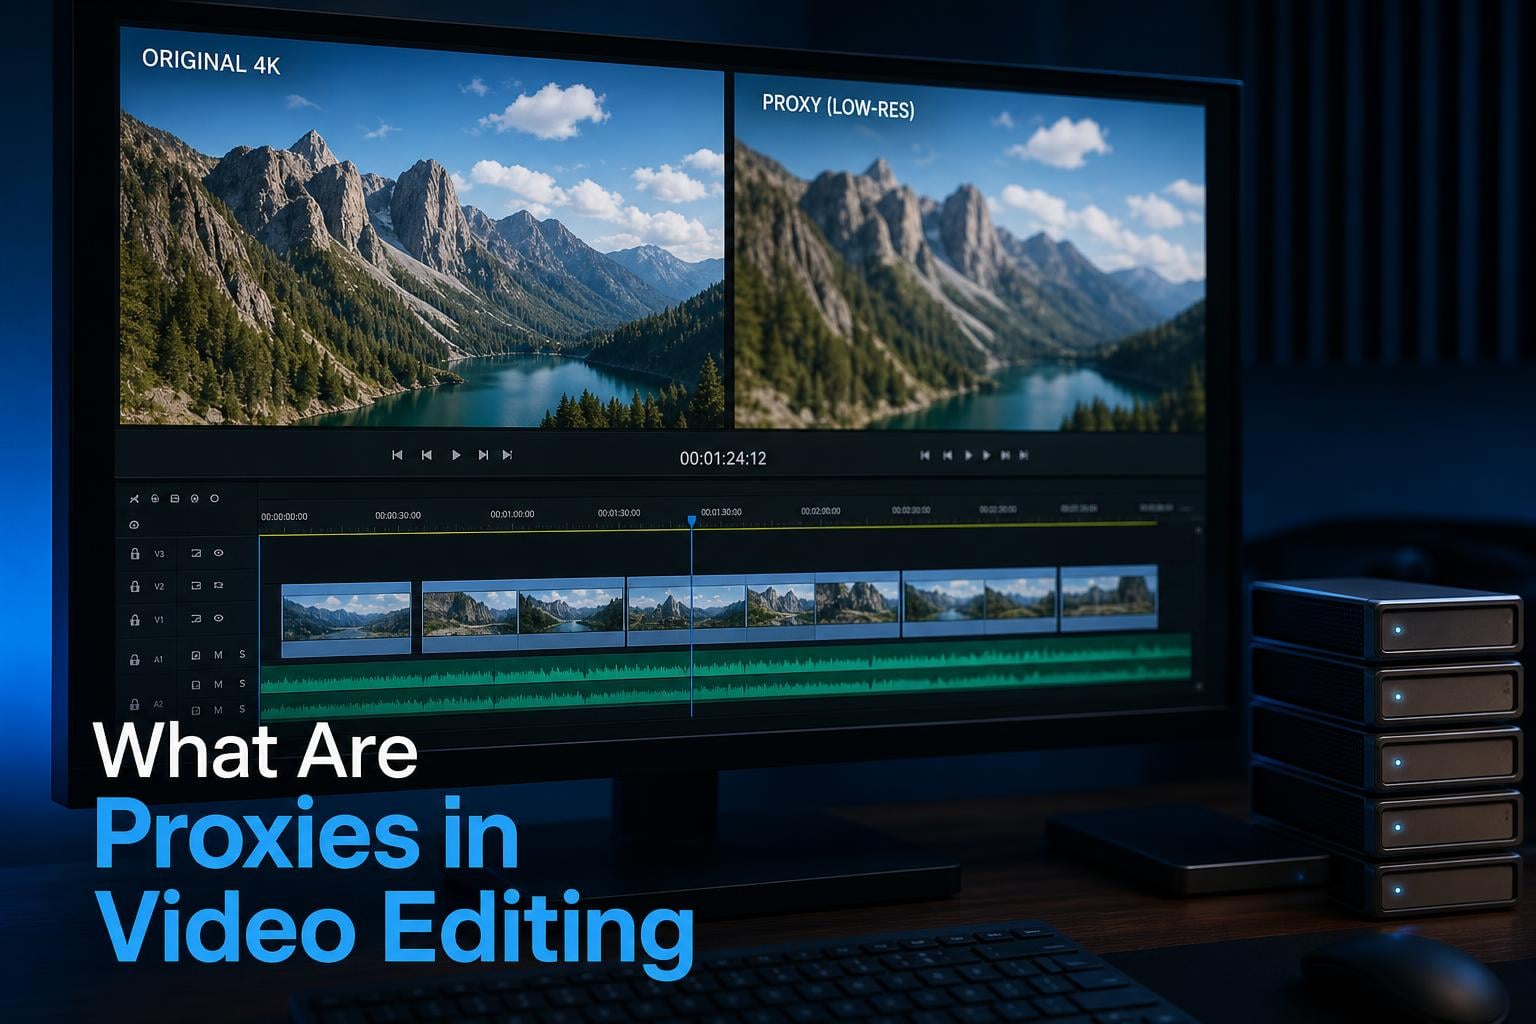
If you have ever tried editing 4K or 8K footage on a laptop that sounds like a jet engine, you already know why people ask what are proxies in video editing. The playback stutters. The timeline lags. Every cut feels like wading through mud. Proxies are the fix that professional editors swear by, but getting them set up can feel like a technical maze, especially when your proxy files refuse to attach.
I spent three years editing high-resolution drone and mirrorless camera footage before I finally committed to a proper proxy workflow. The difference was night and day. Scrubbing went from choppy to buttery smooth. Color grading became real-time instead of a guessing game. But along the way, I hit every single proxy attachment error imaginable, from silent failures to audio channel mismatches to black bars appearing on half my clips.
This guide answers two questions in one place. First, what are proxies and how do they work? Second, why will your proxy files sometimes refuse to attach, and how do you fix it? Whether you edit in Premiere Pro, DaVinci Resolve, or another NLE, the concepts here apply across the board. By the end, you will understand proxies from the ground up and have a troubleshooting playbook for when things go wrong.
Think of it this way. Imagine you are proofreading a 500-page novel. Instead of lugging the heavy hardcover everywhere, you make a lightweight paperback copy with the same words but thinner paper. You mark all your edits on the paperback because it is easier to handle. When you are done, you apply those same edits to the original hardcover for the final published version. That paperback is your proxy. The hardcover is your original footage.
Now let me walk you through everything from the basics to the advanced troubleshooting that most guides skip.
Table of Contents
What Are Proxies in Video Editing?
Proxies in video editing are low-resolution, lightweight copies of your original high-resolution footage. Your editing software uses these smaller files during the editing process for smooth playback and scrubbing. When you export your final video, the software automatically switches back to the original full-resolution files so your output quality is never compromised.
That is the 40-word definition. Now let me break it down further.
A typical proxy file is around 720p or 1080p even when your source footage is 4K, 6K, or 8K. The proxy uses an editing-friendly codec like ProRes 422 Proxy or H.264 instead of whatever heavily compressed format your camera recorded in. The result is a file that is roughly one-quarter to one-tenth the size of the original, which your computer can decode and play back without breaking a sweat.
The key thing to understand is that proxies are temporary working files. They are not your final video. They exist purely to make your editing experience faster and more responsive. Your original footage stays untouched on your storage drive, waiting for the moment you hit export.
Here is a quick comparison to put the size difference in perspective. A single minute of 4K H.265 footage from a modern mirrorless camera might take up 400 to 600 megabytes. The same minute as a 720p ProRes Proxy file might be 40 to 60 megabytes. That tenfold reduction in data is what makes the editing experience so dramatically smoother.
Every major nonlinear editor supports proxies. Premiere Pro has a built-in proxy workflow with automatic creation through Media Encoder. DaVinci Resolve has both proxy media and optimized media features. Final Cut Pro calls them proxy media as well. The underlying concept is identical across all of them.
Why Use Proxies? The Benefits Explained
Proxies solve one fundamental problem. High-resolution video files are enormous, and most computers cannot play them back smoothly in real time while also running editing software, effects, color corrections, and multiple layers.
Smooth playback on any hardware. This is the number one reason editors use proxies. If you are editing 4K footage on a mid-range laptop or an older desktop, playback will stutter without proxies. Proxies reduce the workload on your CPU and GPU, letting the timeline play at full speed without dropped frames.
Fast scrubbing and responsive editing. When you drag the playhead across your timeline, the software has to decode every frame it lands on. With full-resolution H.265 or H.264 footage, this decoding takes time, and you see a lag. With proxies using an editing codec like ProRes, decoding is nearly instant. You can scrub through footage frame by frame with zero delay.
Editing on low-spec systems. Not everyone has a workstation with 128 GB of RAM and a top-tier GPU. Proxies level the playing field. I have edited entire documentary projects on a 5-year-old laptop using 720p proxies. Without them, the same footage would have been uneditable on that machine.
Remote editing and collaboration. If you work with a team or client remotely, sending 4K source files over the internet is painful. Proxies compress those files to a fraction of their original size. You can upload them to a shared drive, let remote editors do their work, and then reconform to the original footage at the end.
Effects and color grading work better. When your timeline is playing back smoothly, you can actually see what your effects and color adjustments look like in real time. Without proxies, the playback is so choppy that judging a color grade or a transition becomes guesswork.
Longer timeline projects stay manageable. A 30-minute documentary with hundreds of clips will bog down even a powerful system if every clip is full resolution. Proxies keep the project responsive no matter how large it grows.
How Proxies Work: The Proxy Workflow Explained
The proxy workflow follows a simple cycle. Ingest, edit, toggle, and conform. Let me walk through each stage.
Stage 1: Ingest. You import your original high-resolution footage into your editing software. At this point, the clips are linked to the full-resolution source files on your drive. The software can play them, but playback may be sluggish depending on your hardware.
Stage 2: Proxy creation. You tell the software to generate proxy versions of your clips. In Premiere Pro, this happens through Media Encoder or the built-in ingest settings. In DaVinci Resolve, it happens through the proxy generation menu. The software creates new, smaller files using a codec designed for editing performance.
Stage 3: Attach and enable. The proxy files are linked to their corresponding original clips. This attachment tells the software that these two files represent the same piece of media. Once attached, you toggle a setting that tells the software to play the proxy instead of the original during editing.
Stage 4: Edit using proxies. From this point on, you edit normally. Cut, trim, add transitions, apply color grades, layer effects. The software uses the proxy files for playback and preview rendering. You will notice immediately how much smoother everything feels.
Stage 5: Toggle back for export. When you are ready to export your final video, you simply toggle proxies off. The software switches back to the original full-resolution files. Your final export uses the highest quality source media, not the proxy files.
Stage 6: Conform (if needed). In some workflows, especially when using third-party proxy tools, you may need to manually reconnect or conform the final project back to the original media. Premiere Pro and DaVinci Resolve handle this automatically for most workflows.
The beauty of this system is that your creative decisions are never tied to the proxy quality. You are making cuts and adjustments based on the timing and content of the footage. The resolution of the file you are viewing does not change where you place a cut or how you grade a scene. The proxy is just a stand-in for preview purposes.
Proxy Codecs: ProRes vs H.264
Choosing the right codec for your proxies matters more than most editors realize. The wrong codec can cause audio channel mismatches, sluggish playback, and attachment failures.
ProRes 422 Proxy is the gold standard for proxy files in most professional workflows. It is an Apple-designed intermediate codec that decodes very quickly, supports multiple audio channels, and maintains consistent quality. The files are larger than H.264 proxies, but the performance and reliability are worth it. Premiere Pro defaults to ProRes Proxy for its built-in proxy preset, and for good reason.
H.264 is the other common proxy codec. It produces much smaller files than ProRes, which makes it attractive for storage-constrained setups. However, H.264 is a delivery codec, not an editing codec. It requires more CPU power to decode during playback, which partially defeats the purpose of proxies. More importantly, H.264 does not reliably support multi-channel audio in all wrappers, which is a primary cause of proxy attachment failures.
ProRes 422 LT sits between ProRes Proxy and ProRes 422 in terms of quality and file size. Some editors prefer it for proxies because it offers slightly better image quality, which matters when you are doing rough color grading or working with footage that has heavy noise.
GoPro Cineform is another option, though it is less common today. It works well on Windows systems and supports multi-channel audio. Some editors working with drone footage still prefer it.
Here is my recommendation based on years of testing different proxy codecs. Use ProRes 422 Proxy as your default. It works with virtually all footage types, supports multi-channel audio, and plays back smoothly on almost any system. Only switch to H.264 proxies if storage space is an absolute constraint, and be prepared for potential audio channel issues during attachment.
One codec mistake I see frequently is editors trying to use H.265 for proxies. H.265 is even more demanding to decode than H.264. Using it for proxies would make playback worse, not better. Always choose a codec that is easier to decode than your source footage.
How to Create and Attach Proxies in Premiere Pro?
Premiere Pro has the most developed proxy workflow of any editing software. You can create proxies automatically during ingest or manually after you have already started editing. Let me cover both methods step by step.
Method 1: Automatic Proxy Creation During Ingest
This is the cleanest workflow. Proxies are generated at the moment you import your footage, before you even start cutting.
Step 1. Open Premiere Pro and go to the Project panel. Click the wrench icon in the top right corner of the panel and select Ingest Settings. Alternatively, go to File > Project Settings > Ingest Settings.
Step 2. Check the box that says Ingest. This opens the ingest options below.
Step 3. From the dropdown menu, select Transcode and Create Proxies. This tells Premiere to both copy your original files to a specified location and generate proxy versions simultaneously.
Step 4. Choose your proxy preset. The default is ProRes 422 Proxy at 1280×720, which works well for most projects. If you need different settings, you can create a custom preset in Media Encoder.
Step 5. Set the destination for both the original copies and the proxy files. I recommend storing proxies on a fast local drive, not an external USB drive, for best performance.
Step 6. Click OK to save the ingest settings.
Step 7. Now import your footage as you normally would. Premiere will automatically send the files to Media Encoder, which generates the proxies in the background while you work.
Once the proxies are created, they are automatically attached to your clips. You will see a small proxy badge appear on each clip in the Project panel, indicating that a proxy file is linked and available.
Method 2: Manual Proxy Creation After Import
If you have already imported footage or started editing, you can still create proxies. This is the method I use most often when a client sends additional footage mid-project.
Step 1. Select the clips you want to create proxies for in the Project panel. You can select all clips by pressing Ctrl+A (Windows) or Cmd+A (Mac).
Step 2. Right-click the selected clips and choose Proxy > Create Proxies.
Step 3. In the Create Proxies dialog, choose your preset. The default ProRes 422 Proxy at 720p works for most situations.
Step 4. Choose where to store the proxy files. You can put them next to the original media or in a dedicated proxy folder.
Step 5. Click OK. Premiere sends the job to Media Encoder, which processes the proxies in the background.
Step 6. Once Media Encoder finishes, the proxies are automatically attached to your clips. Check for the proxy badge in the Project panel to confirm.
Method 3: Attaching Pre-Made Proxy Files Manually
If you created proxy files using third-party software like EditReady, or if a remote editor sent you proxy files, you need to attach them manually.
Step 1. Select the clips in the Project panel that correspond to your pre-made proxy files.
Step 2. Right-click and choose Proxy > Attach Proxies.
Step 3. In the Attach Proxies dialog, browse to the location of your proxy file or files. Select the matching proxy and click OK.
Step 4. Premiere will verify that the proxy file matches the original clip. If successful, the proxy badge appears. If the attachment fails, you will see an error or the dialog will simply do nothing.
That silent failure, where clicking Attach does nothing, is one of the most common and frustrating proxy problems. I will cover exactly why it happens and how to fix it in the troubleshooting section below.
Toggling Proxies On and Off
Once proxies are attached, you need to enable them in the timeline. Look for the Toggle Proxies button in the Program Monitor toolbar. It looks like two small rectangles. If you do not see it, click the plus icon on the right side of the Program Monitor to open the button editor and drag the Toggle Proxies button onto the toolbar.
When the button is highlighted, Premiere uses proxy files for playback. When it is dimmed, Premiere uses the original full-resolution files. You can switch back and forth at any time, even mid-edit.
A keyboard shortcut makes this even faster. Go to Keyboard Shortcuts > Panels > Toggle Proxies and assign it to a key. I use the backtick key, which I can hit quickly to compare proxy and original quality.
How to Create Proxies in DaVinci Resolve?
DaVinci Resolve has its own proxy system that works slightly differently from Premiere Pro. The concept is the same, but the implementation has some unique features worth understanding.
DaVinci Resolve Proxy Workflow
Step 1. Open your project in DaVinci Resolve and go to the Media page (the icon at the bottom that looks like a film strip).
Step 2. Select the clips you want to create proxies for in the media storage area or media pool.
Step 3. Right-click the selected clips and choose Generate Proxy Media.
Step 4. In the dialog that appears, choose your proxy settings. DaVinci Resolve offers resolution options (half, quarter, or custom) and codec options (DNxHR on Windows, ProRes on Mac). I recommend quarter resolution with DNxHR LB or ProRes 422 Proxy for the smallest, fastest files.
Step 5. Click Generate. Resolve creates the proxy files and links them automatically. You do not need to manually attach them.
Step 6. To enable proxies in the timeline, go to Playback > Proxy Playback Mode and select either Proxy or Auto. In Auto mode, Resolve uses proxies when available and falls back to original media when not.
Optimized Media vs Proxy Media in Resolve
DaVinci Resolve also has a feature called Optimized Media, which is different from proxies. Optimized Media converts your footage to an editing-friendly format at full resolution. Think of it as transcoding rather than creating lower-resolution copies. Optimized Media is useful when you want the decoding speed of ProRes but need to maintain full resolution for heavy color grading.
For most editors, especially those working with 4K or higher footage on modest hardware, Proxy Media is the better choice. It gives you the performance benefit without the storage overhead of full-resolution optimized files.
One advantage of Resolve over Premiere Pro is that proxy playback is handled entirely within the application. You do not need Media Encoder or any external tool to generate proxies. Everything is built in.
Proxy Settings That Matter
Proxy attachment failures almost always trace back to mismatched settings between the proxy file and the original. Here are the settings that must match, and what happens when they do not.
Frame rate. The proxy file must have the exact same frame rate as the original footage. If your original clip is 23.976 fps and your proxy is 24 fps, the attachment may fail or the playback will drift out of sync over time. This is especially common when using proxy presets that default to 30 fps regardless of source frame rate.
Audio channels. This is the number one cause of proxy attachment failures in Premiere Pro. Your proxy file must have the same number of audio channels as the original clip. If your original footage has 4 audio channels (common with cameras that record ambient audio on channels 3 and 4) but your proxy only has 2 channels, Premiere will refuse to attach the proxy. This is why ProRes is recommended over H.264 for proxies. ProRes supports multi-channel audio reliably, while H.264 often strips it down to stereo.
Aspect ratio. The proxy must have the same aspect ratio as the original. A 16:9 original with a 4:3 proxy will cause black bars or distorted playback. If you have mixed-aspect-ratio footage in your project, group clips by aspect ratio before creating proxies and use different presets for each group.
Pixel aspect ratio. Similar to aspect ratio but more granular. This is less commonly an issue with modern footage, but anamorphic shooters should be aware of it.
Duration and timecode. The proxy file should be the exact same duration as the original and start at the same timecode. If the proxy is even a few frames shorter or longer, the attachment may fail or cause sync issues during editing.
Variable frame rate (VFR) footage. This is a hidden trap. Many phones, screen recording tools, and some drones record in variable frame rate, meaning the frame rate fluctuates during recording. NLEs expect constant frame rate. When you create proxies from VFR footage, the proxy files may not match the original timing, causing attachment failures or playback drift. The fix is to transcode VFR footage to a constant frame rate before creating proxies.
Here is a quick checklist I run through before creating any proxies. Match the frame rate to the source. Ensure audio channels are preserved. Verify the aspect ratio is identical. Check for variable frame rate using MediaInfo or the properties panel in your NLE. If all four of these match, your proxy attachment will succeed in the vast majority of cases.
Why Won’t My Proxy Attach? Common Causes and Fixes
This is the section most editors need. You clicked Attach Proxies, selected your file, and nothing happened. Or you got a cryptic error message. Or the proxy badge appeared but playback is still using the original footage. Let me walk through every common failure scenario and exactly how to fix each one.
Cause 1: Audio Channel Mismatch
This is the most common reason proxies refuse to attach. The error message in Premiere Pro reads: Proxy media and full resolution media must have matching audio channels.
Why it happens. Your original footage has more audio channels than your proxy file. For example, many cameras record 4 channels of audio, but most proxy presets default to creating files with only 2 channels (stereo). When Premiere compares the two, it sees a mismatch and refuses to attach.
How to fix it. There are two approaches. The first is to recreate your proxies using a codec that preserves all audio channels. Switch your proxy preset to ProRes 422 Proxy, which supports multi-channel audio. The second approach is to modify the audio channels of your original clips before attaching. In Premiere Pro, right-click the clip in the Project panel, select Modify > Audio Channels, and set the number of channels to match your proxy file (usually 2). Then try attaching again.
I have seen this single issue account for at least 60 percent of proxy attachment failures on community forums. The ProRes codec switch resolves it almost every time.
Cause 2: Silent Attachment Failure
You click Attach Proxies, browse to your file, click OK, and nothing happens. No error message. No proxy badge. No indication of any kind.
Why it happens. This usually occurs when the proxy file does not match the original in some way that Premiere cannot clearly communicate. Common culprits include frame rate differences, duration mismatches, or the proxy file being a different clip entirely with a similar name.
How to fix it. First, verify you are selecting the correct proxy file for the correct original clip. It sounds obvious, but mix-ups happen. Second, check the frame rate of both files using the Properties panel in Premiere or a tool like MediaInfo. If the frame rates differ, recreate the proxy with the correct frame rate. Third, try attaching the proxy to just one clip at a time rather than multiple clips at once. Batch attachment sometimes fails silently when even one file does not match.
Cause 3: Variable Frame Rate (VFR) Source Footage
If your footage comes from a smartphone, screen recorder, OBS, or some drones, it likely uses variable frame rate. VFR footage plays fine on its own but causes chaos with proxy workflows.
Why it happens. VFR footage has inconsistent timing between frames. When your NLE creates a proxy, it attempts to create a file with a constant frame rate based on the average. This means the proxy duration and timing differ from the original. When you try to attach the proxy, the mismatch prevents linkage.
How to fix it. Transcode the VFR footage to a constant frame rate before creating proxies. Use HandBrake, Shutter Encoder, or Media Encoder to convert the footage. Set a constant frame rate (CFR) that matches your project settings, such as 23.976, 24, 25, or 30 fps. Once you have CFR files, create proxies from those. The proxies will then match perfectly and attach without issue.
Cause 4: Filename and Path Issues
Proxy files need specific naming conventions to auto-link correctly. If you renamed your proxy files or moved them to a different location after creation, the link breaks.
Why it happens. Premiere Pro and other NLEs store metadata that links the original clip to its proxy. If the proxy file is renamed, moved, or deleted, that metadata becomes invalid. The software cannot find the proxy and therefore cannot attach it.
How to fix it. Keep the default naming convention your NLE assigns. Premiere Pro adds a _Proxy suffix to proxy filenames. Do not rename these files manually. If you have already renamed or moved them, use the Attach Proxies dialog to manually point Premiere to the new location of each proxy file.
Cause 5: Codec Incompatibility
Sometimes the codec of your proxy file is not one your NLE fully supports for proxy playback, even though it can play the file as regular media.
Why it happens. Not all codecs work equally well as proxies. Some codecs in some containers may play in the source monitor but fail when attached as proxies because the proxy system requires specific codec support for real-time switching.
How to fix it. Stick to the recommended proxy codecs. ProRes 422 Proxy in a QuickTime container is the safest choice across all NLEs. If you are using an unusual codec or container format, switch to ProRes and try again.
Cause 6: Corrupted Proxy File
The proxy file itself may be corrupted or incomplete. This happens if Media Encoder crashed during creation, if the storage drive ran out of space, or if the file was interrupted during transfer.
Why it happens. Media Encoder does not always verify the integrity of proxy files after creation. A file that is 95 percent complete looks the same as a fully complete one in the file browser, but it will fail to attach.
How to fix it. Check the file size of the proxy against other proxies created from similar-length clips. If one proxy is suspiciously small, it is likely incomplete. Delete it and recreate. Also try playing the proxy file in a standalone media player like VLC. If it does not play cleanly, it is corrupted.
Cause 7: Premiere Pro Bugs and Cache Issues
Sometimes the proxy system itself has a bug or the media cache is corrupted. This is more common after updating Premiere Pro to a new version.
How to fix it. Clear the media cache. Go to Edit > Preferences > Media Cache (Windows) or Premiere Pro > Settings > Media Cache (Mac) and click Delete. Delete all cache files. Restart Premiere and try attaching the proxy again. If that does not work, try creating a new project and importing the clips and proxies into it. This rules out project file corruption.
Quick Troubleshooting Reference
If you want a fast diagnosis, work through these causes in this order. Check audio channels first, since it accounts for the majority of failures. Then check frame rate. Then check for VFR source footage. Then verify the filename has not been changed. Then try clearing the media cache. If none of these work, recreate the proxy from scratch using ProRes 422 Proxy as the codec.
In my experience, this troubleshooting sequence resolves over 95 percent of proxy attachment issues. The remaining cases usually involve some unusual edge case like embedded captions in the source footage or clips that were recorded with non-standard metadata. For those, recreating the proxy from a transcoded version of the original is the nuclear option that almost always works.
Proxy Myths and Misconceptions
There are several persistent myths about proxies that prevent editors from using them. Let me debunk the most common ones.
Myth: Proxies reduce your final export quality. This is completely false. Proxies are only used during editing and preview. When you export, your NLE uses the original full-resolution footage. The proxy files never touch your final output. Your exported video will be identical in quality whether you used proxies during editing or not.
Myth: Proxies are only for slow computers. Even high-end workstations benefit from proxies. If you are editing 8K RAW footage with multiple layers of color correction and effects, proxies will improve your playback even on a top-tier system. Proxies are about workflow efficiency, not just compensating for hardware limitations.
Myth: Proxies are complicated to set up. With the automatic ingest workflow in Premiere Pro and the one-click proxy generation in DaVinci Resolve, setting up proxies takes about 30 seconds. The initial creation takes time depending on your footage length, but the setup itself is simple.
Myth: You have to attach proxies one at a time. You can batch-attach proxies. Select all clips, right-click, choose Attach Proxies, and select the proxy folder. In some cases you may need to attach individually, but batch attachment works for most standard workflows.
Myth: Proxies and original footage can get mixed up. Your NLE keeps track of which file is the proxy and which is the original through metadata. The proxy badge in the Project panel clearly indicates which clips have proxies attached. You can also use the Toggle Proxies button to instantly verify which version is active. A proxy watermark can be added during creation if you want a visible confirmation during editing.
Proxy File Management Best Practices
Good proxy management prevents most of the problems discussed in this article. Here are the practices I follow on every project.
Use consistent naming conventions. Let your NLE handle the naming automatically. Premiere Pro adds a _Proxy suffix, which makes it easy to identify proxy files in your file browser. If you create proxies manually with third-party tools, add a similar suffix like _PRX or _proxy to keep things organized.
Store proxies in a dedicated folder. Keep proxy files separate from original media. I create a folder structure that looks like this: a 01_Footage folder for originals, a 02_Proxies folder for proxy files, and a 03_Projects folder for the project file itself. This makes it easy to archive or delete proxies without affecting your original footage.
Keep proxies on a fast drive. Proxy playback performance depends on drive speed. Store proxies on an internal SSD or a fast Thunderbolt drive. Avoid USB 2.0 drives or network-attached storage for proxies, as the data transfer speed will bottleneck playback.
Document your proxy settings. When you start a project, write down your proxy preset, codec, resolution, and frame rate. If you need to recreate proxies later, you will have the exact settings documented. This is especially helpful when working with a team where multiple editors need consistent proxy settings.
Back up your project file, not your proxies. Proxies can be recreated at any time from the original footage. There is no need to back them up. Focus your backup strategy on the original footage and the project file. If you lose your proxies, regenerate them. It takes time, but it costs nothing in storage.
Relink proxies after moving projects. If you move a project to a different drive or share it with another editor, the proxy links will break. In Premiere Pro, use Proxy > Relink Proxies or the Reconnect Full Resolution Media option to reestablish the links. Keep your folder structure consistent across machines to make relinking painless.
Delete proxies when archiving. Proxies can take up significant storage over time. When you archive a completed project, delete the proxy files to free up space. The originals and project file are all you need to restore the project in the future. You can regenerate proxies whenever you reopen the project.
FAQs
What do proxies do in video editing?
Proxies create low-resolution, lightweight copies of your original footage so your editing software can play back video smoothly during editing. When you export the final video, the software automatically switches back to the full-resolution original files, so your output quality is never affected.
Why does my proxy not work?
The most common reasons proxies fail are audio channel mismatches between the proxy and original file, frame rate differences, variable frame rate source footage, renamed or moved proxy files, and codec incompatibility. Start by checking that your proxy has the same number of audio channels and the same frame rate as the original clip.
How do I attach proxies in Premiere Pro?
Select the clips in the Project panel, right-click, choose Proxy then Attach Proxies, browse to your proxy file, and click OK. The proxy badge will appear next to the clip if attachment succeeds. If nothing happens, check for audio channel or frame rate mismatches between the proxy and the original.
Is it better to edit with proxies on or off?
Edit with proxies on during your creative workflow for smooth playback and fast scrubbing. Toggle proxies off when you want to check fine detail, do precise color grading, or verify effects at full resolution. Always toggle proxies off before exporting your final video to use the original high-resolution footage.
Do proxies affect final export quality?
No, proxies do not affect export quality at all. Proxies are used only for editing and preview playback. When you export, your editing software uses the original full-resolution source files. Your final video quality is identical whether or not you used proxies during editing.
Can I create proxies after I have already started editing?
Yes, you can create proxies at any point in your project. In Premiere Pro, select your clips in the Project panel, right-click, and choose Create Proxies. The proxies will be generated and attached to your existing clips without affecting your edits. In DaVinci Resolve, right-click clips on the Media page and select Generate Proxy Media.
Conclusion
Understanding what are proxies in video editing transforms how you work with high-resolution footage. Proxies are simply lightweight copies of your originals that make editing smooth and responsive. They do not touch your final quality, they do not complicate your workflow once set up, and they work across every major editing application from Premiere Pro to DaVinci Resolve.
When proxies refuse to attach, the cause is almost always a mismatch between the proxy and the original file. Check audio channels first, then frame rate, then variable frame rate footage, then filename integrity. Work through these causes systematically and you will resolve the vast majority of attachment failures without needing to recreate anything.
Start your next project with proxies enabled from the beginning using the automatic ingest workflow. Once you experience the difference in playback smoothness and editing responsiveness, you will never go back to editing full-resolution footage directly. Your workflow will be faster, your computer will run cooler, and your editing experience will be dramatically more enjoyable.