
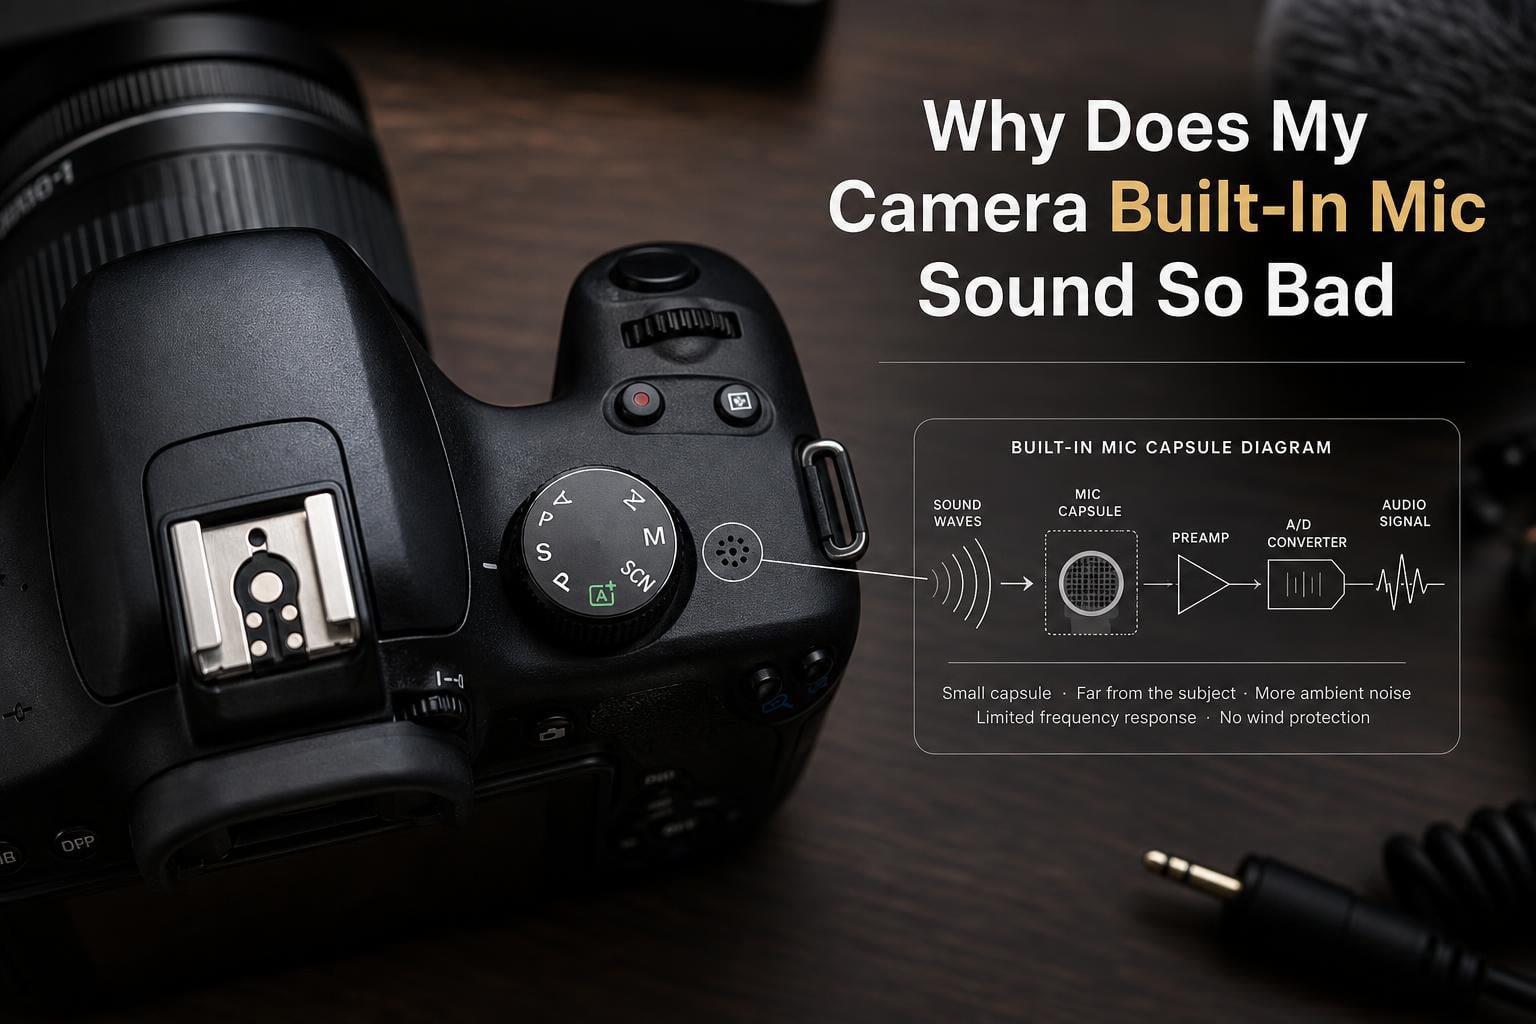
You press record, capture a beautiful shot, then play it back and cringe at the audio. If you are wondering why your camera’s built-in microphone sounds so bad, the short answer is physics. Camera manufacturers pack a tiny condenser capsule, often no larger than 6 to 10 millimeters, into a body designed primarily for imaging. The diaphragm is small, the acoustic chamber around it is nearly nonexistent, and an automatic gain circuit constantly rides the levels to avoid clipping. The result is thin, hissy, compressed audio that makes even a great voice sound distant and muffled.
In this guide, our team breaks down exactly why your camera built-in microphone sounds bad, the most common audio problems we see shooters struggle with, and the quick fixes that can rescue your next recording. Whether you shoot with a DSLR, a mirrorless camera, an action cam, or a smartphone, the principles below apply universally. We have spent years recording interviews, vlogs, and field audio, and the lessons here come from real mistakes, not theory.
Table of Contents
Why Does My Camera’s Built-In Mic Sound So Bad? The Root Causes
A built-in camera microphone sounds bad because it is the product of physical and engineering compromises. Camera bodies prioritize sensors, processors, and lenses, which leaves almost no room or budget for proper audio hardware. Here are the four core reasons your internal microphone struggles.
1. Tiny Diaphragms and Limited Frequency Response
The microphone capsule inside most consumer cameras uses an electret condenser element with a diaphragm measuring roughly 6 to 10 millimeters across. Compare that to a studio condenser, which typically uses a diaphragm of 25 millimeters or more. A smaller diaphragm captures less acoustic energy, especially in the lower frequencies that give a voice warmth and body.
This is why built-in mic quality tends to sound thin and tinny. The frequency response of a typical internal camera mic often rolls off below 100 Hz and above 10 kHz. A dedicated vocal microphone, by contrast, is engineered to reproduce a clean 20 Hz to 20 kHz range. You are simply missing large chunks of the audible spectrum before the signal ever reaches your memory card.
2. Automatic Level Control Compresses Everything
Most cameras ship with Automatic Level Control, or ALC, turned on by default. ALC is a safety circuit that constantly raises the recording level when things get quiet and slams it back down when things get loud. The intention is to prevent clipping, but the side effect is severe compression that makes audio sound unnatural and pumped.
This is one of the biggest reasons your camera audio sounds bad. You hear the background hiss swell up the moment you stop speaking, then duck down again when you resume. It sounds like someone is frantically turning a volume knob up and down during your recording, because that is literally what is happening.
3. No Acoustic Chamber to Shape the Sound
A good microphone is not just a capsule. It is a capsule mounted inside a carefully designed acoustic chamber that helps control resonance, reject off-axis noise, and shape the polar pattern. Inside a camera, the capsule is glued into a tiny port with no meaningful chamber at all. Sound waves bounce off circuit boards, internal ribbing, and the lens mount, creating tiny reflections that smear clarity.
Without that chamber, the built-in microphone cannot develop a true cardioid or directional pickup pattern. It ends up quasi-omnidirectional, grabbing every room echo, keyboard click, and air conditioner rumble within range.
4. Power and Processing Constraints
Camera preamps run on minimal power and share board space with image processors that generate electrical noise. The signal-to-noise ratio on a typical internal camera mic sits around 50 to 55 dB, whereas a decent external microphone and preamp combination can achieve 70 dB or better. That 15 to 20 dB difference is exactly the hiss you hear in quiet moments.
Add in compressed audio formats like low-bitrate AAC, and the processor is discarding even more information before it writes to your card. The camera is doing its best, but the built-in microphone is fighting against size, power, and bitrate limitations all at once.
Common Audio Problems With Built-In Camera Mics
Now that we understand why camera built-in microphones sound bad, let us map the symptoms you hear to their root causes. Forum users on Reddit and photography boards describe the same handful of complaints over and over. Here are the four most common and what is actually happening.
Muffled and Distant Sound
This is the number one complaint, and it comes down to distance and diaphragm size. A built-in camera mic is usually mounted on top of the camera body, which itself sits two to six feet from the person speaking. Sound pressure drops off rapidly with distance, following the inverse square law. At three feet, your voice is already nine times quieter to the capsule than it would be at one foot.
Combine that distance loss with a tiny diaphragm that cannot reproduce low frequencies well, and you get exactly that hollow, telephone-like sound. As one Reddit user wisely put it, a bad mic close to your subject will almost always sound better than a great mic placed far away.
White Noise and Hissing
That constant hiss underneath your audio is the self-noise of the capsule and preamp. Because the diaphragm is small, the camera must crank the gain to detect anything useful. High gain amplifies the electrical noise floor along with your voice, producing the white noise many shooters complain about.
One Reddit user in the Panasonic G7 community reported that every external microphone they tried produced tons of white noise. In most cases, the noise floor was actually coming from the camera preamp, not the microphone itself. The internal preamp is the bottleneck, which is why even a good external mic can still hiss when plugged directly into a camera.
Boomy Proximity Effect
When you stand very close to the camera, your voice can sound unnaturally bass-heavy and boomy. This is called proximity effect, and it is a natural property of directional microphone capsules. The closer the sound source, the more low-frequency boost the capsule produces.
A user on a Nikon forum described this perfectly, noting that the camera mic is directional, and when you stand behind it very close, the proximity effect makes your voice sound boomy. If you have ever noticed your on-camera narration sounding muddy compared to your normal speaking voice, proximity effect is the culprit.
Distortion and Clipping
If your audio sounds harsh and crackly on loud passages, you are hearing clipping. This happens when the input level exceeds what the recording circuit can handle, and the tops of the waveform get sliced off. Built-in mics often have fixed gain or very coarse manual adjustment, which makes it easy to overshoot into distortion.
Ironically, ALC is supposed to prevent this. But when the algorithm reacts too slowly to a sudden loud sound, transient peaks slip through and clip before the gain can duck. You end up with the worst of both worlds, compressed quiet passages and clipped loud ones.
How to Make Your Built-In Camera Mic Sound Better: Quick Fixes
You do not need to buy new gear to hear an immediate improvement. Here are five fixes you can apply before your next recording session, ranked from easiest to highest impact.
Step 1: Disable Automatic Gain Control
This is the single biggest improvement you can make. Dig into your camera menu and look for a setting called Auto Gain Control, AGC, ALC, or Manual Audio Level. Turn it off and switch to manual level control. Set the input level so your loudest speaking volume peaks around minus 12 dB on the meter.
You will immediately notice that the background hiss no longer pumps up between sentences. The audio will sound more natural, more consistent, and far less distracting.
Step 2: Get the Camera Closer to Your Subject
Because of the inverse square law, halving the distance between the speaker and the microphone roughly quadruples the signal. Move the camera from six feet away to three feet away, and your voice will jump dramatically in clarity and presence while the background noise stays the same.
If you cannot move the camera closer for framing reasons, reframe your shot or use a longer lens and step the camera forward. The closer the mic, the better the ratio of voice to room noise.
Step 3: Reduce Background Noise and Room Reflections
Hard walls, bare floors, and glass windows reflect sound back into the omnidirectional capsule, creating that hollow, echoey quality. Soft furnishings absorb those reflections. Record in a room with carpet, curtains, upholstered furniture, or a closet full of clothes if you need a quick vocal booth.
Turn off fans, air conditioners, refrigerators, and computers with loud cooling fans during takes. That low rumble is far more audible on a cheap capsule than your ears suggest, because the camera cannot filter it out the way your brain does.
Step 4: Check Sample Rate and Bit Depth
Many cameras default to 48 kHz at 16-bit AAC. If your camera offers higher quality audio recording, enable it. Some cameras let you record uncompressed linear PCM at 24-bit depth, which captures more dynamic range and gives you far more headroom in post production.
One forum user solved persistent audio issues simply by verifying their sample rate and bit depth settings. If your camera records 48 kHz, make sure any external recorders or editing software match that rate to avoid sync drift and artifacts.
Step 5: Switch From Stereo to Mono When Appropriate
Several Reddit users reported fixing crackling and noise issues by disabling stereo recording in camera settings and switching to mono. Stereo built-in mics split a tiny signal across two channels, which can double the noise without improving clarity. If you are recording a single voice, mono is often cleaner and avoids phase cancellation between the two capsules.
Try recording the same passage in both modes and compare. You may find that mono gives you a fuller, cleaner vocal track.
When to Switch to an External Microphones?
The quick fixes above will squeeze the best possible sound out of your built-in microphone. But eventually, the physical limitations of the capsule will cap your quality. When you are ready to upgrade, here is how the main types of external microphones compare for camera use.
Shotgun Microphones
A shotgun mic mounts on your camera hot shoe and uses a hypercardioid or lobar pickup pattern to reject sound from the sides and rear. This makes it ideal for run-and-gun shooting, documentary work, and any situation where you cannot place a mic close to the subject. The directional pattern helps isolate your subject from background noise even at a distance.
Shotgun mics use larger diaphragms than built-in capsules, typically half-inch or larger, which gives them better low-frequency response and lower self-noise. Look for a frequency response that extends down to 40 or 50 Hz for a fuller vocal tone.
Lavalier Microphones
A lavalier mic, or lapel mic, clips directly onto your subject a few inches below their mouth. This eliminates the distance problem entirely, since the capsule is always within six to eight inches of the voice. Lavaliers are the standard for interviews, presentations, and any seated or stationary subject.
Because the mic is so close, you can run low gain and still capture a strong, clean signal. The trade-off is that a lavalier picks up clothing rustle and cannot capture room ambience, so it is not ideal for environmental or documentary audio.
External Audio Recorders
Sometimes the best approach is to bypass the camera preamp entirely. An external audio recorder, such as a portable field recorder, captures audio through its own higher-quality preamps and writes to its own memory card. You then sync the audio to video in post production using a clapper or waveform matching.
This is the approach used on most professional productions. It solves the noise floor problem because the signal never passes through the camera circuitry at all. The trade-off is the extra step of syncing audio in editing.
Built-In vs External Mic: A Quick Comparison
A typical built-in camera mic offers a frequency response of roughly 100 Hz to 10 kHz, a signal-to-noise ratio around 50 dB, and an omnidirectional pattern. A mid-range external shotgun mic extends that response to 50 Hz to 20 kHz, raises the signal-to-noise ratio to 75 dB or better, and provides a true supercardioid pattern that rejects off-axis noise.
The difference is not subtle. Once you record the same source through both, you will hear the gap immediately. That said, placement still matters. A well-placed built-in mic will outperform a poorly placed external mic every time.
Post-Processing: Rescuing Bad Audio After Recording
If you already recorded with a built-in mic and the audio is less than ideal, you can still clean it up. Free software like Audacity and the free version of DaVinci Resolve include powerful tools for noise reduction, equalization, and compression.
Start with noise reduction. Capture a few seconds of pure room tone, the background hiss with no voice, and use it as a noise profile. Apply gentle noise reduction, no more than 12 to 15 dB of reduction, to avoid that watery, artifact-heavy sound that comes from over-processing.
Next, apply a high-pass filter at around 80 to 100 Hz to remove low-frequency rumble from traffic, air conditioning, and handling noise. Follow with a gentle boost around 2 to 4 kHz to restore presence and intelligibility to the vocal.
Finally, apply light compression, a ratio around 2:1 to 3:1, to even out volume differences. A limiter at minus 3 dB catches any peaks that slip through. These steps will not turn a built-in mic into a studio condenser, but they can take marginal audio from unlistenable to acceptable.
FAQs
How to make built-in microphone sound better?
To make a built-in microphone sound better, disable automatic gain control, move closer to the mic, reduce background noise, enable higher quality audio settings, and switch to mono for single-voice recording. Post-processing with noise reduction and EQ can further improve results.
Why does my mic audio sound so bad?
Mic audio sounds bad because of small diaphragm capsules, limited frequency response, automatic gain control compression, low signal-to-noise ratio from cheap preamps, and excessive distance between the speaker and the microphone.
How to make a webcam mic sound better?
To improve a webcam microphone, position the camera within two feet of your mouth, mute notifications and fans, enable noise suppression in your operating system or conferencing app, and add soft furnishings to reduce room echo. An external USB microphone will always outperform a webcam capsule.
What is the 3 to 1 rule in micing?
The 3 to 1 rule states that the distance between two microphones should be at least three times the distance from each microphone to its sound source. This prevents phase cancellation and comb filtering when using multiple microphones on the same source.
Should I disable automatic gain control on my camera?
Yes, in most cases you should disable automatic gain control. AGC causes background noise to pump up during quiet passages and can introduce unnatural volume swings. Use manual audio levels instead, peaking around minus 12 dB.
Conclusion: Your Camera Mic Is Not Hopeless
If you came here asking why your camera’s built-in microphone sounds so bad, the answer comes down to tiny capsules, automatic gain control, no acoustic chamber, and weak preamps. These are physical constraints that no menu tweak can fully overcome. But as we have shown, you can dramatically improve your built-in microphone quality by disabling AGC, getting closer, controlling your room, and choosing the right recording settings.
When those fixes hit their ceiling, an external microphone, whether a shotgun, lavalier, or field recorder, is the next step. Your viewers will forgive imperfect video. They will not forgive bad audio. Treat sound as half your production, and your content will immediately feel more professional.
Start with the free fixes today. Disable that automatic gain control, move the camera three feet closer, and record a test clip. The difference will be obvious within minutes.