
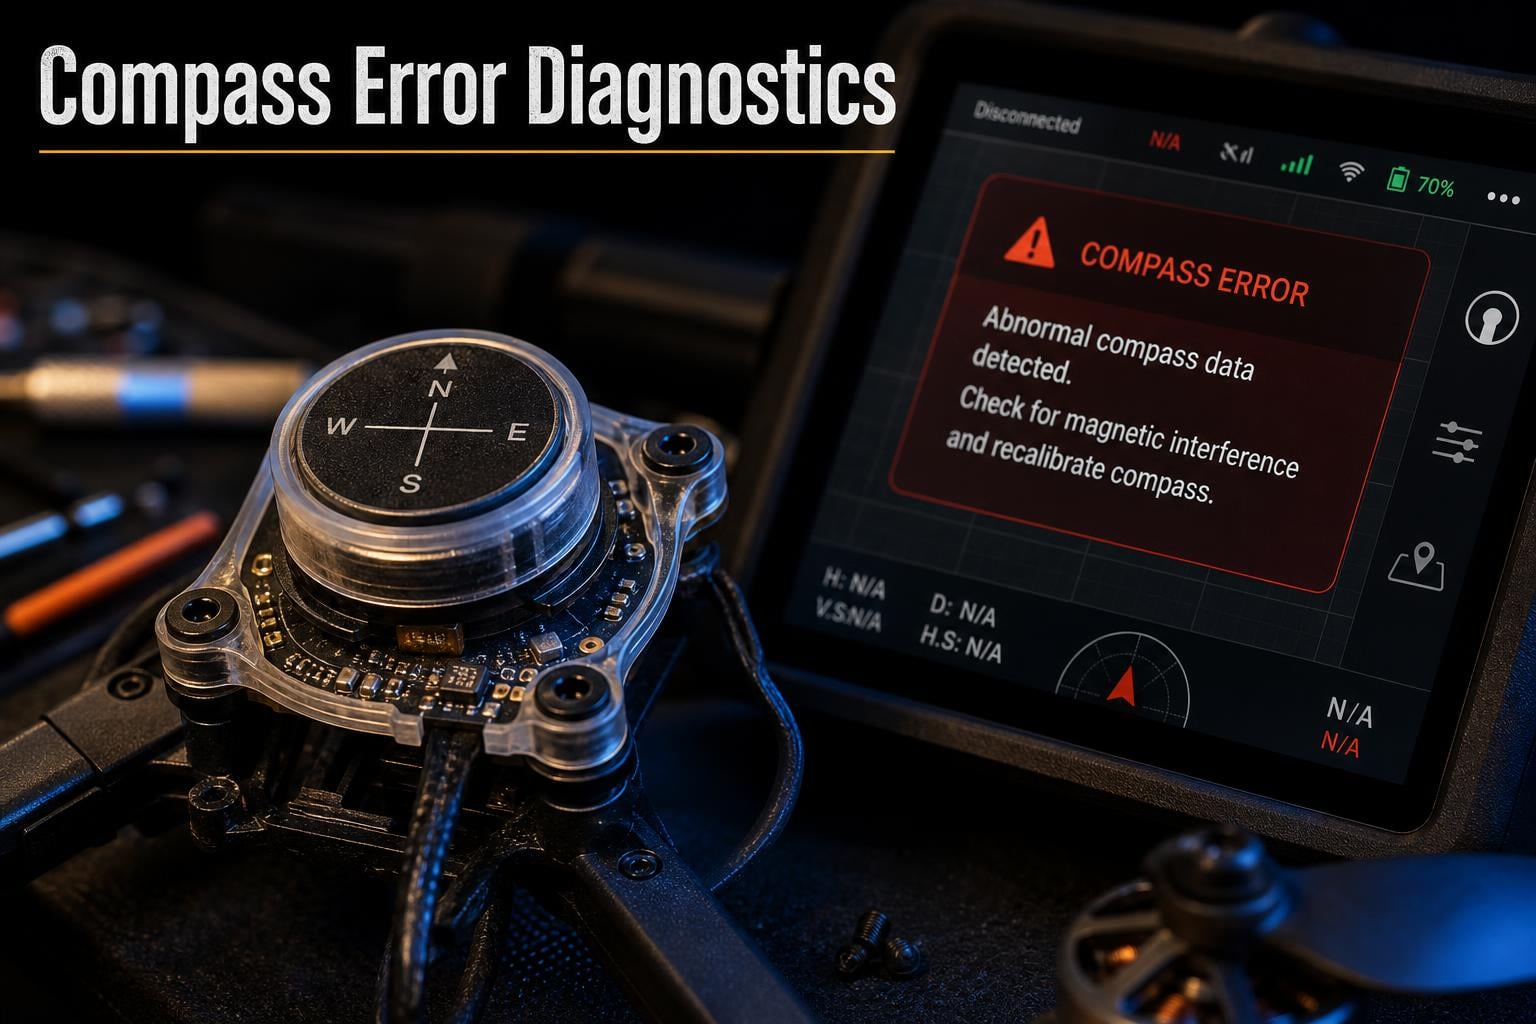
You are standing in an open field, conditions are perfect, and your drone is powered up and ready to fly. You open your controller app, and there it is staring back at you: “Compass Error. Please calibrate compass.” Or worse, you are already 200 feet in the air when the warning flashes and your drone starts drifting in a direction you never commanded.
If you are wondering why your drone says compass error and how to fix it, you are far from alone. Compass errors are one of the most common issues drone pilots face, from first-time DJI Mini owners to seasoned professionals flying Matrice 350 rigs. The good news is that 90 percent of the time, the fix is simple and takes under two minutes.
The bad news? Ignoring a compass error or misdiagnosing it can lead to flyaways, crashes, and total aircraft loss. I have spent years troubleshooting drone compass issues across dozens of models, and I can tell you that understanding the root cause is just as important as knowing the fix. Many guides tell you to “just calibrate” and send you on your way, but that advice fails when the real problem is underground rebar, a failing sensor, or a software glitch.
In this guide, we will walk through exactly what a compass error means, how it differs from a compass interference warning, and a step-by-step calibration process you can follow right now. We will also cover advanced troubleshooting like degaussing, firmware resets, flight log analysis, and what to do when your compass fails mid-flight. By the end, you will have a complete toolkit for diagnosing and resolving any compass issue your drone throws at you.
Table of Contents
Quick Answer: Why Does My Drone Say Compass Error?
Your drone says compass error because its magnetometer sensor is detecting magnetic interference or has become miscalibrated, preventing the flight controller from determining accurate heading. To fix it, move away from metal structures, reinforced concrete, and electronics, then perform a compass calibration through your DJI Fly or DJI Pilot 2 app by rotating the drone horizontally and vertically as prompted. If calibration fails repeatedly, you may have a hardware issue requiring professional repair.
What Is a Drone Compass Error?
A compass error is a warning triggered by your drone’s flight controller when the magnetometer sensor cannot reliably determine which direction the aircraft is facing. The magnetometer is a three-axis sensor that measures Earth’s magnetic field and translates those measurements into heading data the drone uses for navigation, GPS positioning, and the Return to Home function.
Think of the magnetometer as your drone’s internal compass. Just like a handheld compass needle points north, the magnetometer detects the magnetic field lines around it and sends heading data to the flight controller. When this data is accurate, your drone holds its position, flies straight, and returns home safely. When the data is corrupted or unreliable, the flight controller throws a compass error to warn you before something goes wrong.
This is different from GPS. GPS tells your drone where it is on the map. The compass tells it which way it is pointing. Both systems work together for stable, autonomous flight. If either one fails, the drone can drift, fly in circles, or refuse to respond to stick inputs correctly.
Every modern drone, from the DJI Mini 2 SE to the Mavic 3 Pro to enterprise platforms like the Matrice 350, relies on a magnetometer. The sensor is typically built into the drone’s body or connected via a ribbon cable to the nose module. Understanding where this sensor lives helps you diagnose whether your compass error is environmental or physical.
The warning itself can appear in several forms depending on your drone model and app. DJI Fly might show “Compass Error, Calibrate Compass.” DJI GO 4 might display “Compass Error, P Mode Unavailable.” Some drones show a yellow or red status bar with a compass icon. Regardless of the exact wording, the underlying issue is the same: the flight controller does not trust the heading data it is receiving.
Compass Error vs Compass Interference: What Is the Difference?
This is one of the most confusing aspects of compass warnings, and nearly every guide glosses over it. Let me clear it up because the distinction determines which fix path you should follow.
Compass Error means the magnetometer is producing readings that the flight controller cannot use. This could be due to calibration being lost, a sensor that was physically damaged, or interference so severe that the compass data is completely unreliable. With a compass error, the drone typically refuses to take off or enters ATTI mode as a safety measure.
Compass Interference means the magnetometer is detecting elevated magnetic noise in the area but can still function. The drone flies, but heading accuracy is reduced. You might see the interference warning appear and disappear as you move around an area with scattered metal objects.
Here is a quick comparison to help you identify which warning you are dealing with:
- Compass Error: Drone refuses to enter GPS mode or take off. Warning persists after moving locations. Indicates calibration loss or hardware failure. Fix requires recalibration or repair.
- Compass Interference: Drone can still fly but with degraded heading accuracy. Warning may clear when you move to a different spot. Indicates nearby magnetic noise. Fix is to relocate away from interference sources.
- Calibration Required: A prompt asking you to calibrate, not necessarily an error. Often appears after traveling more than 300 miles from your last calibration location. Fix is a standard calibration.
- Compass Disconnected: The sensor is not communicating with the flight controller at all. Usually indicates a hardware failure or disconnected ribbon cable. Requires physical repair.
Many pilots confuse these messages and attempt to calibrate when the real issue is interference, or they try to fly through interference warnings when they actually have a calibration error. Knowing the difference saves you time and prevents dangerous flights.
What Causes Drone Compass Errors?
Compass errors stem from three main categories: environmental interference, software or calibration issues, and hardware failure. Understanding all three helps you diagnose problems quickly and avoid wasted effort on fixes that will not work.
Environmental Interference Sources
The most common cause of compass errors is electromagnetic interference, or EMI. Your drone’s magnetometer is extremely sensitive to magnetic fields, and anything metallic or electronic near the sensor can throw off its readings. Here are the top interference sources ranked by how frequently they cause problems:
- Reinforced concrete and rebar: This is the number one hidden culprit. The steel rebar inside concrete floors, parking structures, bridges, and building foundations creates a massive magnetic field distortion. You might be standing in what looks like an open area, but if there is reinforced concrete beneath your feet, the compass will detect it. Many pilots report compass errors that only appear at specific spots in a field or park, and underground concrete structures are usually the explanation.
- High-voltage power lines: The electromagnetic field around power lines extends well beyond the visible wires. Flying near them, or even launching near a power line corridor, can trigger compass errors mid-flight.
- Cars and metal vehicles: Launching from the roof of your car or even standing next to your vehicle while calibrating can introduce interference. Keep at least 10 feet away from any vehicle.
- Metal structures: Shipping containers, metal fences, steel-framed buildings, and bridges all distort the local magnetic field.
- Smartphones and smartwatches: Your phone, tablet, and smartwatch all contain magnets. If your phone is mounted very close to the drone’s compass sensor during calibration or takeoff, it can interfere. Keep electronics at least 12 inches from the drone body.
- Wi-Fi routers and electronics: Home routers, Bluetooth devices, and nearby electronics emit electromagnetic noise that can affect compass readings during indoor calibration attempts.
- Speaker magnets: Bluetooth speakers, car audio speakers, and even magnetically attached accessories contain strong permanent magnets that will wreck compass readings if placed near the drone.
- Magnetite and geological formations: Certain rocks and soil types contain magnetite, a naturally magnetic mineral. If you are flying in an area with significant magnetite deposits underground, compass errors can appear even in the middle of nowhere.
- ND filters and accessories: Some magnetic neutral density filters or magnetic lens attachments can interfere with the compass if they sit too close to the sensor module.
A Reddit user shared a perfect example: they kept getting compass errors at a specific spot in their local park. After troubleshooting for days, they moved just 30 feet away from their original launch point and the error vanished completely. The cause was an underground utility vault with steel reinforcement buried beneath the grass.
Software and Calibration Issues
Sometimes the compass hardware is fine, but the calibration data stored in the flight controller is corrupted or outdated. This can happen after firmware updates, after traveling to a significantly different geographic location, or after the drone experiences a sudden magnetic shock like being placed near a strong magnet.
Magnetic declination, the difference between true north and magnetic north, varies by location. When you travel more than a few hundred miles from your last calibration point, the stored declination data no longer matches your current location. This is why DJI recommends recalibrating when traveling to a new area.
Firmware updates can also temporarily affect compass readings. Some DJI firmware versions, including updates in the v01.00.0600 and v01.00.1600 ranges, have introduced compass sensitivity changes that caused errors on drones that previously flew without issue. A firmware refresh or, in some cases, a firmware rollback can resolve these software-triggered errors.
Hardware Failure
When neither environmental relocation nor recalibration fixes the error, hardware failure becomes the likely culprit. The compass module itself can fail due to moisture damage, physical impact from crashes, or electronic component degradation over time. The ribbon cable that connects the compass module to the main board can also become damaged, especially on drones that have been opened for repairs or have experienced hard landings.
We cover hardware failure diagnosis in detail in a later section, but the key sign is this: if compass calibration fails instantly or repeatedly fails at the same step regardless of location, the hardware is likely compromised.
The Toilet Bowl Effect: Why This Warning Matters
If there is one reason to never ignore a compass error, it is the toilet bowl effect. This is the scenario every drone pilot fears, and it is a direct consequence of flying with a compromised compass.
The toilet bowl effect, sometimes called TBE, occurs when the drone’s GPS and compass data conflict. The GPS tells the drone it is in one position. The compass tells it that it is facing a different direction. The flight controller tries to correct based on both inputs, and the result is the drone flying in increasingly tight circles, spiraling inward like water draining from a bowl.
Once the toilet bowl effect starts, it is extremely difficult to recover from. The drone’s automated systems fight each other, and manual inputs often make the spiral worse. In severe cases, the drone accelerates into the spiral until it crashes or flies away entirely. Flyaway incidents associated with compass errors almost always involve some form of the toilet bowl effect.
Warning: If your drone begins circling or drifting in an uncommanded circular pattern, immediately switch to ATTI mode if your drone supports it, or Sport mode as a fallback. Reduce throttle gradually and guide the drone toward a clear landing zone. Do not rely on Return to Home, as RTH uses compass data and may send the drone in the wrong direction.
The toilet bowl effect is preventable. It only happens when a pilot ignores a compass error or interference warning and takes off anyway. If you see a compass warning before takeoff, clear it before flying. If a warning appears mid-flight, land as soon as conditions allow. No shot is worth risking your aircraft.
How to Fix Drone Compass Error: 7-Step Calibration Guide
This is the core fix for most compass errors. Follow these seven steps in order, and the vast majority of compass issues will be resolved. I have used this exact process across DJI Mini, Air, Mavic, and Matrice drones with consistent success.
Step 1: Power Down and Relocate
If you are currently seeing a compass error, power off the drone and controller. Pick up the drone and walk at least 30 to 50 feet from your current position. If you are near any vehicles, metal structures, reinforced concrete, or buildings, move to the most open area you can find. Grass, dirt, and sand are ideal launch surfaces because they are unlikely to contain hidden metal.
Step 2: Remove Metal Objects From Your Person
Take your phone out of your pocket, remove your smartwatch, and set down any keys, belts with metal buckles, or magnetic accessories. These items are close to the drone during calibration and can corrupt the calibration data. Place your phone on the ground at least 12 inches from where you will be standing during calibration.
Step 3: Power On and Check Sensor Status
Power on your drone and controller, and open your flying app (DJI Fly, DJI Pilot 2, or DJI GO 4). Navigate to the aircraft status or sensor health menu. Look at the compass status indicator. If it shows “Normal” without any warnings, you may have already resolved the issue by relocating. If it still shows an error or prompts calibration, proceed to the next step.
Step 4: Start the Compass Calibration Process
In DJI Fly, go to Settings (the three dots or gear icon), select “Sensors,” then tap “Compass Calibration.” In DJI Pilot 2, navigate to “Flight Control,” then “Sensors,” then “Calibrate Compass.” In DJI GO 4, go to “Main Controller Settings,” then “Advanced Settings,” then “Compass Calibration.” The app will prompt you to begin the calibration dance.
Step 5: Horizontal Rotation
Hold the drone level at arm’s length in front of you. The app will show an animation or instruction to rotate horizontally. Turn your body slowly and smoothly in a full 360-degree circle while keeping the drone level. The LED on the drone will typically flash green or the app will show a progress indicator. Do not rush this step. A slow, steady rotation takes about 15 to 20 seconds.
Step 6: Vertical Rotation
After the horizontal rotation completes, the app will prompt you to rotate the drone vertically. Turn the drone so the camera points straight up at the sky, with the bottom of the drone facing you. Rotate the drone in a full 360-degree circle around its vertical axis, keeping the nose pointing upward. Again, move slowly and steadily. The app will confirm when calibration succeeds.
Step 7: Verify and Test
Once calibration completes, return to the sensor health menu and confirm the compass status shows “Normal.” Check that the heading indicator on your map view is pointing in the correct direction relative to where the drone’s nose is actually facing. If everything looks correct, you are clear to fly. If the compass error persists, repeat the full process one more time in a different location. If it still fails after two attempts, move on to the advanced troubleshooting section.
The Golden Rule of Field Calibration: Only calibrate in the location where you intend to fly. Do not calibrate at home and then drive to your flying site. The calibration data is location-specific, and magnetic conditions vary significantly between locations. Calibrating at your flying site ensures the stored data matches the local magnetic environment.
One important note from experienced pilots on Mavic Pilots and Reddit: you do not need to calibrate before every single flight. Once calibrated successfully at a location, the compass data remains valid until you travel to a significantly different location or encounter a strong magnetic disturbance. Calibrating unnecessarily can actually introduce errors if done in a marginal environment.
Calibrating in DJI Fly vs DJI Pilot 2 vs DJI GO 4
The calibration process is similar across DJI apps, but the menu paths and features differ. Here is a breakdown of how to calibrate in each app.
DJI Fly App (Mini Series, Air Series, Neo)
The DJI Fly app is used with consumer drones like the DJI Mini 5 Pro, Air 3S, Mini 2 SE, and DJI Neo. To calibrate the compass:
- Open DJI Fly and connect to your drone
- Tap the three dots (Settings) in the top right corner
- Select “Sensors” from the menu
- Tap “Compass Calibration”
- Follow the on-screen prompts for horizontal and vertical rotation
- Wait for the “Calibration Successful” message
The DJI Fly app shows a clear animation demonstrating the rotation positions. If calibration fails, the app will display a specific error message. Common issues include “Calibration Failed, Please Retry” and “Magnetic Interference Detected, Move to Another Location.”
DJI Pilot 2 App (Mavic 3 Enterprise, Matrice Series)
The DJI Pilot 2 app is designed for enterprise and professional drones like the Mavic 3 Enterprise and Matrice 350. The interface is more complex but offers additional sensor diagnostics:
- Open DJI Pilot 2 and connect to your aircraft
- Tap the aircraft icon or go to “Flight Control” settings
- Select “Sensors”
- Choose “Calibrate Compass”
- Follow the rotation prompts as guided by the app
- Review the detailed sensor health data after calibration
DJI Pilot 2 provides more granular sensor health information than DJI Fly. After calibration, you can view compass modulus values and interference levels numerically. This is useful for professional operators who need to document sensor health for compliance purposes.
Some Pilot 2 users have reported calibration getting stuck at 99 percent. This usually indicates residual magnetic interference that is just barely above the acceptance threshold. Moving even a few feet can resolve it.
DJI GO 4 App (Older Mavic, Phantom, Inspire Models)
For older drones like the Mavic 2 Pro, Phantom 4 series, and Inspire 2, the DJI GO 4 app handles calibration:
- Open DJI GO 4 and connect to your drone
- Go to “Main Controller Settings” (the drone icon)
- Select “Advanced Settings”
- Tap “Compass Calibration”
- Follow the on-screen rotation prompts
- Confirm the LED indicator turns solid green
The DJI GO 4 app relies more heavily on LED indicators for calibration feedback. The rear LED on the drone will flash specific colors to indicate calibration progress: yellow for horizontal rotation, green for vertical rotation, and solid green for success.
If you are switching between apps because you own multiple drones, note that the calibration process is the same even though the menu paths differ. The rotation dance is identical across all apps and all DJI drone models.
IMU vs Compass Calibration: Which Do You Need?
One of the most common sources of confusion for drone pilots is the difference between IMU calibration and compass calibration. They are separate processes that address different sensors, and doing the wrong one will not fix your problem.
The IMU, or Inertial Measurement Unit, is a suite of sensors that includes the accelerometer and gyroscope. These sensors measure the drone’s tilt, rotation, and acceleration. The compass is a separate sensor that measures magnetic heading. Both feed data to the flight controller, but they serve different purposes.
Here is how to tell which calibration you need:
- You need compass calibration if: The drone’s heading does not match its actual orientation, the map shows the drone pointing the wrong way, you get a compass error or calibration required message, or you have traveled to a new geographic area.
- You need IMU calibration if: The drone tilts or drifts when hovering in calm conditions, the horizon in your camera feed is tilted, you get an IMU error or warning, or the drone has been stored for a long period or experienced a crash.
- You need both if: The drone has been through a firmware update that reset sensor data, or after a significant impact or crash that may have affected both sensor systems.
The IMU calibration is done with the drone sitting flat on a level surface, not while holding it. The app guides you through placing the drone in six different orientations (flat, on each side, and inverted). It takes about five minutes and should be done indoors away from vibration and wind.
Compass calibration involves the rotation dance described earlier. It should be done outdoors in an open area free of magnetic interference. Attempting compass calibration indoors almost always fails due to building materials and electronics.
If you are unsure which sensor is causing your issue, start with a compass calibration since it is faster and more commonly needed. If symptoms persist after compass calibration, proceed to IMU calibration.
When Calibration Fails: Advanced Troubleshooting
Sometimes a standard calibration does not resolve the compass error. Calibration might fail repeatedly, get stuck at a certain percentage, or succeed temporarily before the error returns on the next flight. When standard fixes fail, these advanced techniques can help.
The Degaussing Technique
Degaussing is the process of removing a permanent magnetic charge from the compass sensor. Over time, or after exposure to a strong magnet, the magnetometer itself can become magnetized. When this happens, its readings are permanently skewed, and no amount of recalibration will fix it.
A handheld degausser, also known as a demagnetizer, can clear this residual magnetism. The technique involves powering off the drone, passing the degausser in slow circular motions around the compass module area (typically the nose or belly of the drone), and then powering the drone back on to recalibrate.
This is an advanced technique that carries some risk. A degausser generates a strong magnetic field, and improper use can damage other electronics in the drone. If you attempt this, use a low-power handheld degausser designed for small electronics, keep it moving continuously, and never hold it stationary over any component. Many professional repair shops use degaussing as a standard step in compass diagnostics.
Some pilots report success using a simple bulk tape eraser or a CRT monitor degaussing coil as an alternative to purpose-built degaussers. The principle is the same: expose the sensor to a decaying alternating magnetic field to neutralize any residual magnetism.
Firmware Refresh and Rollback
Software bugs in firmware can cause persistent compass errors. If your compass started acting up immediately after a firmware update, the firmware itself may be the problem. Two approaches can help:
Firmware refresh: Use DJI Assistant 2 on a computer to reinstall the current firmware. This overwrites any corrupted files and can clear software-related sensor issues. Connect your drone to the computer via USB, open DJI Assistant 2, select your drone model, and choose “Firmware Refresh” or “Reinstall Firmware.”
Firmware rollback: If the current firmware version is causing compass issues, rolling back to a previous stable version can resolve it. DJI Assistant 2 sometimes offers older firmware versions for download. Select the version you want to install and follow the prompts. Note that rollback is not always available for the newest drone models.
After any firmware change, perform a fresh compass calibration and an IMU calibration to ensure all sensor baselines match the new firmware.
Hard Reset
A hard reset restores the drone’s controller settings to factory defaults, which can clear corrupted calibration data. To perform a hard reset:
- Power on the drone and controller
- Open your flying app and navigate to controller settings
- Look for “Restore Factory Settings” or “Reset All Settings”
- Confirm the reset and wait for the drone to restart
- Perform a full compass and IMU calibration before flying
Note that a hard reset clears all saved settings, including RTH altitude, stick sensitivity, and obstacle avoidance preferences. You will need to reconfigure these after the reset. A hard reset does not affect firmware version, so you do not need to reinstall firmware afterward.
Calibration Stuck at 99 Percent
This is a specific frustration reported by many pilots, especially on DJI Pilot 2. Calibration progresses normally but freezes at 99 percent and never completes. The cause is usually residual magnetic interference that is just above the acceptance threshold. The app is detecting interference but cannot confirm calibration success.
To resolve this, pick up the drone and walk 50 to 100 feet in any direction. Hold the drone away from your body and away from any electronics. Restart the calibration process. The new location should have different magnetic characteristics that allow calibration to complete.
If the calibration still sticks at 99 percent after multiple attempts in different locations, the compass module itself may be degraded. This is a sign of early hardware failure, and professional diagnosis is recommended.
ATTI Mode: Your Safety Net When Compass Fails Mid-Flight
If your compass fails while you are flying, your drone may automatically switch to ATTI (Attitude) mode. Understanding ATTI mode and knowing how to handle it can save your aircraft.
In normal GPS mode, the drone uses GPS and compass data to hold its position automatically. It fights wind drift and stays where you put it. In ATTI mode, the drone maintains altitude using its barometer and IMU, but it no longer holds horizontal position. The drone will drift with the wind, and you must manually keep it in place with stick inputs.
ATTI mode activates automatically when GPS or compass data becomes unreliable. Some drones, like the Mavic 3 series and Phantom 4 series, also allow you to manually switch to ATTI mode through the app settings or by toggling a switch on the controller.
If your drone enters ATTI mode mid-flight due to a compass error, follow these steps:
- Stay calm and keep your eyes on the drone. Do not rely solely on the screen view.
- Reduce altitude gradually to get below any wind currents that could push the drone away.
- Fly the drone manually back toward your launch point using visual orientation.
- Compensate for wind by applying gentle corrective stick inputs. The drone will drift, so you need to constantly adjust.
- Land in a clear, open area as soon as possible. Do not attempt to continue your planned flight.
- Do not use Return to Home. RTH depends on compass data and may fly the drone in an incorrect direction.
Experienced pilots on the AirData forum recommend practicing ATTI mode flying in calm conditions before you ever need it in an emergency. If your drone supports manual ATTI switching, try it in a large open area on a calm day. The skill of flying without GPS position hold is one of the most valuable safety skills a drone pilot can develop.
Some consumer drones, like the DJI Mini series, do not offer a user-selectable ATTI mode. These drones rely entirely on automatic fallback. If you fly a Mini series drone, your best strategy is to maintain a clear line of sight and keep the drone close enough to fly back manually if GPS or compass fails.
Reading Flight Logs for Compass Diagnostics
For pilots who want to go beyond basic troubleshooting, flight logs offer a powerful diagnostic tool. Your drone records detailed sensor data on every flight, including magnetometer readings, GPS coordinates, IMU data, and error timestamps. Analyzing this data can reveal whether your compass issue is environmental or hardware-related.
The easiest way to access flight logs is through AirData, a popular flight log analysis platform. Sync your DJI flight logs to AirData, then look at the compass sensor data for the affected flight. The magnetometer reading should show three values, one for each axis, that change smoothly as the drone moves.
Flatlining is the key indicator of hardware failure. If the magnetometer values are completely static, showing the same numbers regardless of the drone’s orientation or movement, the compass module is dead or disconnected. No amount of calibration will fix this. The sensor needs to be replaced.
Spike patterns indicate interference. If you see sudden jumps in magnetometer values at specific timestamps, look at the GPS coordinates for those moments. You may find that the spikes correspond to flying near power lines, metal structures, or other interference sources. This confirms an environmental issue rather than a hardware problem.
Consistently elevated readings suggest the compass was calibrated in a contaminated environment. The baseline values are too high because interference was present during calibration. Recalibrating in a clean, open location will bring the baseline readings back to normal levels.
To access raw flight logs directly, connect your drone to a computer with DJI Assistant 2 and export the log files. These files contain comma-separated sensor data that can be opened in spreadsheet software for detailed analysis. AirData provides a more user-friendly interface with visual graphs and automated anomaly detection.
Hardware Failure: When DIY Is Not Enough
If you have tried calibration, degaussing, firmware refresh, and relocation, and the compass error persists, you are likely dealing with hardware failure. Here is how to identify a broken compass module and what to do about it.
Symptoms of a Broken Compass Module
- Calibration fails instantly, before you even begin the rotation process
- Compass status shows “Disconnected” or “No Signal” in the sensor health menu
- Flight logs show flatlined magnetometer values across all flights
- Compass error appeared immediately after a crash or hard landing
- Error persists regardless of location, weather, or conditions
- The compass values change randomly even when the drone is stationary
The Ribbon Cable Issue
On many DJI drones, the compass module connects to the main board via a thin ribbon cable. This cable runs through the drone’s arm or body and can be damaged by impacts, repeated folding (on foldable drones), or moisture ingress. A damaged ribbon cable causes intermittent or complete compass failure.
Second-hand drone buyers frequently encounter this issue. A previous owner may have opened the drone for repair or modification and damaged the ribbon cable during reassembly. Users on Reddit report replacing ribbon cables on Mavic Pro and Mini 2 SE models only to find the compass still does not work because the replacement cable was also faulty or improperly seated.
When to Seek Professional Repair
If you have confirmed hardware failure, DIY replacement is possible but not recommended unless you have experience with microelectronics repair. The compass module is small, the ribbon cable connector is fragile, and improper reassembly can cause further damage.
Professional drone repair services can diagnose the exact failure point and replace the compass module with OEM parts. The typical repair process includes a full sensor diagnostic, compass module replacement, ribbon cable inspection, and a professional recalibration using specialized equipment.
Attempting to fly with a known hardware compass failure is extremely dangerous. The drone may appear to function normally for a short time, but the unreliable heading data can cause sudden flyaways or crashes without warning. If your compass module is confirmed broken, ground the drone until it is repaired.
Prevention: Pre-Flight Compass Health Checklist
The best compass fix is preventing the error in the first place. A simple pre-flight routine catches compass issues before they become dangerous. Here is a checklist I run before every flying session.
Before Leaving Home
- Check for any pending firmware updates in DJI Fly or DJI Assistant 2
- Review your last flight logs in AirData for any compass anomalies
- Confirm your drone was stored away from strong magnets and electronics
- Pack a non-metallic launch pad or mat to use at your flying site
At the Flying Site
- Choose a launch surface that is grass, dirt, sand, or wood. Avoid concrete, asphalt, and metal surfaces.
- Check your surroundings for overhead power lines, metal buildings, and vehicles. Move at least 50 feet from any large metal structure.
- Power on the drone and check the sensor health menu before takeoff. Confirm compass status shows “Normal.”
- Verify the heading indicator on the map matches the drone’s actual orientation. Rotate the drone by hand 90 degrees and confirm the heading changes correctly.
- Check that GPS has acquired enough satellites for a stable lock before takeoff.
- Confirm the Home Point has been recorded accurately before taking off.
Calibration Frequency Guidelines
One of the most frequently asked questions is how often you should calibrate your compass. The answer depends on your flying habits:
- After traveling more than 300 miles from your last calibration location. Magnetic declination changes with latitude and longitude, and long-distance travel invalidates stored calibration data.
- After a firmware update. Updates can reset sensor baselines, so a fresh calibration ensures everything is synchronized.
- After a crash or hard landing. Physical impact can shift or damage the compass module, requiring recalibration.
- If the app prompts you to calibrate. Trust the app’s recommendation. If it says calibration is needed, do it.
- Every 3 to 6 months if you fly regularly at the same locations and have had no issues. This is a preventive measure, not a strict requirement.
You do not need to calibrate before every flight. Reddit consensus across r/drones and r/dji strongly agrees that unnecessary calibration can actually introduce errors if done in marginal environments. The key is establishing a valid home point and verifying compass status before takeoff, not blindly recalibrating every time.
A folding carbon fiber launch pad is one of the best investments you can make for compass health. It provides a consistent, metal-free surface that keeps you off concrete and away from hidden rebar. It also keeps your drone clean and protects the gimbal during takeoff and landing.
Frequently Asked Questions
Why does my drone say compass error?
Your drone says compass error because the magnetometer sensor is detecting magnetic interference or has lost calibration data. Common causes include flying near reinforced concrete, metal structures, power lines, or electronic devices. Moving to an open area away from metal and performing a compass calibration through your flying app resolves most cases.
How do I fix a drone compass error?
To fix a drone compass error, move to an open area away from metal structures and electronics, power cycle the drone, then perform a compass calibration using the DJI Fly, DJI Pilot 2, or DJI GO 4 app. Follow the on-screen rotation prompts, keeping the drone away from your body and any metal objects during the process.
Can I fly my drone with a compass error?
No, you should not fly with an active compass error. Flying with compromised compass data risks the toilet bowl effect, flyaways, and Return to Home failures. Always clear the compass error through calibration before takeoff. If the error appears mid-flight, land immediately in a safe location.
How often should I calibrate my drone compass?
Calibrate your drone compass after traveling more than 300 miles from your last calibration, after a firmware update, after a crash or hard landing, or when the app prompts you. You do not need to calibrate before every flight. Calibrating unnecessarily in marginal environments can actually introduce errors.
What causes drone compass interference?
Drone compass interference is caused by electromagnetic fields from metal objects and electronics. The most common sources are reinforced concrete with steel rebar, high-voltage power lines, vehicles, metal buildings, smartphones, smartwatches, Wi-Fi routers, speaker magnets, and natural magnetite deposits in certain soils.
How do I know if my compass is broken vs just needs calibration?
If calibration fails instantly or repeatedly fails at the same step regardless of location, the compass module is likely broken. Flight logs showing flatlined magnetometer values also indicate hardware failure. If calibration succeeds in one location but fails in another, the issue is environmental interference, not hardware.
Does my phone cause compass errors on my drone?
Yes, smartphones contain magnets and electromagnetic components that can interfere with your drone’s compass during calibration and takeoff. Keep your phone at least 12 inches away from the drone body during calibration. Remove smartwatches and metal objects from your person before calibrating.
What is the toilet bowl effect on drones?
The toilet bowl effect is when a drone flies in increasingly tight circles because GPS and compass data conflict. The flight controller receives contradictory heading and position information, causing the drone to spiral. It is a direct result of flying with a compromised compass and can lead to flyaways or crashes.
How do I calibrate the compass in DJI Fly app?
To calibrate the compass in DJI Fly, open the app, tap the three dots for Settings, select Sensors, then tap Compass Calibration. Hold the drone level and rotate horizontally 360 degrees, then turn the drone nose-up and rotate vertically 360 degrees. The app confirms when calibration is complete.
What is the difference between IMU and compass calibration?
IMU calibration calibrates the accelerometer and gyroscope sensors that measure tilt and rotation, done with the drone flat on a level surface. Compass calibration calibrates the magnetometer that measures magnetic heading, done outdoors while rotating the drone. Different symptoms require different calibrations.
Can a hard reset fix compass error?
A hard reset can fix compass errors caused by corrupted software settings or calibration data. It restores factory defaults and clears stored sensor data. After a hard reset, you must perform fresh compass and IMU calibrations. If the compass error persists after a hard reset and recalibration, the issue is likely hardware-related.
Why does compass error only happen in Sport mode?
Compass errors in Sport or S mode occur because the drone flies at higher speeds, which amplifies the effect of minor compass inaccuracies. At higher speeds, the flight controller relies more heavily on compass data for heading corrections. If the compass has slight interference, the error becomes visible in Sport mode before it appears in normal P mode.
Conclusion
Understanding why your drone says compass error and how to fix it is one of the most important skills for any pilot. The vast majority of compass errors are environmental, caused by interference from reinforced concrete, metal structures, power lines, or electronics you are carrying. Moving to an open area and performing a standard compass calibration through your DJI Fly or DJI Pilot 2 app resolves most issues in under two minutes.
The key takeaways are straightforward. Always check sensor health before takeoff. Never fly with an active compass error. Learn the difference between a compass error that requires calibration and compass interference that requires relocation. Keep a non-metallic launch pad handy to avoid hidden rebar. And if calibration fails repeatedly, do not force it. Use flight logs to diagnose whether the problem is environmental or hardware-related, and seek professional repair when DIY methods are not working.
If you take away one thing from this guide, let it be this: a compass error is a warning, not a suggestion. Treat it seriously, clear it before flying, and your drone will come home safely every time. Fly smart, calibrate properly, and enjoy your time in the air.