
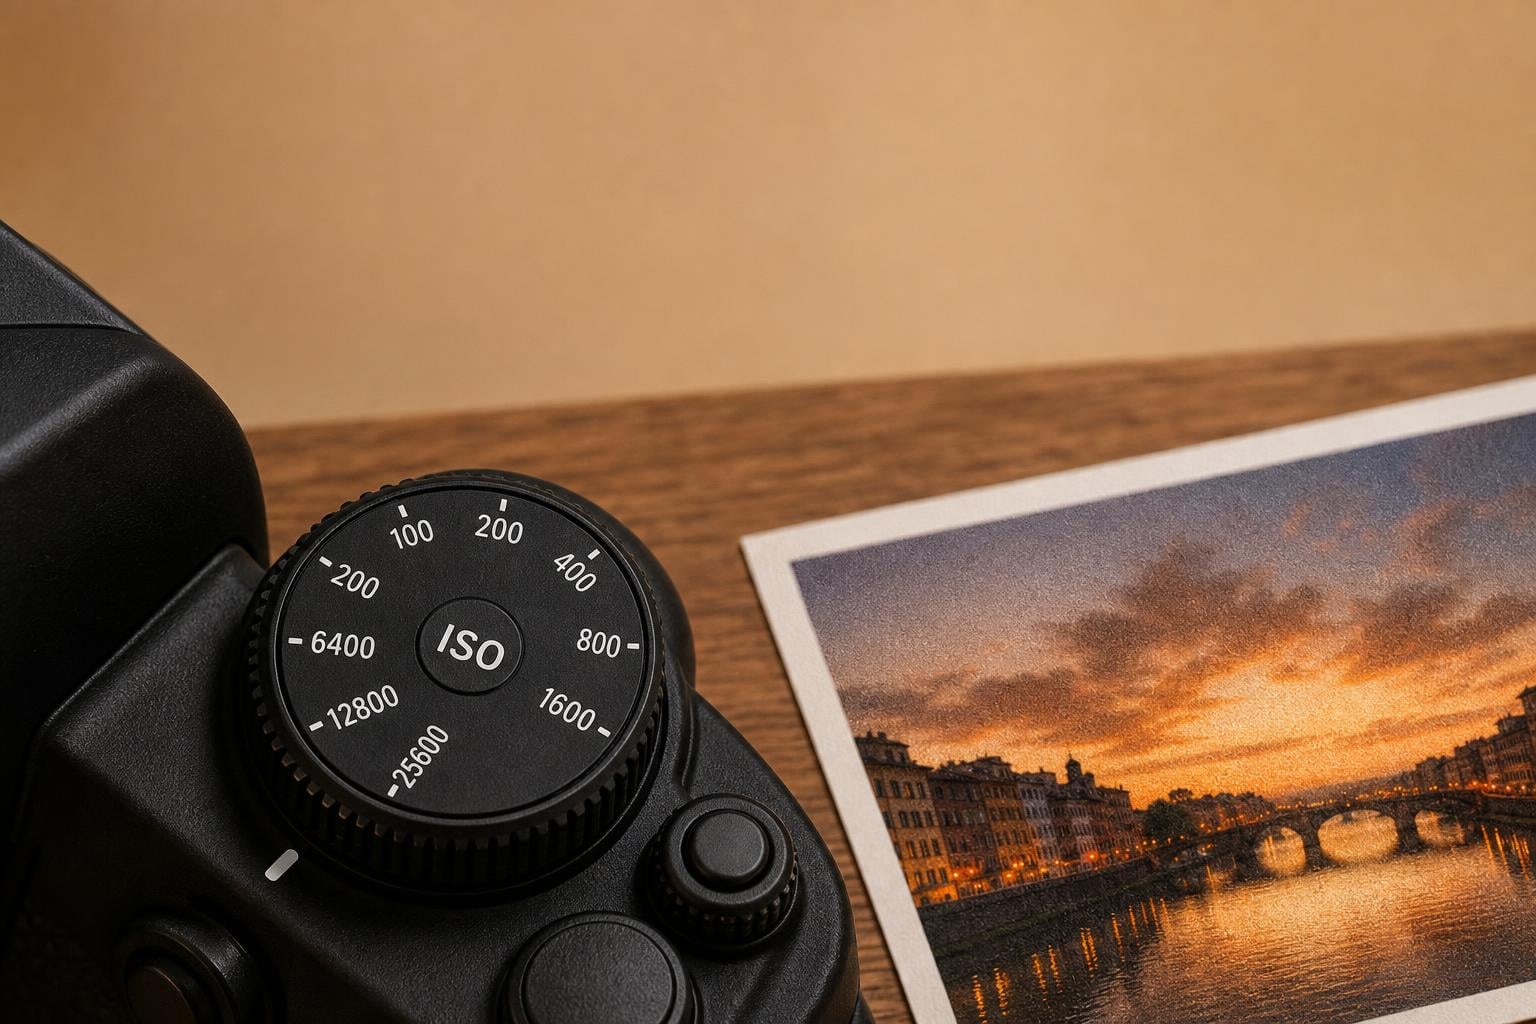
Every camera has an ISO ceiling, but the number printed on your spec sheet is almost always a lie. My Nikon D750 claims it can shoot at ISO 51,200, but I would never sell a print shot above ISO 12,800. That gap between what the camera advertises and what it can actually deliver is what photographers call the highest usable ISO, and finding it changed how I shoot in low light forever.
When I first started shooting concerts, I cranked ISO to whatever number got me a sharp image. Half my shots ended up looking like they were taken through a sandstorm. The problem was not my camera. I just did not know where my personal noise threshold lived. Once I ran a proper ISO test, I stopped wasting shots and started shooting with confidence.
Here is the truth that most photography guides skip: there is no universal “good” ISO number. Your highest usable ISO depends on your camera model, your sensor size, your intended output, and frankly, your personal tolerance for grain. A wedding photographer delivering large prints needs a different ISO ceiling than a street shooter posting to Instagram.
That is exactly what this guide will help you figure out. I will walk you through a dead-simple test you can run at home in about 30 minutes, explain why ISO creates noise in the first place, and show you how to use your test results to configure Auto ISO so your camera never crosses your personal noise threshold again.
Table of Contents
Quick Answer: What Is the Highest Usable ISO?
The highest usable ISO is the maximum ISO setting on your camera where images still maintain acceptable detail, color fidelity, and noise levels for your specific needs. As a general rule of thumb, it sits about 1 to 2 stops below your camera’s maximum native ISO.
For most full-frame cameras, that lands somewhere between ISO 6400 and ISO 12,800. APS-C sensors typically top out around ISO 3200 to ISO 6400, and Micro Four Thirds cameras usually hit their wall between ISO 1600 and ISO 3200. These are starting points, not final answers. You need to test your specific camera to find your real number.
The fastest way to get close without running a full test: look up your camera on photonstophotos.net and check its Photographic Dynamic Range (PDR) chart. Find where the PDR drops below 4.0 stops, and that is roughly where most photographers consider images too noisy for serious work.
What “Usable” Actually Means: The Three Noise Zones
Photographer Fil Nenna popularized a framework that divides ISO performance into three distinct zones. I have used this system for 2026 with every camera I have owned, and it makes decision-making in the field dramatically simpler. Instead of asking “is this ISO too high,” you ask “which zone am I in, and is that acceptable for this situation.”
Zone 1: The Ideal Range
This is your camera’s comfort zone. Images shot in this ISO range are clean, colors are accurate, and detail retention is excellent. You can crop heavily, print large, and pixel-peep without wincing. For most modern full-frame cameras, the ideal range runs from base ISO (usually 100 or 200) up to about ISO 1600. For APS-C, expect the ideal ceiling around ISO 800 to 1600.
I treat this zone as my default shooting range. If the light allows me to stay here, I stay here. No exceptions.
Zone 2: The Compromised Range
Images shot in this range show visible noise at 100% magnification, but it is manageable. Luminance noise becomes noticeable, and you might see slight color degradation in shadows. The key word is slight. With moderate noise reduction in Lightroom or your RAW processor of choice, these images are still highly usable for web, social media, and medium-sized prints.
For a Canon EOS R5, this zone typically runs from ISO 3200 to about ISO 6400. For a Sony A7III, it stretches similarly from ISO 3200 to ISO 6400 or even ISO 8000 on the high end. This is where event photographers, concert shooters, and wildlife photographers live most of the time.
I happily shoot in this zone when the situation demands it. A slightly noisy photo that tells a story beats a blurry, clean photo every time.
Zone 3: The High-Noise Range
Beyond the compromised zone, image quality falls off a cliff. Colors wash out, detail smears, chroma noise explodes in shadows, and no amount of noise reduction fully rescues the file. You might get a usable social media post at small resolution, but forget about prints or heavy cropping.
On that same Canon R5, this zone kicks in around ISO 12,800 and gets progressively worse up to the maximum of ISO 51,200. I reserve this zone for emergencies only: a once-in-a-lifetime moment in near darkness where getting any shot matters more than getting a clean shot.
Understanding which zone each ISO setting places you in removes all the guesswork from low-light photography. You stop worrying about the number on your dial and start thinking about what you can do with the result.
How ISO Actually Creates Noise (Without the Jargon)
Before we get to the test itself, it helps to understand why higher ISO settings produce more noise. Not because ISO “adds” noise, which is the most common misconception in photography. The real story is more interesting.
Your camera sensor captures light as photons. Each pixel on the sensor collects photons during the exposure, and those photons get converted into an electrical signal. In bright light, each pixel collects thousands or millions of photons. In low light, each pixel might capture only dozens.
Here is where physics gets in your way. Photon arrival is random. It follows what statisticians call a Poisson distribution, but you do not need to remember that term. The practical takeaway is this: when you capture fewer photons, the randomness of how they arrive becomes a larger percentage of your total signal. That randomness shows up in your image as noise.
This is called shot noise or photon noise, and it is the dominant source of noise in most photographs. It exists regardless of your ISO setting. When you raise ISO, you are amplifying the signal your sensor already captured. If the signal is mostly noise because you captured very few photons, amplifying it makes that noise more visible.
Think of it like turning up the volume on a weak radio signal. The music gets louder, but so does the static. ISO does not create the static. It just makes it louder alongside the music.
There is a second type of noise worth knowing about: read noise. This is electronic noise introduced by your camera’s sensor electronics when reading the signal from each pixel. Read noise is relatively constant regardless of light level, which is why it becomes most visible in shadow areas of images shot at high ISO. Modern cameras have dramatically lower read noise than models from even five years ago, which is why today’s high-ISO images look so much cleaner than they used to.
The signal-to-noise ratio (SNR) is simply the ratio of your actual light signal to the total noise. More photons means a higher SNR and a cleaner image. Higher ISO means you are working with a lower SNR, which means more visible noise. The relationship is mathematical, not mysterious.
Understanding this matters because it explains why a 45-megapixel full-frame sensor does not necessarily have worse high-ISO performance than a 24-megapixel sensor of the same physical size. Smaller pixels capture fewer photons individually, but when you view the final image at a normal size, the noise from multiple small pixels averages out. Pixel size matters less than total sensor area for overall noise performance.
Native ISO vs Expanded ISO vs Dual Native ISO
When you scroll through your camera’s ISO menu, you might see settings marked as “expanded” or flagged with an indicator like “H1” or “H2.” These labels matter more than most photographers realize.
Native ISO
Native ISO settings are the range your camera’s sensor and analog amplifier are designed to handle. Within this range, each ISO step represents a genuine change in analog amplification applied to the sensor signal. This is where your camera performs at its best.
For most cameras, the native range starts at ISO 100 or ISO 200 and extends to somewhere between ISO 25,600 and ISO 51,200. Check your manual to find the exact native range for your model. The native range is what you should base your ISO test on.
Expanded ISO
Expanded ISO settings (often labeled “H1,” “H2,” or equivalent) push beyond the native range using digital processing rather than analog amplification. The camera essentially takes the highest native ISO signal and digitally pushes it further, which introduces additional noise and reduces dynamic range significantly.
Expanded ISO settings almost always produce worse results than simply shooting at the maximum native ISO and brightening in post-processing. I recommend ignoring expanded settings entirely unless you need a quick JPEG preview of an extremely dark scene. If you shoot RAW, you are better off staying at maximum native ISO and adjusting exposure later.
Dual Native ISO
Some cameras, particularly from Panasonic and now Sony and Canon, feature dual native ISO technology. These cameras have two separate analog amplifier circuits with different base noise characteristics. One circuit handles low ISO settings with minimal noise, and a second circuit switches in at higher ISO settings to maintain lower noise.
The practical implication is that these cameras have a sudden jump in noise performance at a specific ISO threshold. For example, the Panasonic GH5s has a native ISO of 400 for its low circuit and ISO 2500 for its high circuit. Images shot at ISO 2500 can actually look cleaner than images shot at ISO 2000, because the camera switches to the second amplifier.
If your camera has dual native ISO, you need to know where that switch point is. Your ISO test will reveal it as a sudden improvement in noise at a specific setting. This is one of the most important discoveries you can make about your camera’s performance characteristics.
How to Find the Highest Usable ISO for Your Specific Camera: Step-by-Step Test
This is the core of everything. I am going to walk you through the exact method I use, which combines the Fil Nenna approach popularized on PetaPixel with the classic newspaper-on-wall technique discussed in photography forums for years. You can complete this test in about 30 minutes with equipment you already own.
What You Need
You need your camera, a lens (any focal length works, but a standard 50mm equivalent is ideal), a tripod, a memory card, and a well-lit subject with fine detail. That subject is traditionally a newspaper taped flat to a wall, but you can use anything with small text, fine patterns, or intricate detail. A fabric swatch, a colorful book cover, or a printed test chart all work.
You also need a way to review images at 100% magnification. A computer monitor is ideal. Your camera’s rear LCD will work in a pinch, but it can mask noise due to its small size and processing.
Step 1: Set Up Your Test Scene
Tape your newspaper or test target flat against a wall in even lighting. Indoor lighting near a large window works well. The key is consistency. You want the light to stay the same for every shot in the test, so avoid times of day when sunlight changes rapidly.
Position your camera on the tripod about 3 to 5 feet from the target. Frame the target so it fills a good portion of the frame. Set your camera to RAW mode. This is non-negotiable. JPEG processing applies noise reduction that will mask your camera’s true noise characteristics and invalidate your test.
Step 2: Lock Your Exposure Variables
Set your camera to manual mode. Choose an aperture that gives you good depth of field, around f/5.6 or f/8. Choose a shutter speed that gives you a correct exposure at your base ISO. Take a test shot at ISO 100 (or 200 if that is your base) and check the histogram to confirm proper exposure.
Now here is the critical part: you will keep aperture and shutter speed locked for every shot. Only ISO changes between frames. This ensures that the only variable affecting image quality is ISO itself.
Step 3: Shoot the ISO Ladder
Start at your base ISO and take a shot. Then increase ISO by one full stop at a time and shoot again. Go through every full stop: 100, 200, 400, 800, 1600, 3200, 6400, 12800, 25600, and 51200 if your camera reaches that high.
I also recommend shooting the intermediate third-stop settings in the range where you expect your noise threshold to fall. If you think your limit is around ISO 3200, also shoot ISO 2500 and ISO 4000 to fine-tune your findings.
Take a moment between each shot to let your sensor cool down, especially if you are testing in warm conditions. Thermal noise accumulates as the sensor heats up during continuous shooting, which can skew your results.
Step 4: Load and Review at 100% Zoom
Transfer your RAW files to your computer and open them in your preferred RAW processor. Do not apply any noise reduction, sharpening, or exposure adjustments. You want to see the raw data exactly as the sensor captured it.
Zoom to 100% on the same area of each image. Look at the fine text or detail in your test target. Start with your base ISO image as a reference point, then scroll through each subsequent ISO setting.
Step 5: Identify Your Three Noise Zones
As you scroll through, you will notice three transitions. The first is where noise becomes barely visible but detail is still fully intact. That is the boundary of your Ideal zone. The second is where noise becomes prominent, colors start shifting, and shadow detail degrades noticeably. That is the boundary between your Compromised and High-Noise zones.
Write down both numbers. These are your personal ISO thresholds for this specific camera.
Step 6: Test With Noise Reduction
Now go back and apply your standard noise reduction settings to the images in your Compromised zone. Many photographers are surprised by how much noise modern RAW processors can remove without destroying detail. The best results often come from AI-based tools like DxO PureRAW or Topaz Denoise AI.
This step tells you what your real-world working range looks like. If ISO 6400 cleans up beautifully with moderate noise reduction, that becomes your practical ceiling for everyday shooting, even though the unprocessed file looks noisy.
Step 7: Create Your Personal ISO Reference Card
Take your findings and write them down somewhere you can reference quickly. I keep a small card in my camera bag with my three zones listed for each camera body I own. It takes the guesswork out of shooting in fast-changing light.
For example, here is what my card looks like for a Sony A7III: Ideal zone up to ISO 3200, Compromised zone ISO 3200 to ISO 12800, High-Noise zone above ISO 12800. With noise reduction applied, the Compromised ceiling extends to ISO 12800 for web use and ISO 6400 for prints up to 13×19 inches.
How Your Output Type Changes Everything
Here is something that trips up a lot of photographers during their ISO test. The noise you see at 100% zoom on your monitor is not the noise someone will see in your final output. Pixel-peeping at full magnification is useful for finding your thresholds, but it overstates how noisy an image actually looks in real-world viewing conditions.
Web and Social Media
For Instagram, Facebook, web galleries, and any image displayed at 2048 pixels or smaller, noise is dramatically reduced. Images shot at ISO 12,800 that look rough at 100% zoom often look perfectly clean when downsized to social media resolution. The downsizing process averages pixel data, which naturally smooths noise.
I have posted concert photos shot at ISO 10,000 on a full-frame Sony that looked pristine at Instagram resolution. The same photo at 100% crop was a noisy mess. The output format matters as much as the ISO setting.
Print is even more forgiving than screen viewing, provided you print at a reasonable size. An 8×10 inch print from a 24-megapixel file involves significant downscaling, which masks noise the same way social media downscaling does. Noise that screams at you on screen becomes a subtle grain texture in print that many viewers actually find pleasing.
Viewing distance plays a role too. Nobody examines a 24×36 inch gallery print from six inches away. The standard viewing distance for a print is roughly equal to the diagonal measurement of the print itself. At that distance, moderate noise disappears entirely.
The general rule I follow: for prints up to 13×19 inches, I respect my Compromised zone ceiling. For prints up to 8×10, I can push into the High-Noise zone and get away with it. For web and social media, I push as far as the High-Noise zone allows if the content demands it.
Sensor Size and ISO Performance: What to Expect
Sensor size is the single biggest factor in ISO performance, aside from sensor generation. Larger sensors capture more total light at the same aperture and shutter speed, which means a higher signal-to-noise ratio and cleaner images at high ISO.
Here is a rough guide to typical ISO ceilings by sensor format. These are community-validated ranges gathered from photographer reports across DPReview forums, Reddit, and my own testing. Individual camera models within each format will vary.
Full Frame (36mm x 24mm)
Modern full-frame sensors from Sony, Canon, Nikon, and Panasonic typically deliver clean images through ISO 3200 to 6400. The Compromised zone extends to ISO 12,800 on most current-generation sensors. Flagship models like the Sony A7S III and Canon R3 can produce usable results at ISO 25,600 and beyond.
Reddit and DPReview users with the Nikon D750 consistently report usable images at ISO 12,800 for web and small prints. Sony A7III owners report similar ceilings, with some pushing to ISO 16,000 for social media with noise reduction applied.
APS-C (approx. 24mm x 16mm)
APS-C sensors typically deliver clean images through ISO 1600. The Compromised zone runs from ISO 1600 to ISO 6400, with the High-Noise zone kicking in around ISO 6400 to 12,800 depending on the camera.
Fujifilm’s X-Trans sensors are a notable exception. Their unique color filter array handles noise differently from Bayer sensors, and many photographers find Fujifilm APS-C images have a more film-like grain structure that remains pleasing even at high ISO settings. A Fujifilm X-T4 or X-T5 can produce attractive images at ISO 6400 that rival some full-frame cameras in perceived quality.
Micro Four Thirds (approx. 18mm x 13mm)
MFT sensors are smaller than APS-C, which means higher noise at equivalent ISO settings. The Ideal zone typically runs through ISO 800, with the Compromised zone extending to ISO 3200. Above ISO 3200, noise becomes prominent for most MFT cameras.
That said, recent MFT sensors from Panasonic and OM System have narrowed the gap significantly. The Panasonic GH5s with its dual native ISO design produces remarkably clean images at ISO 2500 and can push into usable territory at ISO 6400 for web output.
1-Inch and Smaller Sensors
Compact cameras and smartphones with 1-inch or smaller sensors face a fundamental physics challenge. The Ideal zone often ends at ISO 400 or ISO 800. The Compromised zone is narrow, and the High-Noise zone begins early.
DPReview users with the Sony RX100 series (1-inch sensor) report usable images up to ISO 1600 for web and up to ISO 3200 for small prints. Smartphone sensors, despite computational photography advances, still struggle above ISO 800 in truly low light.
After the Test: Setting Up Auto ISO With Your Findings
This is where your ISO test transforms from an academic exercise into a practical advantage. Once you know your Compromised zone ceiling, you can configure Auto ISO to never exceed it. This is something I have never seen covered in any other ISO guide, and it is the single most useful thing you can do with your test results.
Why Auto ISO Is Your Secret Weapon
Auto ISO lets your camera choose the ISO setting automatically based on the light available, while respecting a maximum limit you define. It is the most underused feature in modern cameras, primarily because photographers either do not trust it or do not know how to configure it properly.
After running your ISO test, you have hard data. You know exactly where your image quality falls off. Setting your Auto ISO maximum to your Compromised zone ceiling means the camera will raise ISO as high as it needs to for a proper exposure, but never past the point where your images fall apart.
Canon Auto ISO Setup
On Canon cameras (EOS R series, EOS DSLRs), navigate to the ISO speed settings menu. Select Auto ISO range and set the upper limit to your tested Compromised ceiling. For a Canon R5, I would set this to ISO 6400 for general shooting or ISO 3200 for client work that requires large prints.
Canon also offers a minimum shutter speed setting when Auto ISO is active. Set this to the slowest shutter speed you can handhold reliably, typically 1/(focal length x 2) for non-stabilized lenses. The camera will maintain that shutter speed and raise ISO to compensate for dimming light, only dropping the shutter speed below your minimum when ISO hits the ceiling you set.
Nikon Auto ISO Setup
Nikon has had the best Auto ISO implementation for years. Go to the Photo Shooting Menu, select ISO sensitivity settings, and turn on Auto ISO sensitivity control. Set the Maximum sensitivity to your tested Compromised ceiling.
Nikon’s Minimum shutter speed option is excellent. You can choose “Auto” to let the camera calculate based on focal length, which works well for zoom lenses. Or set a specific speed like 1/250 for sports and wildlife. The camera prioritizes your minimum shutter speed, raises ISO to compensate, and only drops below the minimum shutter when it has exhausted your ISO ceiling.
Thom Hogan of bythom.com recommends setting Nikon Auto ISO to 800 as a maximum for older bodies like the D3 and D3s, which aligns with the conservative approach many professionals take. For newer bodies like the Z8 or Z9, ISO 6400 is a perfectly reasonable Auto ISO ceiling based on community testing.
Sony Auto ISO Setup
Sony cameras (A7, A1, A9 series) offer Auto ISO through the ISO menu. Set ISO AUTO and then define the upper limit using the ISO AUTO Maximum setting. My Sony A7III is configured with a maximum of ISO 12,800, which represents the top of my Compromised zone from testing.
Sony’s minimum shutter speed in Auto ISO can be set to “Faster/Slower” relative to focal length, which is a clever approach. “Standard” uses the traditional 1/focal length rule. “Faster” doubles the shutter speed, which is useful for moving subjects. I use “Faster” for event photography and “Standard” for landscapes and static subjects.
Fujifilm Auto ISO Setup
Fujifilm cameras offer three custom Auto ISO presets (C1, C2, C3), which is brilliant. You can configure one for general shooting with a ceiling at your Compromised zone (ISO 6400 for example), one for low-light events pushed to your High-Noise zone entry point (ISO 12800), and one for tripod work locked at base ISO.
Set the minimum shutter speed for each preset based on your needs. For the general preset, 1/125 works well for static subjects. For the event preset, 1/500 freezes moderate motion. Switching between presets is fast via the Q (Quick) menu.
Common ISO Myths Debunked
Let me clear up some persistent misconceptions that I hear constantly from workshop students, forum readers, and even experienced photographers who should know better.
Myth: Higher ISO damages image quality. ISO does not damage anything. It amplifies the signal your sensor already captured. If the signal is noisy because you captured few photons, amplification makes that noise visible. The noise was already there. ISO just made it louder alongside the music. Shooting at base ISO and brightening in post produces the same or worse noise because you are still working with the same weak signal.
Myth: You should never go above ISO 800. This advice might have made sense in 2010. Modern full-frame cameras produce cleaner images at ISO 6400 than cameras from a decade ago did at ISO 800. Your camera’s capabilities have outpaced this old rule by a wide margin.
Myth: You can read ISO performance from megapixel count. A 61-megapixel Sony A7R IV does not necessarily have worse high-ISO performance than a 24-megapixel Sony A7III. When you view both images at the same output size, the noise from higher-resolution sensors averages out. Total sensor area matters far more than pixel count.
Myth: Manufacturer ISO ranges tell you what is usable. That ISO 102,400 setting on your spec sheet is a marketing number, not a working tool. The usable range is almost always 2 to 3 stops below the maximum advertised ISO. Your test will confirm this quickly.
FAQs
What is the highest acceptable ISO?
The highest acceptable ISO varies by camera model, sensor size, and your intended output. As a rule of thumb, it is typically 1-2 stops below your camera’s maximum native ISO. For full-frame cameras, ISO 6400-12800 is often the practical limit, while APS-C cameras typically top out around ISO 3200-6400.
How do I determine which ISO to use?
Run a simple ISO test: place a newspaper or detailed target on a wall, lock your aperture and shutter speed, then shoot at every full ISO stop. Review the images at 100% zoom on a calibrated monitor and note where noise becomes unacceptable. That threshold becomes your personal ISO ceiling.
Is ISO 6400 too noisy for my camera?
For most modern full-frame cameras (Sony A7III, Canon R5, Nikon Z6), ISO 6400 falls in the Compromised zone. Noise is visible at 100% zoom but manageable with noise reduction for web and medium prints. For APS-C sensors, ISO 6400 typically sits at the edge of the High-Noise zone. Test your specific camera to find out.
What is the difference between native ISO and expanded ISO?
Native ISO settings use analog amplification within the sensor’s designed range and produce the best image quality. Expanded ISO settings push beyond native range using digital processing, which adds noise and reduces dynamic range significantly. Always test using native ISO settings and avoid expanded settings for critical work.
Can I trust manufacturer ISO range specifications?
No. Manufacturer ISO ranges represent the maximum possible settings, not the usable ones. The advertised maximum ISO (often ISO 51200 or higher) is almost always 2-3 stops above what produces acceptable image quality. Run your own ISO test to find the real usable range for your specific camera and output needs.
How does sensor size affect the highest usable ISO?
Larger sensors capture more total light at the same exposure settings, producing a higher signal-to-noise ratio. Full-frame sensors typically deliver clean images through ISO 6400, APS-C through ISO 3200, Micro Four Thirds through ISO 1600, and 1-inch sensors through ISO 800. Newer sensor generations narrow these gaps but the hierarchy remains.
Conclusion
Finding the highest usable ISO for your specific camera is not about reading spec sheets or trusting forum opinions. It is about running a 30-minute test that gives you concrete numbers for your exact equipment, your shooting style, and your output needs. Once you know your three noise zones and configure Auto ISO to respect them, you stop fighting your camera and start working with it.
Grab your tripod, tape a newspaper to the wall, and run the test this weekend. The results will change how you shoot in low light for as long as you own that camera.