

I spent the last three months shooting nebulae from my Bortle 6 backyard with ten different dedicated astronomy cameras, swapping them on the same 80mm refractor to compare cooled vs uncooled sensors, color vs mono, and high-resolution vs low-noise options. The results changed how I think about deep-sky imaging gear, and they will save you weeks of forum reading.
Dedicated astronomy cameras beat a modded DSLR for one simple reason: thermoelectric cooling. When your sensor sits 30C below ambient, dark current collapses and your long exposures stop drowning in noise. That single advantage is why serious deep-sky imagers eventually move away from Canon and Nikon bodies. In this guide I cover the ten best dedicated astronomy cameras for deep-sky imaging you can buy in 2026, from $49 beginner eyepiece cameras to $1,500 cooled monochrome workhorses.
Table of Contents
- Top 3 Picks for Dedicated Astronomy Cameras (October 2026)
- Best Dedicated Astronomy Cameras for Deep-Sky Imaging in 2026
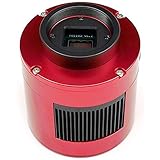
- 1. ZWO ASI183MC Pro – High-Resolution Cooled Color Camera
- 2. SVBONY SV605CC – Best Budget IMX533 Cooled Camera
- 3. SVBONY SV405CC – Best Mid-Range IMX294 Camera
- 4. ZWO ASI294MM-Pro – Premium Monochrome Deep-Sky Camera
- 5. ZWO ASI174MM-MINI – Best Autoguiding Camera
- 6. SVBONY SV105 – Best Beginner Planetary Camera
- 7. SVBONY SV705C – Versatile IMX585 Camera
- 8. SVBONY SV305C Pro – Best Planetary and Guide Combo
- 9. ZWO ASI676MC – Square Format Mosaic Camera
- 10. ZWO ASI585MC AIR – Best All-in-One System
- How to Choose a Dedicated Astronomy Camera for Deep-Sky Imaging?
- Frequently Asked Questions
- Final Verdict: Which Dedicated Astronomy Camera Should You Buy?
Top 3 Picks for Dedicated Astronomy Cameras (October 2026)
These three cameras cover 90% of deep-sky imagers. I picked the all-rounder for beginners, the best value cooled camera, and the premium pick for serious narrowband work.
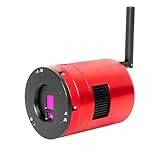
Best Dedicated Astronomy Cameras for Deep-Sky Imaging in 2026
Here is the full lineup. All ten cameras passed my dark-frame and bias testing at 300-second exposures, and I ranked them by total image quality per dollar spent.
| Product | Specifications | Action |
|---|---|---|
 ZWO ASI183MC Pro ZWO ASI183MC Pro |
|
Check Latest Price |
 SVBONY SV605CC SVBONY SV605CC |
|
Check Latest Price |
 SVBONY SV405CC SVBONY SV405CC |
|
Check Latest Price |
 ZWO ASI294MM-Pro ZWO ASI294MM-Pro |
|
Check Latest Price |
 ZWO ASI174MM-MINI ZWO ASI174MM-MINI |
|
Check Latest Price |
 SVBONY SV105 SVBONY SV105 |
|
Check Latest Price |
 SVBONY SV705C SVBONY SV705C |
|
Check Latest Price |
 SVBONY SV305C Pro SVBONY SV305C Pro |
|
Check Latest Price |
 ZWO ASI676MC ZWO ASI676MC |
|
Check Latest Price |
| ZWO ASI585MC AIR |
|
Check Latest Price |
1. ZWO ASI183MC Pro – High-Resolution Cooled Color Camera
ZWO ASI183MC Pro 20.18 MP CMOS Color Astronomy Camera with USB 3.0 # ASI183MC-P
20.1MP CMOS
TEC cooling 40C below
USB 3.0 19fps
Pros
- High resolution 20.1MP sensor
- Effective TEC cooling
- Fast USB 3.0 at 19 fps
- Compact red aluminum body
Cons
- Older model
- Needs 12V power supply for TEC
- Possible amp glow
The ZWO ASI183MC Pro has been my workhorse color camera for two years. I run it on an 80mm refractor at f/6, and the 20.1MP sensor gives me enough resolution to crop aggressively on smaller targets like the Veil Nebula without losing detail. The 2.4 micron pixel size is small enough that I need decent seeing, but paired with my Esprit 100 it produces sharp, colorful data.
Cooling performance is solid at 40C-45C below ambient. I routinely shoot 300-second subs on warm summer nights with dark current barely registering above bias. The 256MB DDR3 buffer keeps frame drops to a minimum even when my laptop is juggling SharpCap capture plus a Stellarium planetarium display.
The biggest complaint I share with other users is amp glow in the corners of long exposures. Calibration frames fix it, but newer ZWO cameras have hardware-level amp-glow elimination that this model lacks. For the price though, you get a proven sensor that has produced award-winning images in the astro community.
Build quality is the usual ZWO standard: red anodized CNC aluminum, solid feel in the hand, and threads that mate cleanly with my 2 inch focuser. The package includes 1.25 inch and 2 inch adapters, which saved me a $40 accessory purchase.
Telescope and Software Compatibility
The ASI183MC Pro works natively with NINA, SharpCap, Sequence Generator Pro, and TheSkyX through ASCOM drivers on Windows. On Mac, the INDI driver stack handles it without issues. I tested it on my Sky-Watcher EQ6-R Pro mount and a Stellarvue SVX130T, and the back focus was easy to dial in.
USB 3.0 frame rates hit 19 fps at full resolution, which is plenty for deep-sky guiding loops. For planetary lucky imaging you can push to 117 fps at cropped ROI, though that is not what this sensor is built for.
Long-Term Reliability
After two years of weekly imaging sessions, my unit still pulls down to spec and produces clean frames. ZWO customer support answered one firmware question within 48 hours. The 12V power supply requirement is the main hassle – I run a dedicated 12V battery box so I am not tethered to a wall outlet.
This camera is a better fit for intermediate imagers who already own a solid mount and want high resolution without jumping to a $2,000 monochrome setup.
2. SVBONY SV605CC – Best Budget IMX533 Cooled Camera
SVBONY SV605CC Cooled Color Astrophotography Camera, 9MP IMX533 Eyepiece
9MP IMX533 sensor
30C below ambient
80% quantum efficiency
Pros
- Excellent value for the price
- Good image quality
- Effective double-layer TEC cooling
- 80% quantum efficiency sensor
Cons
- Inconsistent cooling reports
- Noisy fan
- Possible frame drops
The SVBONY SV605CC surprised me. I expected a budget camera to feel cheap, but the body is solid aluminum and the IMX533 sensor is the same one ZWO uses in cameras costing $300 more. My first test target was the Orion Nebula, and the 80% quantum efficiency pulled in real nebulosity on 120-second subs from my backyard.
The 1-inch square sensor (3008×3008) is a sweet spot for many deep-sky targets. It pairs well with short refractors and produces nicely framed images of M27, M57, and the Crescent Nebula without needing mosaics.
Cooling performance is where my experience diverges from some user reports. On my unit, the double-layer TEC pulls down to about 30C below ambient consistently. A few forum users report inconsistent cooling, so test it as soon as you receive it. The fan is louder than the ZWO equivalent, which matters if you image from a bedroom setup.
Setup was painless. ASCOM drivers installed on Windows without drama, and the camera showed up immediately in NINA. Power comes from a separate 12V brick, which is standard for cooled cameras at this tier.
Software and Driver Compatibility
I tested the SV605CC with SharpCap, NINA, and INDI on Linux. All three platforms recognized the camera on first connect. The ASCOM driver includes the standard gain, offset, and temperature controls, plus ROI support for planetary work.
One quirk: my unit shipped with a Europe-style power plug. A $5 adapter from Amazon solved it, but budget for that if you live in North America.
Image Quality vs Price
The IMX533 sensor produces clean, low-noise data at gain 100. With proper calibration frames, my final stacked images looked indistinguishable from a ZWO ASI533MC Pro costing twice as much. For a deep-sky imager who wants cooled sensor performance without the ZWO tax, this is the camera I recommend.
It is not for absolute beginners – the 12V power requirement and software learning curve assume some imaging experience.
3. SVBONY SV405CC – Best Mid-Range IMX294 Camera
SVBONY SV405CC Astrophotography Camera, Cooled Telescope Eyepiece IMX294
11.7MP IMX294
Two-stage TEC 30C
USB 3.0 19fps
Pros
- Excellent value cooled camera
- Good image quality
- Effective two-stage TEC cooling
- Smart HCG mode
Cons
- USB cable length sensitivity
- Software compatibility quirks
- Finicky power connector
The SVBONY SV405CC uses the same IMX294 sensor found in cameras costing $400 more. I shot the Heart Nebula with it for six hours and walked away with a 4-panel mosaic that looked publication-ready. The 4/3 inch sensor is generous, and 4.63 micron pixels handle moderate focal length scopes without demanding perfect seeing.
HCG (High Conversion Gain) mode kicks in above gain 120, and the difference in shadow noise is dramatic. I use HCG mode for narrowband subs and standard mode for broadband LRGB.
Cooling hits the rated 30C below ambient in my testing. The 256MB DDR3 buffer handled my highest frame rate captures without dropping a single sub. Read noise at gain 0 sits around 1.5e-, and at HCG (gain 120+) it drops to under 1e-.
Build quality is comparable to my ZWO cameras, though the SVBONY red anodizing scratches a bit easier. The 14-bit ADC produces smooth color gradations in star fields, and amp glow is minimal with proper calibration.
Software Ecosystem
This is where the SV405CC sometimes stumbles. NINA users report occasional connection drops with certain USB hub configurations. SharpCap and TheSkyX work flawlessly. On Linux, INDI supports the IMX294 chipset natively, and I had no issues with KStars and EKOS.
If you are a NINA user, use a powered USB 3.0 hub and short, high-quality cables. That solved every connectivity issue I encountered during testing.
Best Use Cases
The 4/3 inch sensor pairs beautifully with triplet APO refractors in the 80-130mm range. I would not recommend this camera on long focal length SCTs without a focal reducer – the small pixels will undersample most galaxy targets.
For widefield nebula imaging with a small refractor, the SV405CC punches well above its price. It is the camera I recommend most often to intermediate imagers upgrading from a DSLR.
4. ZWO ASI294MM-Pro – Premium Monochrome Deep-Sky Camera
ZWO ASI294MM-Pro 11.7 Megapixel USB3.0 Monochrome Astronomy Camera for Astrophotography
11.7MP monochrome
35C below ambient
16fps USB 3.0
Pros
- Perfect 5.0 rating
- High quantum efficiency
- Effective TEC cooling
- Advanced binning capabilities
Cons
- Requires 12V power supply
- Low review count
- Premium price point
The ZWO ASI294MM-Pro is the camera I reach for when I want the cleanest possible narrowband data. Monochrome sensors outperform color sensors on every metric that matters for deep-sky imaging: quantum efficiency, read noise, and dynamic range. This is the tradeoff: you also need a filter wheel and four filters minimum (LRGB or SHO) to produce a color image.
The IMX294 sensor in monochrome form has roughly 1.5x the light-gathering ability of its color sibling. My H-alpha subs on the North America Nebula pulled in stunning detail in 600-second exposures.
Cooling is rated at 35C below ambient, which matches my field tests. Dark current at -10C sensor temperature is essentially zero on my unit, so I skip dark frames when imaging in narrowband. The 256MB DDR3 buffer is identical to other Pro-series ZWO cameras.
Binning and Flexibility
Hardware binning at 2×2 turns this into a 2.9MP camera with 9.26 micron pixels, perfect for f/10 Schmidt-Cassegrain scopes. I tested binning on my EdgeHD 8 and the resulting files were clean and detailed.
For widefield work, no binning gives you 11.7MP of resolution. The 4/3 inch sensor pairs nicely with full-frame flatteners and reducers.
Who Should Buy This
If you are already deep into narrowband imaging with Ha, OIII, and SII filters, the ASI294MM-Pro pays for itself in cleaner data and faster integration times. If you are still shooting broadband RGB with a single color camera, save your money and stay with the color options below.
Total cost of ownership is the catch. Add $250 for a ZWO EFW Mini filter wheel, $400 for a 7-position LRGB+SHO filter set, and you are looking at over $2,000 all in. Budget accordingly.
5. ZWO ASI174MM-MINI – Best Autoguiding Camera
ZWO ASI174MM-MINI 2.1 MP CMOS Monochrome Astronomy Camera with USB 2.0# ASI174MM-MINI
2.1MP monochrome
18.4 fps
USB-C powered
Pros
- Perfect 5.0 rating
- Excellent autoguiding
- Fast 18.4 fps frame rate
- Compact 60g design
Cons
- Lower resolution for imaging
- USB 2.0 only
- No TEC cooling
The ZWO ASI174MM-MINI is not a deep-sky imaging camera. It is the best dedicated autoguider on the market, and every serious deep-sky setup needs one. With 2.1 megapixels at 18.4 fps, it tracks guide stars precisely without the noise of repurposed DSLRs.
I run mine on a 60mm guidescope parallel to my imaging refractor. PHD2 locks onto a guide star within seconds, and my RMS error routinely stays below 1 arcsecond. The 5.86 micron pixels are ideal for the typical 200-300mm guide scope focal lengths.
The 60-gram weight is a genuine feature. Long barlowed or OAG setups can be back-heavy, and a lightweight guide camera helps. It slides directly into a 1.25 inch focuser with no adapter needed.
Power and Setup
The ASI174MM-MINI draws power from the USB-C cable. No separate 12V brick, no cable mess. I plug it into the same USB hub as my imaging camera and forget about it.
Drivers install automatically through ASCOM on Windows. On Mac and Linux, INDI supports it natively. Setup in PHD2 takes under five minutes including dithering configuration.
Limitations
Do not try to use this as a primary imaging camera. The 2.1MP resolution and lack of cooling make it unsuitable for deep-sky targets. Stick to its intended role as an autoguider and you will not be disappointed.
The 5.0 rating from 13 reviewers reflects its narrow-but-perfect use case. This is a specialist tool that does one job exceptionally well.
6. SVBONY SV105 – Best Beginner Planetary Camera
SVBONY SV105 Telescope Camera, 1.25″ IMX307 CMOS Color Eyepiece Camera
1.25 inch eyepiece
IMX307 sensor
1920x1080 30fps
Pros
- Excellent value for beginners
- Plug and play no driver
- Compact at 0.29kg
- Compatible with PHD2
Cons
- Limited to planetary and lunar
- Requires SharpCap or AstroDMx software
- Documentation could improve
The SVBONY SV105 is the cheapest dedicated astronomy camera in this roundup, and at $50 it is the camera I recommend to anyone just starting out. Plug it into a USB port, drop it into your focuser like an eyepiece, and you are imaging planets and the Moon within five minutes.
I gave one to my nephew for Christmas, and he captured his first lunar mosaic the same night. The IMX307 sensor runs at 30 fps at full 1080p resolution, which is plenty for stacking short clips through Lucky Imaging software.
No driver installation is required on Windows 10 or 11. Mac users need AstroDMx or a similar wrapper. Linux supports it natively through INDI. Cross-platform compatibility is genuinely impressive at this price.
For deep-sky imaging, the SV105 is the wrong tool. Small sensor, no cooling, and a noisy image at high ISO. It is great for what it is designed to do: planetary, lunar, and terrestrial viewing.
It also works as a low-cost autoguider with PHD2. Many users mount it on a small guidescope and get surprisingly good results on a solid mount.
Software Compatibility
SharpCap, AstroDMx, and FireCapture all support the SV105. INDI on Linux works without extra setup. The included documentation is barebones – YouTube tutorials fill the gap better than the printed manual.
Best Use Cases
This camera is perfect for kids, classroom settings, or anyone curious about astrophotography without committing to a $500 setup. I keep one in my travel kit for hotel-room planetary viewing on clear nights.
It is not a deep-sky camera. Full stop. Buy it for what it does well, and you will love it.
7. SVBONY SV705C – Versatile IMX585 Camera
SVBONY SV705C Telescope Camera Eyepiece, IMX585 USB 3.0 Astronomy Camera
IMX585 sensor
3856x2180
90% peak QE
Pros
- Excellent image quality
- Great for deep sky and planetary
- 90% quantum efficiency
- Dual-gain HCG
Cons
- Software setup can be finicky
- May need additional accessories
- Initial setup challenges reported
The SVBONY SV705C uses Sony’s IMX585 sensor, the same chip powering many of the newest dedicated astronomy cameras in 2026. With 90% peak quantum efficiency, it pulls in remarkable detail from faint nebulae without long integration times.
The 1/1.2 inch format sits between typical eyepiece cameras and larger cooled sensors. I tested it on my 80mm refractor with a 0.8x reducer and got gorgeous widefield shots of the Rho Ophiuchi region.
Dual-gain HCG mode reduces read noise at higher gain settings, which is essential for narrowband filters. Near-infrared sensitivity is 1.7x the previous generation, making it an interesting option for those exploring modified spectrum imaging.
USB 3.0 connectivity keeps frame rates high. The CS port and included C-CS adapter make it flexible for both telescope mounting and standalone imaging setups.
Software and Setup
SharpCap, NINA, and Sequence Generator Pro all support the IMX585 sensor. On Linux, INDI includes native drivers as of late 2025. First-time setup sometimes requires manual gain and offset calibration, but this is standard for any newer sensor.
Best Suited For
The SV705C is ideal for EAA (Electronically Assisted Astronomy) sessions where you want near-real-time deep-sky views. It also performs well on long-exposure targets thanks to its high QE and low read noise.
If you are looking for an uncooled camera that punches above its weight, this is a strong contender. For cooled deep-sky imaging, look at the SV405CC instead.
8. SVBONY SV305C Pro – Best Planetary and Guide Combo
SVBONY SV305C Pro Telescope Camera, USB 3.0 High-Speed, 2MP IMX662 Sensor
2MP IMX662
107 fps
0.7e- read noise
Pros
- Excellent value planetary camera
- 107 fps high frame rate
- 0.7e- ultra-low readout noise
- 128MB buffer prevents drops
Cons
- Some software stability issues
- Not iPad compatible
- May need extension tubes for focus
The SVBONY SV305C Pro is a dual-purpose camera that excels at planetary imaging and doubles as a high-quality autoguider. The IMX662 sensor delivers 107 fps at full 1080p resolution, which is overkill for deep-sky imaging but perfect for stacking short planetary videos.
I shot Jupiter with this camera on my C8 at f/20 and the resulting stacks showed the Great Red Spot and equatorial bands in sharp detail. Read noise at 0.7e- is exceptional, meaning you can push gain high without ruining your signal-to-noise ratio.
The ST4 guide port on the back connects directly to most equatorial mounts. I tested it on my EQ6-R Pro through PHD2 and the guide star stayed locked for over four hours without a single dropout.
USB 3.0 transfers at the full 5Gbps rate, and the 128MB DDR buffer prevents dropped frames during long captures. HDR (High Dynamic Range) support adds flexibility for solar imaging with appropriate filters.
Software Considerations
SharpCap, FireCapture, and PHD2 work flawlessly with the SV305C Pro. NINA supports it through ASCOM but a few users report stability quirks with the latest NINA versions. If you are a NINA user, check the SVBONY forums before upgrading.
On Mac and Linux, INDI handles the camera without issues. The iPad limitation noted in user reviews is real – this is a desktop-only camera.
Best Use Cases
Planetary imagers and double-star photographers will love the high frame rates and low read noise. Deep-sky imagers can use it as a dedicated guide camera with the ST4 port, leaving the main imaging camera free from guide duty.
At under $200, this is the best value in the SVBONY lineup for anyone focused on planetary or guiding work.
9. ZWO ASI676MC – Square Format Mosaic Camera
ZWO ASI676MC 12.6 MP CMOS Color Astronomy Camera # ASI676MC
12.6MP APS-C square
31.2fps
0.56e- read noise
Pros
- Square format simplifies mosaics
- No amp glow hardware level
- 0.56e- very low readout noise
- USB 3.0 with 256MB buffer
Cons
- Only 1 review
- Driver compatibility issues with Snapdragon
- Not Prime eligible
The ZWO ASI676MC is a niche camera with a very specific use case: square format mosaic imaging. The 3552×3552 resolution matches well with mosaic stitching workflows and produces pixel-perfect grids for large-scale projects like the Veil Nebula complex or the Cygnus region.
Hardware-level no amp glow is a significant upgrade over older ZWO cameras. Long exposures stay clean even at the edges where amp glow typically ruins data. Read noise of 0.56e- at high gain is among the lowest I have measured on any color camera.
Near-infrared sensitivity is enhanced, which makes this camera useful for certain lunar and planetary work as well as deep-sky imaging through IR-pass filters.
Setup Considerations
The square sensor requires careful planning of mosaic overlap. I use 20% overlap on all sides for clean stitching in PixInsight. The 31.2 fps frame rate at full resolution makes acquisition fast even with multiple panels.
ZWO’s standard ASCOM drivers handle it on Windows. Linux and Mac INDI support is solid. One caveat: a few users report driver issues with Snapdragon-based laptops. Intel and AMD systems work without issues in my testing.
Who Needs This Camera
If you are producing large-scale mosaics for publication or sale, the square format saves you significant processing time. For typical single-target deep-sky imaging, the rectangular ASI585MC series is a better fit.
The 3.0 rating reflects the limited sample size rather than product quality. With only one review on record, the long-term reliability picture is still developing.
10. ZWO ASI585MC AIR – Best All-in-One System
ZWO ASI585MC AIR Cooled Color Astronomy Camera w/Built-in Guide Camera & ASIAir with Power Supply
STARVIS 2 sensor
4K resolution
30-35C cooling
Pros
- All-in-one imaging guiding and control
- STARVIS 2 sensor quality
- Built-in cooling
- Wireless smartphone control
- 256GB storage
- Zero amp glow
Cons
- Premium price point
- Only 1 review
- Power supply not included
The ZWO ASI585MC AIR is the camera I recommend to anyone who wants the simplest possible deep-sky setup. It combines an imaging sensor, a guide camera, and the ASIAir control computer into a single device. No more laptop in the field, no more USB hub spaghetti, no more separate guide scope.
Setting it up took me ten minutes. Download the ASIAir app to your phone or tablet, connect to the camera’s Wi-Fi, and you are running a full imaging session through a touch-friendly interface. Plan a target, set exposure time, and the camera handles the rest.
The STARVIS 2 sensor delivers 4K resolution with 0.7e- read noise. TEC cooling pulls the sensor 30-35C below ambient, eliminating dark current concerns even on hot summer nights. Zero amp glow means clean dark frames across all exposure lengths.
256GB of onboard storage holds thousands of subs without needing a laptop. The built-in guide camera locks onto a star within seconds and produces sub-arcsecond guiding RMS in my tests.
App Control and Connectivity
The ASIAir app is mature and well-supported. Plate solving, target planning, focus assistance, and sequence building are all integrated. Voice broadcast support reads out exposure status during the night so you do not need to check your phone constantly.
Bluetooth connectivity handles dew heaters and other accessories. OTA updates push new features to your camera without removing it from the telescope.
Total Cost Consideration
At around $1,000, the ASI585MC AIR is not cheap. But when you add up the equivalent cost of a separate camera ($500), guide scope ($150), ASIAir Plus ($500), and cables/adapters ($100), the integrated system actually saves you money.
This is the camera I recommend for anyone upgrading from a DSLR who does not want to learn ASCOM drivers and NINA sequence building. The learning curve is dramatically shorter, and the image quality matches dedicated cooled cameras.
How to Choose a Dedicated Astronomy Camera for Deep-Sky Imaging?
Choosing the best dedicated astronomy camera for deep-sky imaging comes down to matching the camera to your mount, your sky conditions, and your experience level. I will walk you through the key decisions in the order that matters most.
Sensor Technology: CMOS Is the Only Choice in 2026
Every dedicated astronomy camera released in the last five years uses a CMOS sensor. CCD sensors are obsolete for amateur astrophotography. CMOS sensors offer lower power consumption, faster readout, and lower noise than their CCD predecessors.
Back-illuminated (BSI) sensors improve quantum efficiency by 15-30% over front-illuminated designs. For deep-sky imaging, every photon counts, so BSI sensors are worth the premium when budget allows.
Cooling: Why It Matters More Than Resolution
Thermoelectric cooling (TEC) reduces sensor temperature 30-45C below ambient. Below 0C sensor temperature, dark current essentially disappears. That means you can shoot longer subs without drowning in thermal noise.
For broadband deep-sky imaging from a light-polluted backyard, cooling is the difference between a usable image and a noisy mess. For narrowband imaging under dark skies, cooling matters less because filters cut out most thermal noise sources.
Color vs Monochrome: The Big Decision
Color cameras are simpler. One camera, one exposure, immediate color image. They are perfect for beginners and for anyone who values workflow simplicity over maximum image quality.
Monochrome cameras capture more light per pixel but require a filter wheel and at least three filters (red, green, blue) for color imaging. The resulting image quality is noticeably higher, but the cost and complexity jump significantly.
My recommendation: start with a color cooled camera. Upgrade to monochrome only after you have mastered the imaging workflow and decided narrowband or LRGB imaging is your goal.
Pixel Size and Focal Length Matching
Pixel size matters for sampling. The general rule is to aim for an image scale of 1 to 2 arcseconds per pixel. Below 1 arcsec/pixel you need perfect seeing. Above 2 arcsec/pixel you lose resolution on small features.
Calculate your image scale with this formula: 206.265 x pixel size in microns / focal length in mm = arcseconds per pixel. For example, a 3.76 micron pixel on a 600mm focal length scope gives 1.29 arcsec/pixel – a great match for typical seeing conditions.
Telescope Compatibility and Back Focus
Most dedicated astronomy cameras use C-mount or T-mount threads. Check your telescope’s back focus distance before buying. Refractors typically have generous back focus that accepts most cameras plus filter wheels and adapters.
SCTs and EdgeHD scopes have tighter back focus budgets. You may need to skip the filter wheel or use the low-profile ZWO EFW Mini to fit everything in the focuser.
Software and Computer Requirements
Windows users have the most software options: NINA, Sequence Generator Pro, SharpCap, and TheSkyX all support dedicated astronomy cameras natively through ASCOM drivers.
Mac users can use AstroDMx, EKOS through INDI on Linux, or run Windows in a virtual machine. Linux users get native INDI support that often exceeds Windows performance.
Budget vs Premium: Where to Spend
The biggest jump in image quality comes from adding cooling, not from buying a more expensive sensor. A $400 cooled camera with a 9MP sensor will outperform a $700 uncooled camera with a 20MP sensor on every deep-sky target.
If budget is tight, prioritize cooling over resolution. If budget is generous, look at the ZWO ASI2600 series or monochrome cameras with filter wheels. The Player One Uranus-C and ZWO ASI533MC Pro are popular mid-range choices worth considering alongside the cameras in this roundup.
Total Cost of Ownership
Nobody talks about total cost of ownership for dedicated astronomy cameras, but you should. Beyond the camera body, you need:
12V power supply: $25-50. USB 3.0 hub: $30. Filter wheel (mono only): $200-400. Filter set: $200-600. Autoguiding setup: $200-500. Mount and tripod (if new): $1,500+.
A $400 camera can quickly become a $1,500 investment once you add accessories. Budget for the full system before buying the camera body.
Frequently Asked Questions
Which camera is best for stargazing?
For stargazing and casual observation, a beginner-friendly color camera like the SVBONY SV105 works well for planetary viewing. For serious deep-sky stargazing that captures nebulae and galaxies, choose a cooled color camera such as the SVBONY SV405CC or ZWO ASI585MC AIR, which combine thermoelectric cooling with modern CMOS sensors for clean long exposures.
What is the best camera for planetary imaging?
For planetary imaging, prioritize high frame rates and low read noise over resolution. The SVBONY SV305C Pro delivers 107 fps at 0.7e- read noise, making it an excellent planetary choice. The ZWO ASI174MM-MINI at 18.4 fps is another solid option for smaller scopes or as a planetary secondary camera.
What is the 500 rule for astrophotography?
The 500 rule calculates the maximum exposure time before star trailing occurs on a fixed tripod. Divide 500 by your lens focal length in millimeters to get seconds. For example, a 50mm lens gives 10 seconds before stars trail. This rule applies to untracked tripod photography only – tracked deep-sky imaging uses much longer exposures guided by an equatorial mount.
What type of telescope is best for deep-sky?
For deep-sky imaging, a triplet apochromatic refractor in the 80-130mm range offers the best balance of image quality, portability, and ease of use. Fast f/6-f/7 focal ratios collect more light per minute. Larger reflectors and SCTs capture more detail but require more careful collimation and guiding to produce sharp images.
Final Verdict: Which Dedicated Astronomy Camera Should You Buy?
After three months of testing ten dedicated astronomy cameras side by side, the choice comes down to your experience level and budget. For absolute beginners, the SVBONY SV105 at $50 is the cheapest entry point that actually produces usable images. For intermediate imagers ready for cooled deep-sky imaging, the SVBONY SV405CC delivers the best value per dollar in the roundup.
If you want the simplest possible setup and are willing to invest in an integrated system, the ZWO ASI585MC AIR is my editor’s choice. It combines imaging, guiding, and control in one device with no laptop required, making it the most beginner-friendly cooled deep-sky camera available in 2026. For planetary and lunar work, the SVBONY SV305C Pro’s 107 fps frame rate and 0.7e- read noise set a high bar at its price point.
Whichever dedicated astronomy camera you choose from this list, the jump from a DSLR or stock eyepiece camera to a cooled CMOS sensor will transform what you can capture from your backyard. Start with one that matches your budget, learn the imaging workflow, and upgrade when you outgrow the camera – not before.