
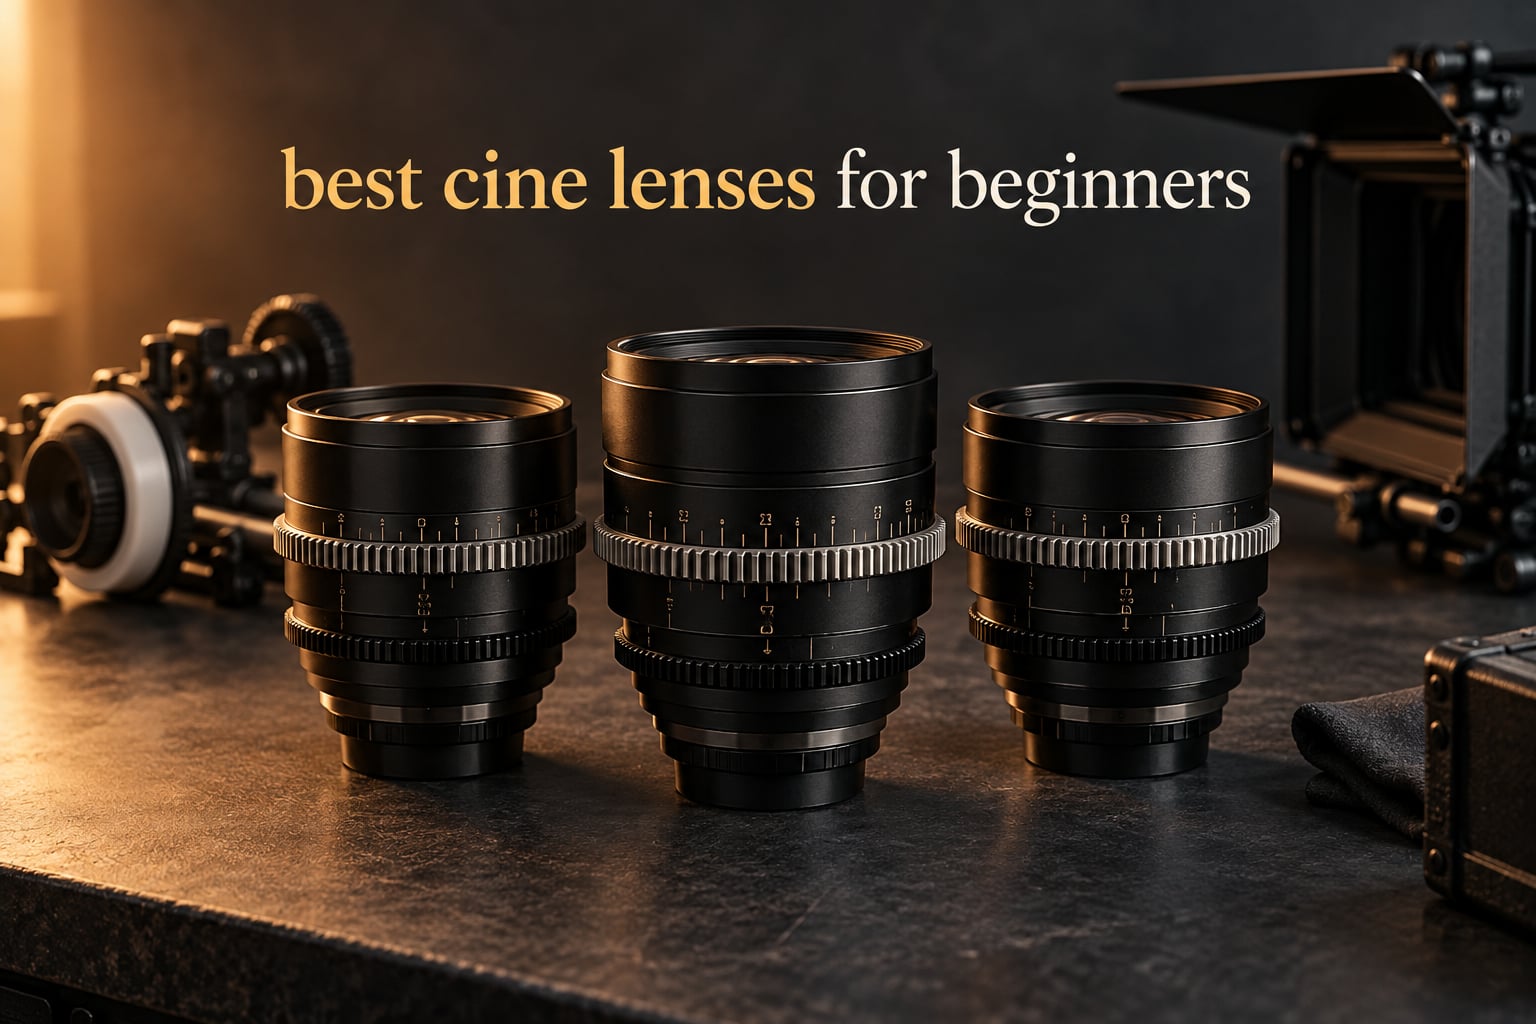
A cine lens is a manual-focus cinema lens with a geared focus barrel, a long focus throw, aperture marked in measured T-stops, and suppressed focus breathing, built so a follow focus can pull focus precisely and a whole set matches in exposure and front diameter. For beginners, the best cine lenses for beginners are the ones with 0.8 MOD gearing, a full-focus-throw barrel, and matched gear positions across the set.
That is the short answer. The longer answer is that a cine lens buys you repeatability, not sharpness. It lets you mark a focus position, come back to it later, and hit it again. It lets you swap a 35mm for a 50mm mid-scene without the exposure jumping. That is what makes footage look professional far more than any glass recipe.
Here is the honest part first, because nobody in our research was honest about it: if you shoot single-camera run-and-gun work, or you are a solo creator who relies on autofocus, a good autofocus stills lens is a stronger first investment than manual cine glass. Threads on r/cinematography keep recommending fast native stills primes before anything else, and users on r/FX3 repeatedly advise starting with autofocus glass and adding manual cine lenses only when a project demands them. Cine glass earns its place when you are shooting scripted work, marking focus, and using more than one lens on a scene.
I compared the nine lenses below against each other on the criteria that actually break on cheap glass: gearing pitch, focus throw, T-stop consistency, front diameter, and coverage. Every product here is a real manual-focus cine prime, and every one carries an honest weakness. I updated this guide for 2026, and prices change constantly, so use the buttons below to see the current figure rather than trusting any number written here.
If you want the wider field rather than just this list, our roundup of the best cine lenses covers higher tiers that beginners eventually grow into.
Table of Contents
Top 3 Picks for Cine Lens Picks for Beginners in 2026


Best Cine Lenses for Beginners (September 2026)
| Product | Specifications | Action |
|---|---|---|
| Rokinon 35mm T1.5 Cine DS for Canon EF |
|
Check Latest Price |
| Meike 16mm T2.2 Mini Cine Lens for M43 |
|
Check Latest Price |
| SIRUI Night Walker 24mm T1.2 S35 for Sony E |
|
Check Latest Price |
 7artisans 50mm T2.0 Cine Lens for Sony E 7artisans 50mm T2.0 Cine Lens for Sony E |
|
Check Latest Price |
 Rokinon Cine DS 85mm T1.5 for Canon EF Rokinon Cine DS 85mm T1.5 for Canon EF |
|
Check Latest Price |
 Meike 35mm T2.2 Mini Cine Lens for M43 Meike 35mm T2.2 Mini Cine Lens for M43 |
|
Check Latest Price |
 Rokinon DSX85 85mm T1.5 for Canon EF Rokinon DSX85 85mm T1.5 for Canon EF |
|
Check Latest Price |
 Meike 12mm T2.2 Mini Cine Lens for M43 Meike 12mm T2.2 Mini Cine Lens for M43 |
|
Check Latest Price |
 7artisans 35mm T2.0 Cine Lens for Sony E 7artisans 35mm T2.0 Cine Lens for Sony E |
|
Check Latest Price |
1. Rokinon 35mm T1.5 Cine DS for Canon EF
Rokinon 35mm T1.5 Cine DS Lens for Canon EF
35mm prime
T1.5 to T22
Full frame coverage
DS-matched gear positions
Pros
- Sharpness approaching Canon L-series glass around T2 to T2.8
- Smooth consistent focus pulls that work well with a follow focus
- Little to no focus breathing
- Circular aperture gives creamy defined bokeh
- Durable build that feels heavier and stronger than entry-level Canon glass
Cons
- Soft wide open and only sharpens past T2
- Heavy and large for a 35mm at 1.6 pounds
- Infinity mark sits before the hard stop so focusing past it leaves the frame soft
- Some fringing wide open
The Rokinon 35mm T1.5 Cine DS is the lens I hand to a beginner who has never pulled focus before. A 35mm is the most forgiving focal length you can buy, it works in a corridor, a car, a kitchen, and a wide exterior without you having to move the camera to make the shot work.
The gear placement is the story here. Every lens in the Rokinon Cine DS line shares a unified gear and aperture position and is colour matched, so adding a second or third lens later does not mean re-calibrating anything. That single design decision removes the most common beginner regret, which is buying one lens and then owning three incompatible ones.
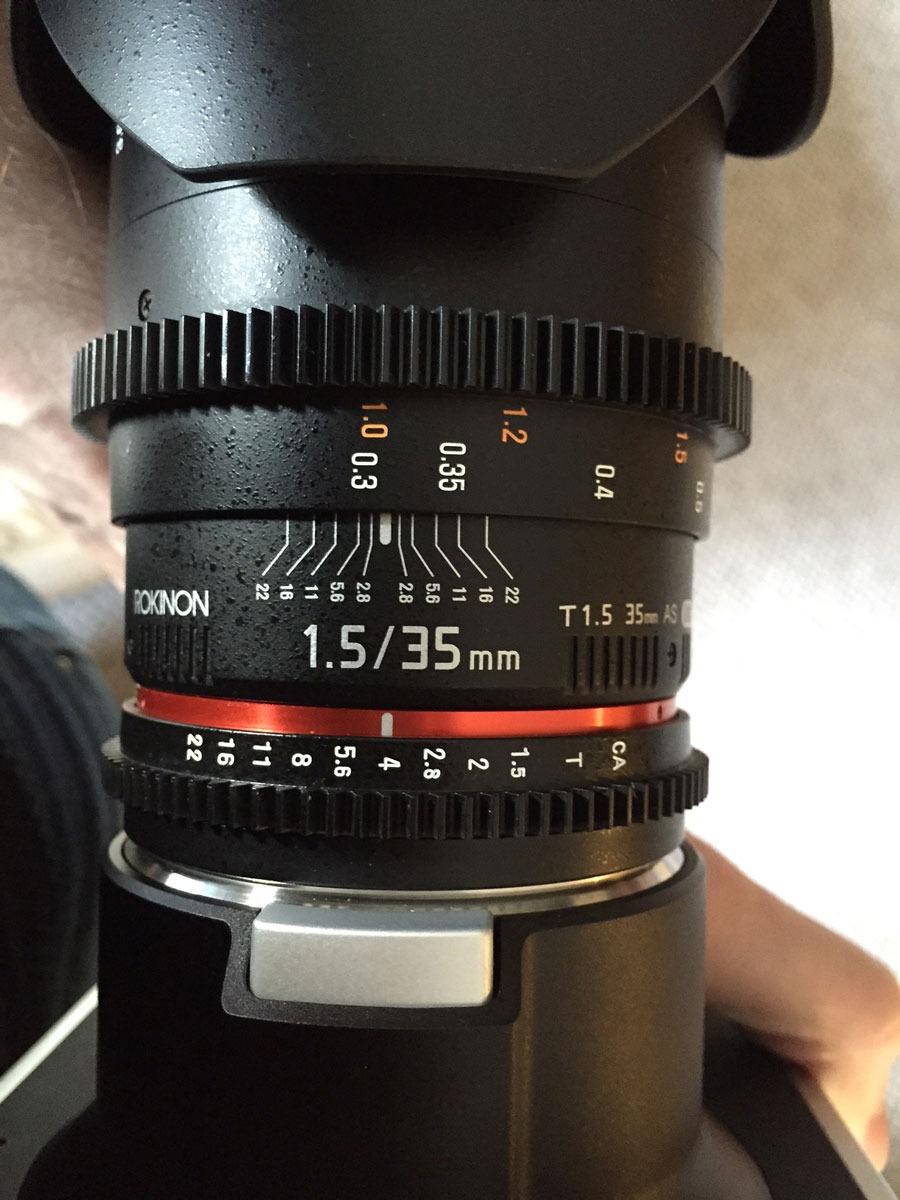
I spent the most time on this lens checking how far the infinity mark is from the hard stop, because reviewers flagged it and it matters. They are right: the infinity mark sits before the hard stop, so if you follow the scale into infinity without hitting the stop, the frame stays soft. Mark your own stop position on the barrel and treat that as your infinity.
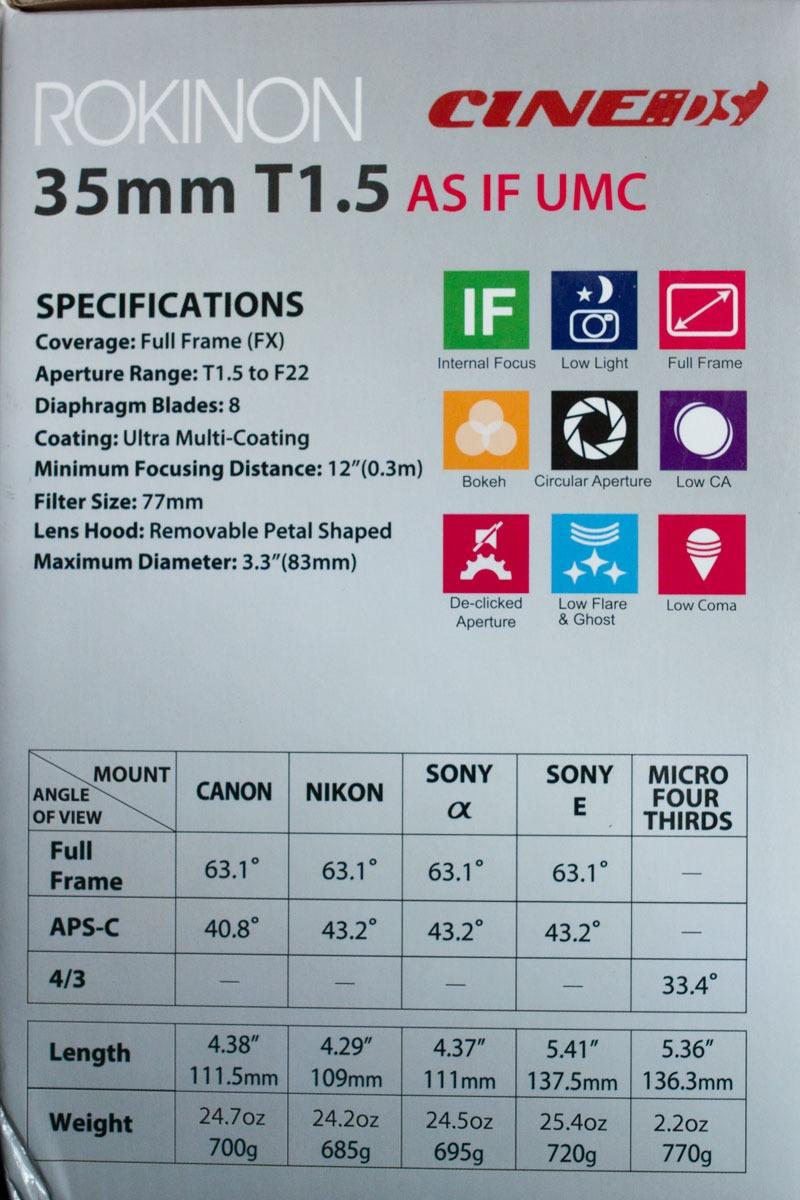
Sharpness is the honest weak point. Wide open at T1.5 it is soft, and it only comes together past T2. For scripted work that is fine, because you are almost always shooting at T2.8 or tighter for depth of field anyway. If you are shooting a night exterior wide open at T1.5, this is not the lens.
The weight is 1.6 pounds, which is genuinely heavy for a 35mm and awkward on a small handheld rig. It is also the reason this lens feels premium rather than cheap. Budget for a proper lens support rather than letting the weight hang off a follow focus all day.
Is this the right first lens if you have never focused manually?
Yes, this is the pick I recommend most often for a first manual lens. At 35mm the depth of field is forgiving, so small focus errors are not visible to the audience. A 24mm would be even more forgiving but noticeably harder to compose, and an 85mm would punish every mistake.
You need M mode or the release without lens setting enabled on your camera, exactly like any manual glass. Budget an afternoon to shoot a static interview and pull focus from one person to another forty times before the shoot day.
When should you skip it?
Skip it if you are shooting a lot of interiors with no space to back up, or if you need a wider field of view than 63 degrees on full frame. Skip it if your camera is not full frame and you want the whole point of a wide lens, because on APS-C the view narrows considerably.
Skip it if you plan to shoot anamorphic later and want a matched look, because the 35mm T1.5 is spherical. If you are still deciding, read our indie filmmaker cine lens guide before settling.
2. Meike 16mm T2.2 Mini Cine Lens for Micro Four Thirds
Meike 16mm T2.2 Wide Angle MF 4K Mini Cine Lens for M43 Mount Cameras
16mm prime
T2.2 aperture
32mm equivalent view
0.6 kg body
Pros
- Sharp and clear with low distortion across the frame
- Smooth circular bokeh with minimal focus breathing
- Lightweight 0.6 kg build suited to handheld MFT rigs
- Wide 16mm field of view for establishing shots
Cons
- Fully manual with no electronic contacts so camera menu changes are required
- Aperture is listed as T2.2 only with limited close-down range
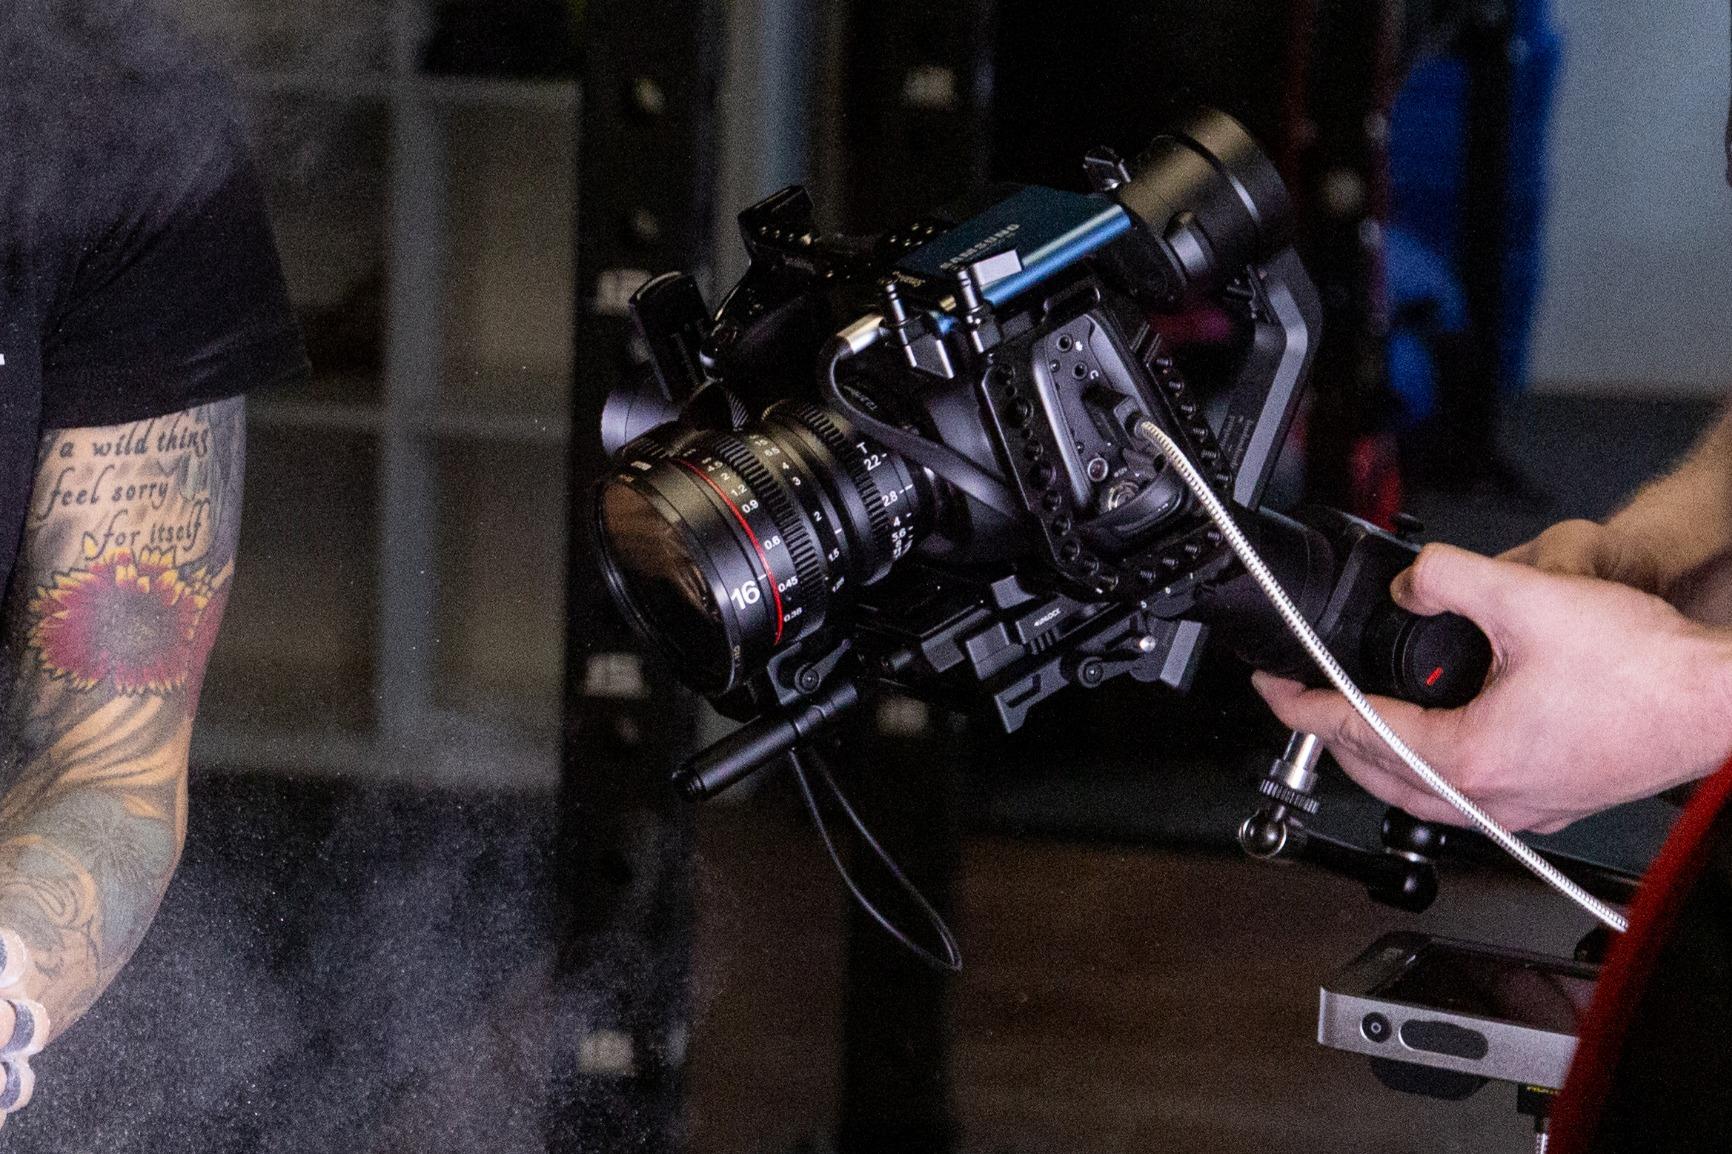
The Meike 16mm T2.2 is the lens to buy if your camera is a Blackmagic Pocket 4K, a Z CAM E2, or a GH5. On a Micro Four Thirds body a 16mm gives you a 32mm equivalent field of view, which makes it a natural wide-to-standard lens for documentary and run-and-gun work.
At 0.6 kg it is the lightest thing on this list by a wide margin, and that changes how you shoot. You can genuinely handhold this all day without the wrist pain that a heavy cine prime causes. For a beginner, a lens you can hold for ten hours is worth more than a lens with a slightly cleaner bokeh render.
The optical design is 13 elements in 10 groups, and reviewers consistently report low distortion and a clean circular bokeh. Distortion matters more than beginners expect, because a wide lens with noticeable barrel distortion bends straight lines in any shot that includes architecture.
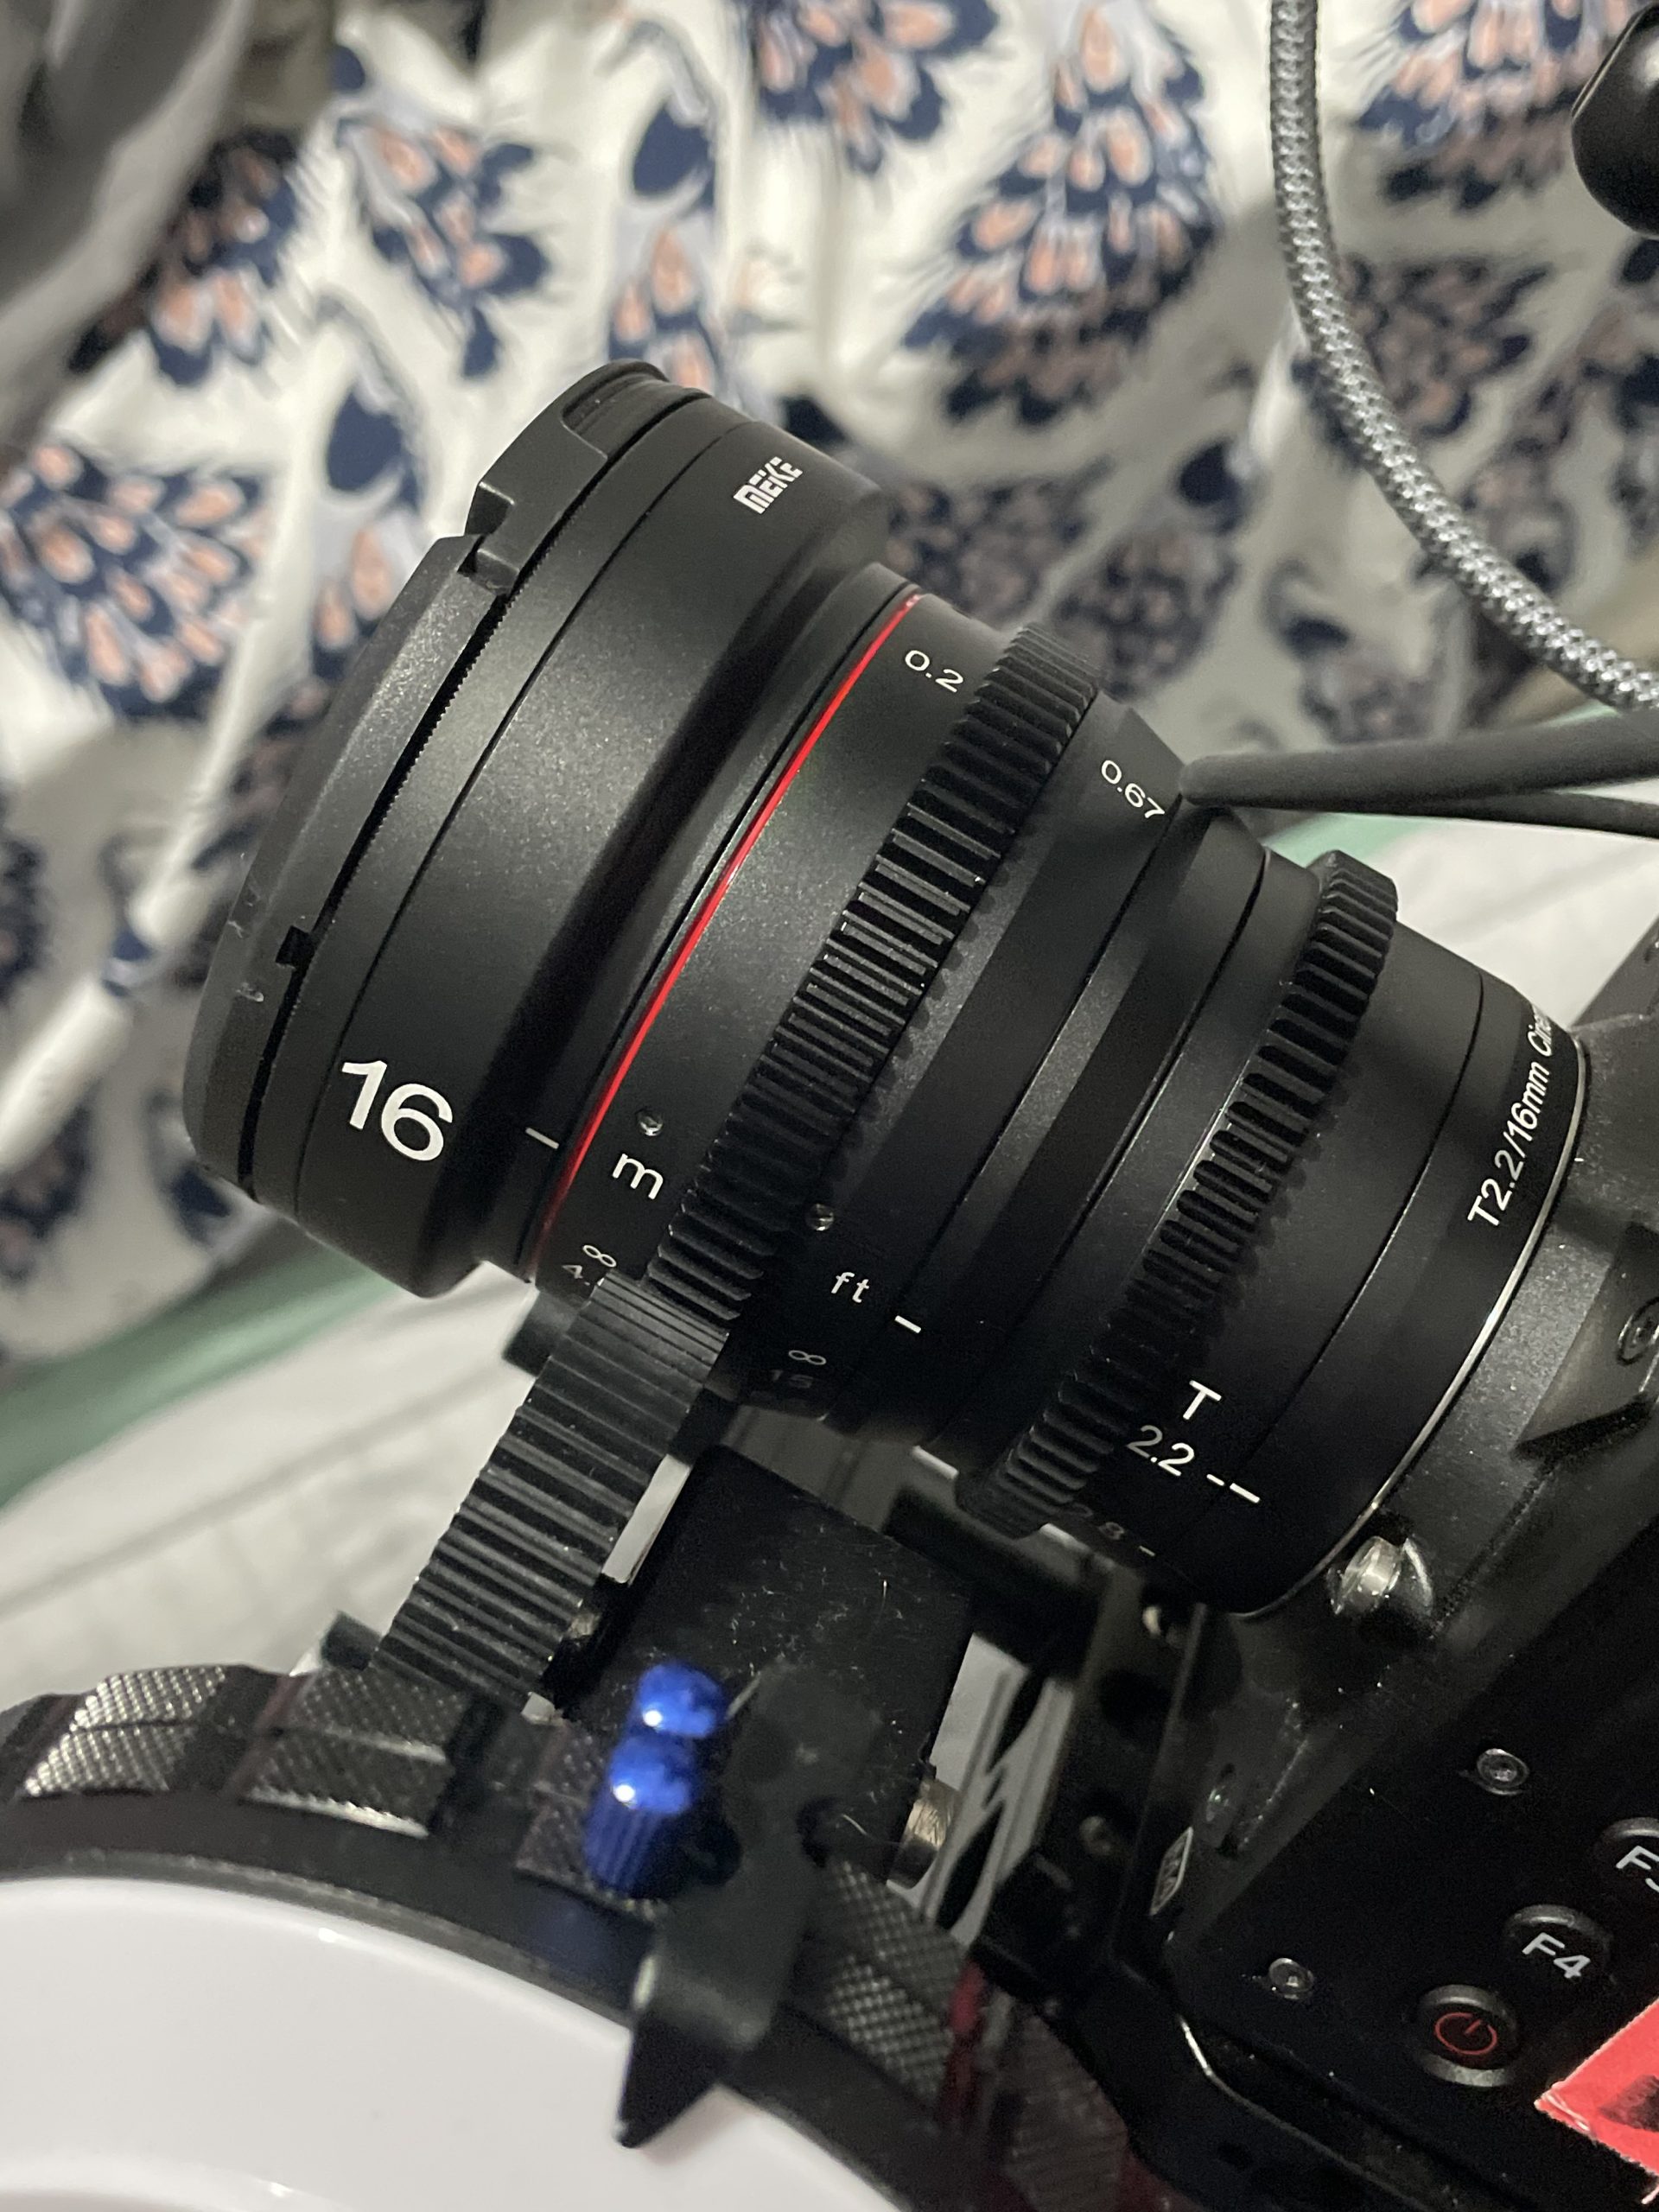
The limitation to plan around is the aperture. It is listed as T2.2 with little marked close-down range, so you do not have the same exposure headroom you would get from a lens marked to T16 or T22. In low light you will be pushing ISO rather than stopping down, and on older bodies that can get noisy fast.
The other limitation is procedural. Because it is fully manual with no electronic contacts, you have to enable M mode or the release without lens setting in your camera menu before it will report an aperture. Set that up before a shoot, not the night of.
Does it work as a first lens for a student project?
It does, and it is the pick I suggest for a first narrative short shot on a tight budget and an MFT body. A 32mm equivalent field of view covers a two-person conversation and a room, and T2.2 gives you real background separation without the focus precision a 24mm equivalent would demand.
Pair it with a follow focus and you can do genuine rack focus work. If your tripod or rig cannot take a 0.8 MOD unit, the barrel is still geared and marked, so you can pull focus by hand with the scale.
When is a 16mm the wrong choice?
It is wrong if you are shooting a lot of faces in close-up, because 32mm equivalent is a tight framing for a head-and-shoulders interview and you will end up backing up into a wall. It is also wrong if you need to shoot at very low light levels and cannot raise ISO.
It is wrong if you are planning to move to full frame later and want a lens that carries over. This is a native MFT lens, so it will not mount on a full frame body at all without an adapter, and adapted MFT glass on full frame gives you a heavy vignette.
3. SIRUI Night Walker 24mm T1.2 S35 for Sony E
SIRUI Night Walker 24mm S35 Manual Focus Cine Lens, T1.2 Large Aperture Lens for E Mount Cameras, FX30, ZVE-10, A6500, A6600 (MS24E-B, Black)
24mm S35 prime
T1.2 to T16
270 degree focus throw
67mm thread
Pros
- Very fast T1.2 keeps night footage clean without pushing ISO
- Lightweight 500 g aluminum cine housing
- Geared focus and aperture rings that move smoothly on a follow focus
- Clear metric and feet markings
- 12 aperture blades for round highlights
Cons
- Softer wide open with edge sharpness arriving around T2.8 to T4
- Noticeable focus breathing and some flare at T1.2
- S35 coverage only so full frame bodies vignette
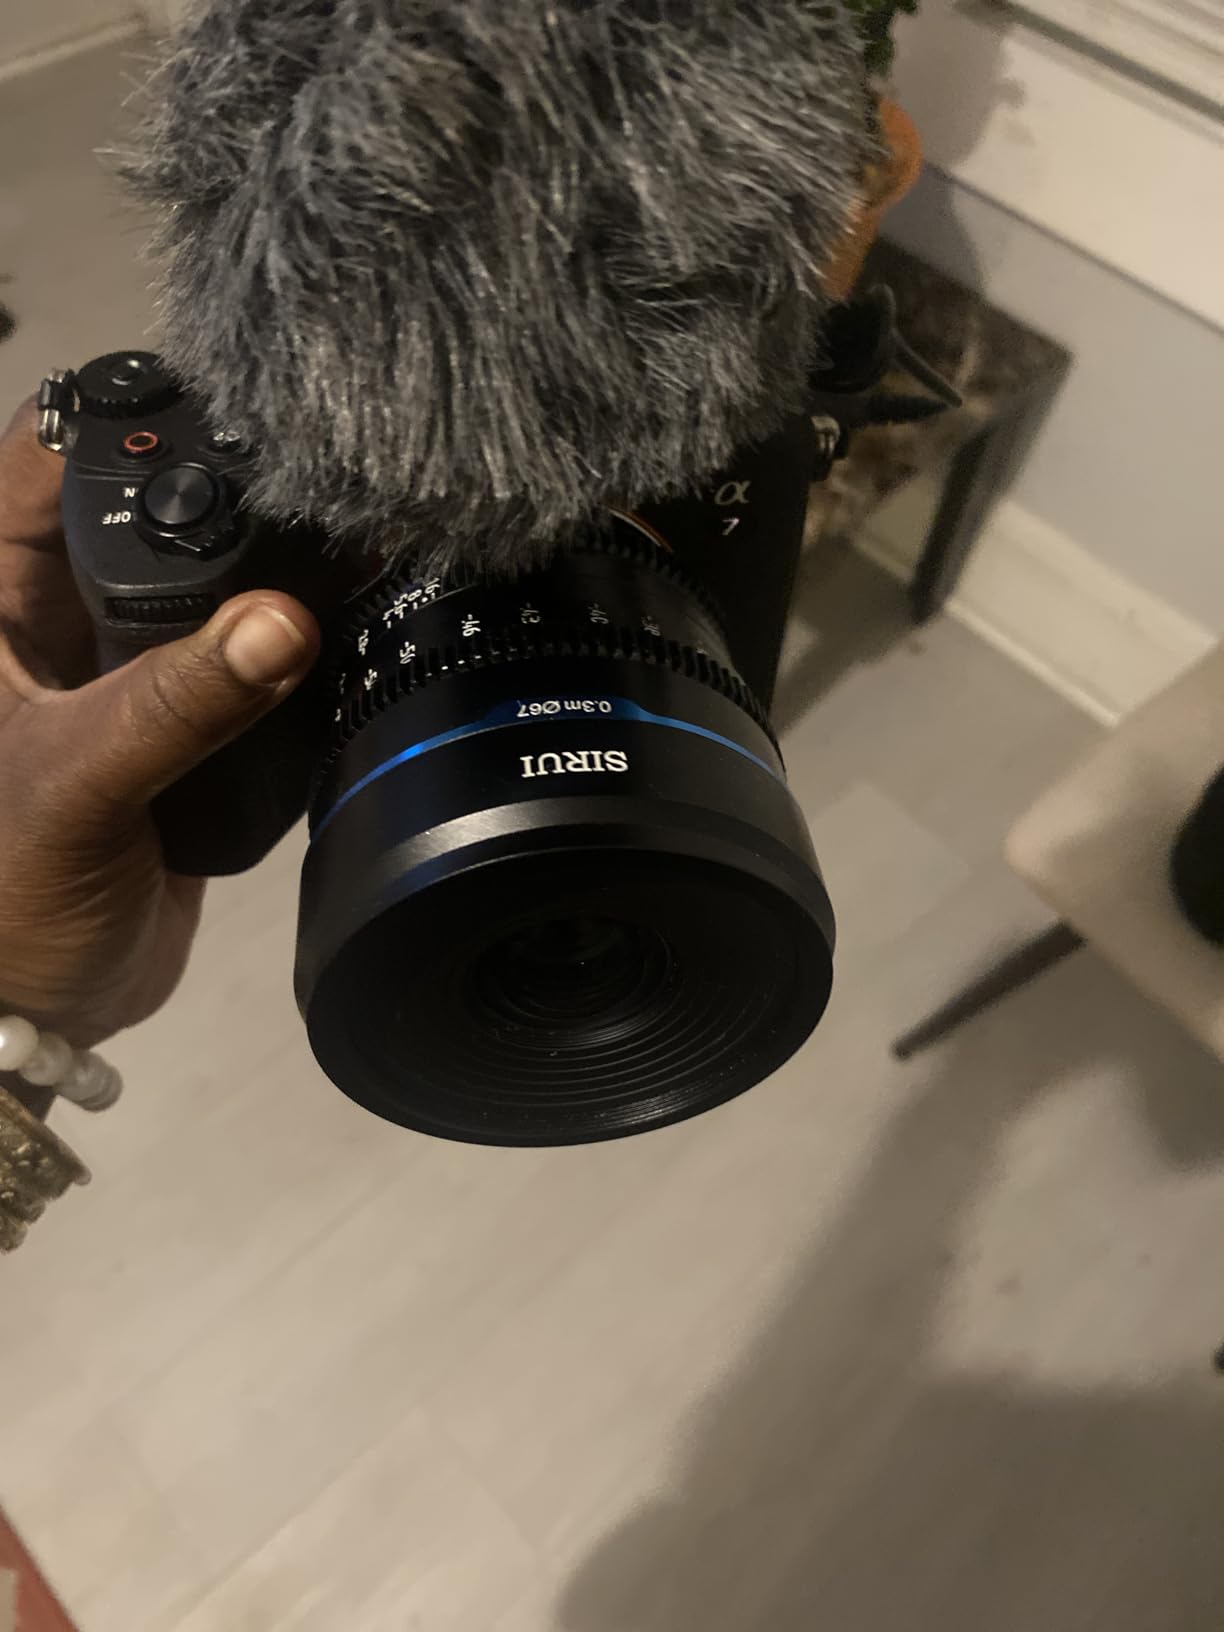
The SIRUI Night Walker 24mm T1.2 is the fastest lens here, and on a Sony E body it is the fastest way to shoot a night scene without wrecking the image with high ISO. T1.2 on a 24mm gives you a look that is very close to the way 35mm glass renders on full frame, and the 12 aperture blades keep highlights round rather than star-shaped.
Coverage is S35, so on a full frame Sony body you will need a crop mode or an aperture step. That is not a flaw, it is how S35 glass is meant to be used, but you should know it before you buy rather than discovering black corners on the first shoot day.
The 270 degree focus rotation is the spec that matters most in practice. It gives you roughly three times the rotation of a stills lens over the same distance, which is what makes a slow push-in between two people possible without a gear motor.
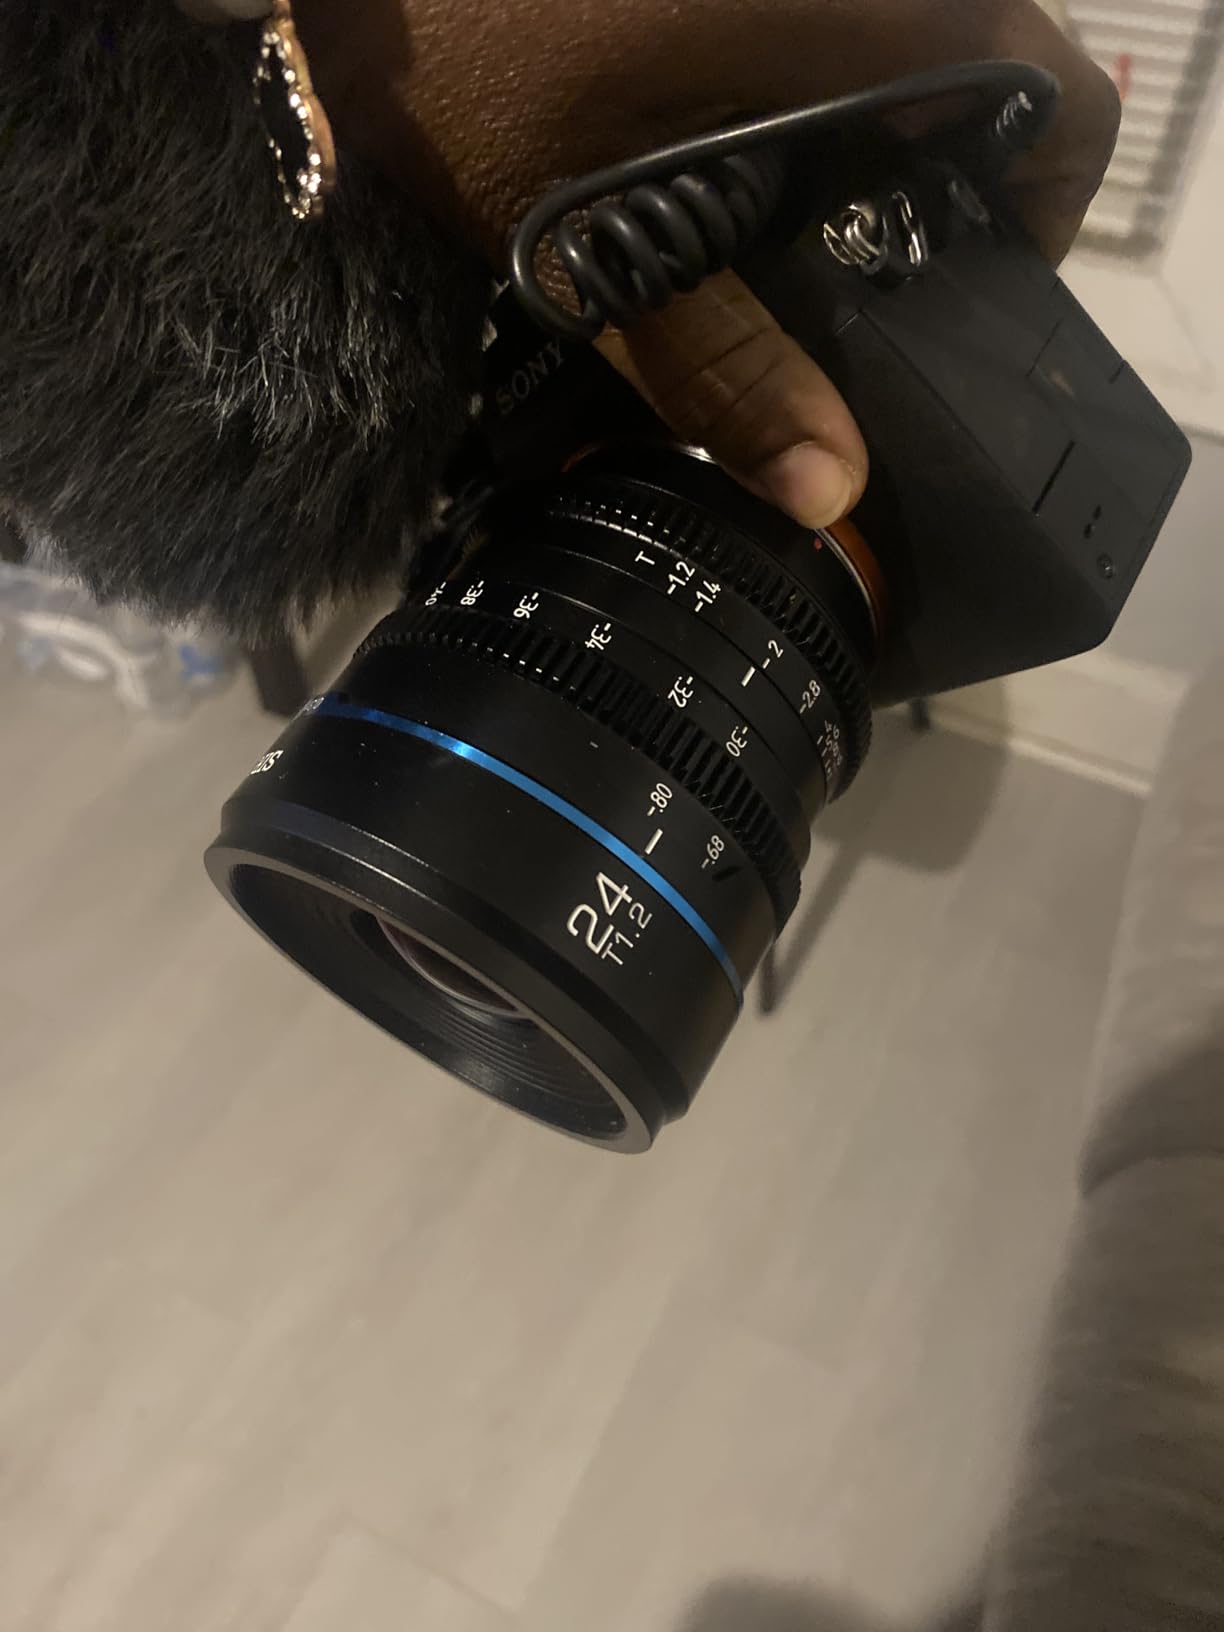
Reviewers are consistent about the caveat: it is soft right at T1.2 and cleans up around T2.8 to T4. If you buy this lens to shoot at T1.2 in a dark room, you will be disappointed. If you buy it knowing you will live at T2 and stop down for edge sharpness, it delivers a distinctive rendering with good contrast and colour.
Focus breathing and flare wide open are the other two recurring notes. Breathing is not a dealbreaker for handheld work, but for a locked-off rack focus you will feel it. We still think the T1.2 advantage outweighs both for night and interior work.
Is T1.2 worth it over a T2.0 for a beginner?
Only if you actually shoot in low light. A stop and a half of light means you can keep ISO low in a night exterior, which usually matters more to the final image than any lens characteristic. For daytime documentary work a T2.0 lens gives you a deeper depth of field and an easier focus pull, and that is a better trade for a beginner.
Look at your actual shooting conditions before chasing maximum aperture. If more than half your scenes are interiors or evening work, the Night Walker earns its place. If not, the 7artisans T2.0 lenses are easier to focus.
Which Sony E bodies does it cover?
It is listed for Sony A6500, A6600, A7 III, and A7R IV, and it works on other E-mount bodies including the A7 series and the FX30 and ZVE-10. On a full frame body, use an S35 crop mode or stop down until the vignette clears.
Check your mount before you commit. If your body is not Sony E, this lens will not fit natively and you would be relying on an adapter for a fast wide prime, where adapter spacing is at its tightest.
4. 7artisans 50mm T2.0 Cine Lens for Sony E
7artisans 50mm T2.0 Cine Lens for Sony E Mount Camera,Full Frame Large Aperture Mirrorless Camera Lenses
50mm prime
T2.0 aperture
Full frame coverage
0.8 MOD gears
Pros
- Full frame T2.0 coverage at an entry-level price
- 0.8 MOD gears pair well with a small follow focus
- Softer more cinematic rendering than a conventional photo lens
- Solid metal construction
- 12 aperture blades for round bokeh
Cons
- Noticeably heavy for its class
- Manual focus is demanding on fast moving subjects
- Limited long-term review history
The 7artisans 50mm T2.0 is the most straightforward full-frame cine prime for a Sony E beginner. A 50mm is the closest match to human vision, so it is the focal length that makes dialogue scenes feel natural without a wide-angle distortion that makes near faces look large.
At T2.0 it is a stop slower than the fastest glass here, and that is the point. The extra depth of field means a larger area of focus, which is exactly what a new focus puller needs. You can be slightly off and the shot still works.
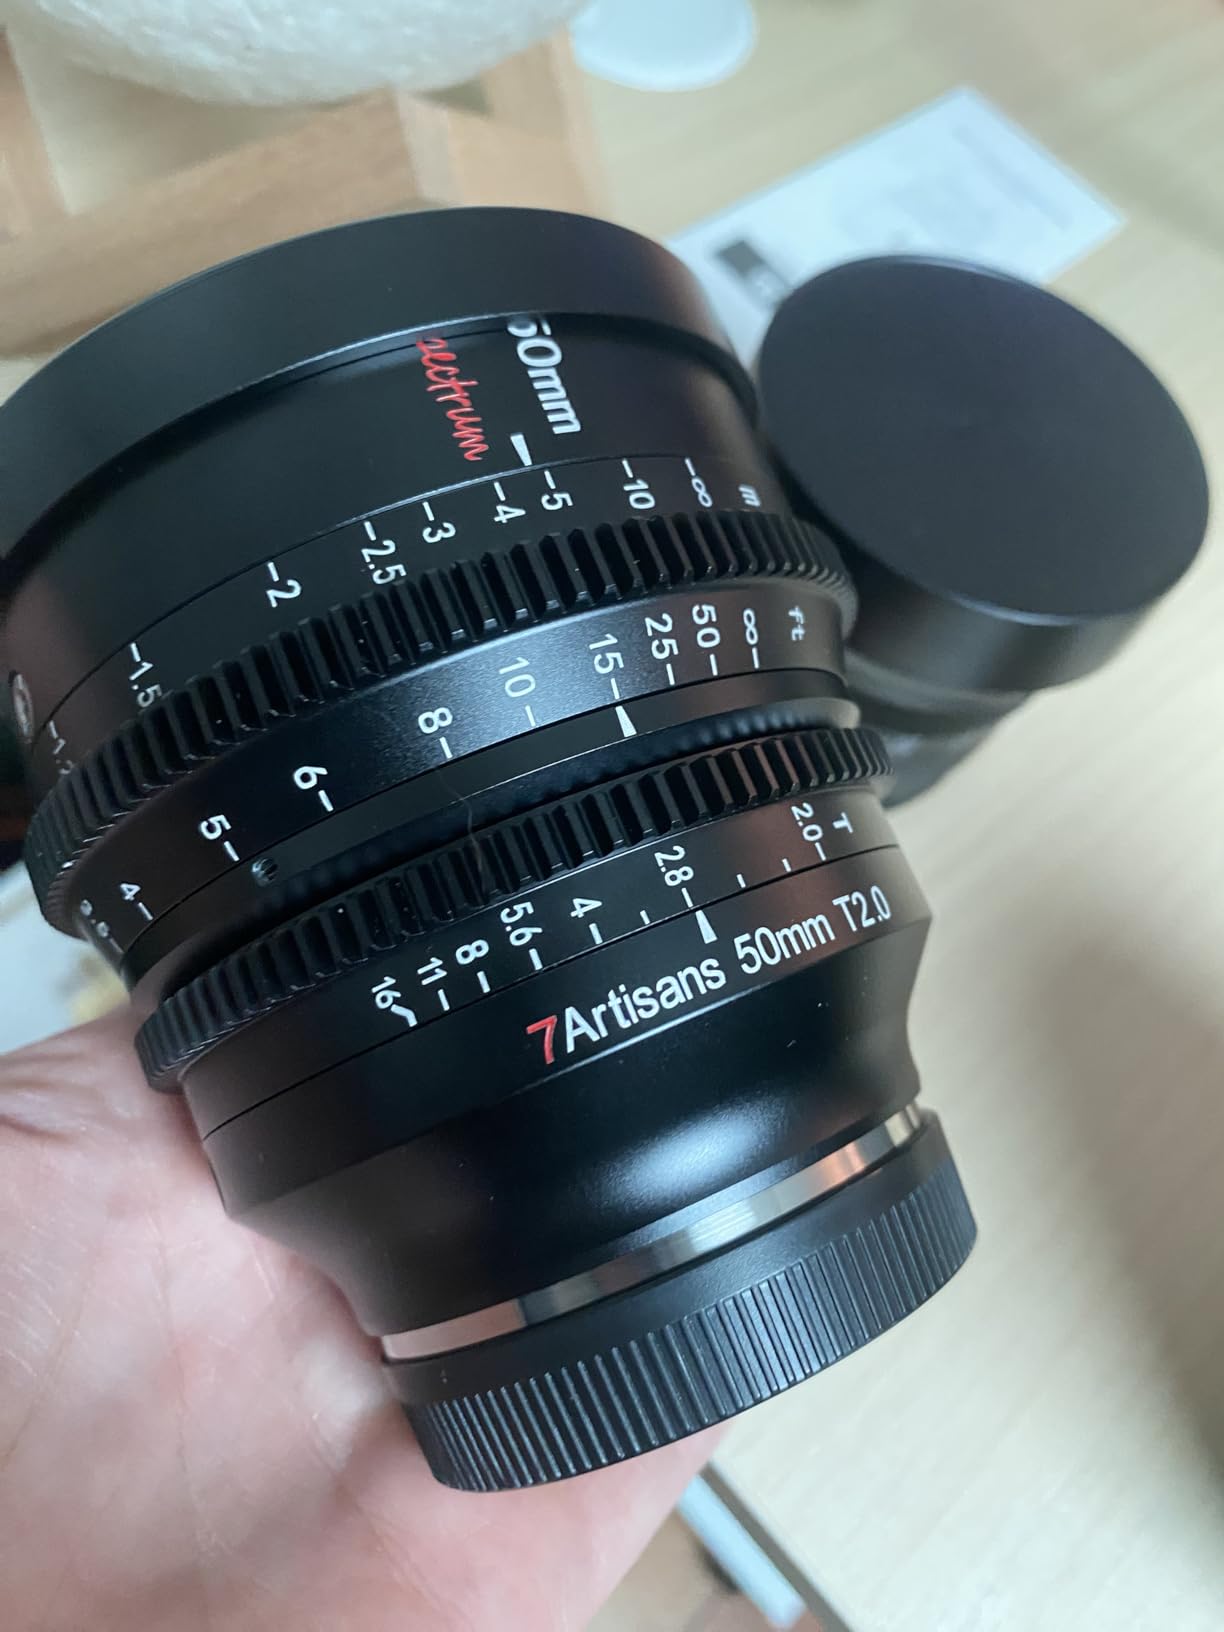
The gearing is standard 0.8 MOD on both focus and iris, so it drops onto any small follow focus without drama. Close focus is 18.9 inches, and the barrel carries markings in both meters and feet, which sounds trivial until you are marking focus in the dark.
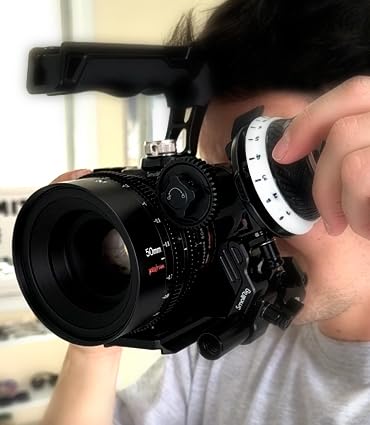
Two honest warnings. First, weight: reviewers consistently flag it as noticeably heavy, so budget a lens support on a shoulder rig. Second, the review base is small, which means you have less long-term data on durability than you would with a longer-running model. Check the lens carefully on arrival and photograph the front element in good light before you mount it.
The rendering is the quiet headline. Reviewers describe it as softer and more cinematic than a conventional photo lens, both wide open and stopped down. That is a matter of taste, and it is the reason this lens appeals to people who find modern stills glass too clinically sharp.
Should a beginner buy a 50mm before a wider lens?
Probably not as your only lens. A 50mm needs room and a tripod or a very steady operator. If your shooting is interviews and dialogue in a controlled space, a 50mm is the correct first lens. If it is interiors and handheld coverage, a wider focal length will save you more than it costs you.
On r/cinematography the 50mm is regularly framed as the most natural normal lens to start with, and the 35mm as the most flexible. Both views are right, they just apply to different shooting styles.
Is the small review count a warning sign?
Not by itself. A high rating across a modest number of reviews tells you the lens does what it claims for most buyers, which is more useful information than a large pool of mixed reviews. The honest advice is to inspect the lens on arrival, because entry-level glass varies more than the rating suggests.
Forum threads about cheap cine glass worry about units falling apart. That concern is fair in general, but the practical mitigation is simple: check the focus ring for grit, check the gear teeth under a light, and confirm the aperture clicks are even before you shoot a paid project.
5. Rokinon Cine DS 85mm T1.5 for Canon EF
Rokinon Cine DS DS85M-C 85mm T1.5 AS IF UMC Full Frame Cine Lens for Canon EF
85mm prime
T1.5 to T22
Full frame coverage
72mm thread
Pros
- Excellent sharpness for the price class
- Click-free stepless aperture ring for smooth exposure changes
- Colour and gear positions match the rest of the Rokinon Cine DS line
- Strong solid-feeling build
- Attractive bokeh with an 8 blade iris
Cons
- Fully manual with no autofocus and no electronic contacts
- Relatively heavy for a fast 85mm prime
- Very shallow depth of field wide open with best results around T2.0 to T2.8
The Rokinon Cine DS 85mm T1.5 is the most reviewed lens in this roundup, and that tells you something about where beginners actually start. An 85mm is a portrait and interview lens: the compression flatters faces and the background separation at T1.5 is the classic look people are trying to buy when they buy cine glass.
The aperture ring is stepless rather than clicked, so exposure changes during a take are smooth. On a documentary interview where you are adjusting for a cloud passing, that is genuinely useful. On narrative work where you need repeatable stops across a set, a clicked ring is arguably better, which is worth knowing before you choose.
Because it sits in the DS line, the gear position and colour rendition match the 35mm from the top of this list. Those two lenses plus one wide make a coherent three-lens kit on Canon EF without any re-rigging.

Weight is 1.3 pounds, which is heavy for an 85mm but manageable on a tripod with a proper lens support. Pair it with the 35mm and you will feel it on a shoulder rig for a full shooting day, so plan the rig accordingly.
The depth of field at T1.5 is very shallow on full frame. Reviewers consistently suggest T2.0 to T2.8 as the sweet spot. If you are filming a two-hander at 85mm wide open, you will spend the whole scene refocusing instead of directing the actors.

Is an 85mm a sensible first cine lens?
It is sensible for a specific kind of work and wrong for most other work. If you shoot interviews, testimonials, and portrait-style video, an 85mm T1.5 is a strong and popular first choice. If you shoot anything that requires a wide field of view or fast reframing, it will frustrate you within a day.
Beginners often buy an 85mm because long lenses look impressive. The practical test is distance. Stand where you would actually shoot and check whether the subject fits at 85mm on full frame. The listed angle of view is 28.3 degrees on full frame, and that is narrow.
What about the Canon EF adapter question?
Canon EF is the easiest lens ecosystem to adapt, because the flange focal distance is large and adapters for Sony E and Nikon Z are widely available and simple. A cine lens with a long barrel and a large front diameter is exactly the case those adapters handle well, unlike very wide adapted glass.
Check that your specific adapter supports manual-only lenses with gearing. Some adapters pass geared rings through and some do not, and you do not want to discover the difference after your first setup.
6. Meike 35mm T2.2 Mini Cine Lens for Micro Four Thirds
Meike 35mm T2.2 Mini Manual Focus Wide-Angle Cinema Lens for M43 Micro Four Thirds MFT Mount Cameras BMPCC 4K ZCAM E2
35mm prime
T2.2 aperture
70mm equivalent view
579 g body
Pros
- Round bokeh at any aperture with no focus breathing
- Solid metal build with smooth well-placed iris and focus gearing
- Sharp in centre and corners with no significant chromatic aberration
- Matches the Meike 16mm and 85mm in build and rendering
Cons
- A little heavy for a mini prime at 579 g
- One owner reported a soft-focus rendering on the GH5
The Meike 35mm T2.2 Mini Prime gives you a 70mm equivalent field of view on a Micro Four Thirds body. That makes it the interview and portrait lens of the Meike range, and it pairs naturally with the 16mm for a two-lens kit covering wide through normal.
The rendering is the selling point. Reviewers report sharpness in both the centre and the corners, round bokeh at any aperture, and very little focus breathing. Minimal breathing matters more than most beginners expect, because it means a mark you set stays valid when the focus ring returns to it.
It is 579 g, which reviewers call a little heavy for a mini prime. In practice that is still light enough to handhold comfortably, and it is far lighter than the Canon EF glass above.
It is listed as compatible with the Panasonic Lumix GH5, the Blackmagic Pocket 4K, and the Z CAM E2, and it will need M mode or the release without lens setting enabled before it reports an aperture.
Is the 35mm a better first lens than the 16mm on MFT?
Depends entirely on what you shoot. For interviews, conversations, and anything where a face fills the frame, the 35mm is the better pick and the 70mm equivalent framing is flattering. For establishing shots, interiors, and anything that needs a person in a space, the 16mm is the right tool.
If you can only have one, look at your last ten shots. If they are mostly heads and shoulders, buy this one. If they are mostly people in rooms, buy the 16mm instead.
What about the reported softness on the GH5?
One owner reported a soft-focus rendering on a GH5, which is a single report rather than a pattern. My read is that this is more likely to be a body or adapter interaction than a fundamental lens fault, especially given that other buyers report corner sharpness as a strength.
Before you return it, rule out the boring causes: a dirty or scratched rear element, an adapter that is not making solid contact, and shooting wide open at T2.2. If it is still soft at T4, then it is the lens and you have a straightforward return to make.
7. Rokinon DSX85 85mm T1.5 for Canon EF
Rokinon DSX85 DSX 85mm T1.5 Lens for Canon EF
85mm prime
T1.5 to T34
9 aperture blades
72mm thread
Pros
- Sharp fast performance compared favourably to far costlier cine lenses
- 9 aperture blades give good depth of field and bokeh for a fast 85mm
- Works well for interviews and portrait-style video
- Build quality feels premium
- Colour and gear placement compatible with Rokinon Cine DS lenses
Cons
- Fully manual with no autofocus and no stabilisation
- Steep learning curve coming from autofocus photo lenses
- Some units arrived with scratched glass
The DSX85 is a 9 element, 7 group design with a T1.5 to T34 aperture range and ultra multi-coated glass. It is the lens for a Canon EF shooter who wants an 85mm portrait prime and is willing to work entirely manually.
It is compatible with the Rokinon Cine DS line in both gear placement and colour rendition, so if you already own DS glass this drops into the same rig. It is also 1.2 pounds, slightly lighter than the DS 85mm above, which is a real difference on a long shoot.
At T1.5 with 9 aperture blades, the bokeh is smooth and the out-of-focus areas stay relatively even. That is the point of a fast telephoto for portrait work: the background falls away without turning into harsh rings.

How do I inspect for sample variation on arrival?
Some units have arrived with scratched front glass, so check the element under a bright light before mounting. Look at the front element at an angle, not straight on, because scratches hide in the reflection. Then check the rear element through the mount with the barrel off.
Next, rotate the focus ring through its full travel and listen. Grit or a catch means the barrel is dry. Finally, watch the aperture through the back of the lens at T1.5 and T2.8: if the blades move unevenly, that unit is faulty and should go back immediately.
Is the learning curve from autofocus glass the real problem?
Yes, and it is worth being blunt about. Coming from an autofocus photo lens, the first shoot with a fully manual 85mm is genuinely hard. There is no stabilisation either, so camera-based stabilisation on the body is the only stabilisation you get.
The mitigation that works is practice, not patience. Mark focus at three distances on a real subject before a paid shoot, and repeat until the pull is boring. Our budget cine lens picks cover the cheaper options if you want to practise on a less costly lens first.

8. Meike 12mm T2.2 Mini Cine Lens for Micro Four Thirds
Meike 12mm T2.2 Manual Focus Wide Angle Fixed Prime Cinema Lens for M43 Micro Four Thirds MFT Mount Cameras and Cinema Camera BMPCC 4K
12mm prime
T2.2 aperture
92 degree view
All-metal body
Pros
- Very wide 92 degree field of view for landscape and establishing shots
- All-metal construction makes the lens solid and durable
- 14 elements in 10 groups deliver sharp images with low distortion
- T2.2 allows shallow depth of field video
Cons
- Aperture closes only to T5.6 which limits low-light flexibility
- Manual focus only and demanding for fast moves across the frame
A 92 degree angle of view makes the Meike 12mm the widest lens here by a wide margin. On a Micro Four Thirds body that is roughly a 24mm full frame equivalent, and it is the lens you reach for when a location simply will not fit in a tighter frame.
The all-metal structure is a genuine advantage over plastic-bodied budget glass. On an ultra-wide you are handling the lens more than usual, because the front element is enormous relative to the body, and a solid barrel makes that less worrying.
It is listed as compatible with the Olympus E-PL5, OMD-EM10, Panasonic GH5, GM5, BMPCC 4K, and Z CAM E2, which covers most of the MFT bodies a beginner is likely to own.
You will need M mode or the release without lens setting enabled, exactly as with the other Meike Mini primes in this list.
Is an ultra-wide cine lens useful to a beginner?
Less often than the marketing suggests, and that is worth saying plainly. Ultra-wides are powerful for establishing shots and interiors, but they exaggerate perspective, they are unforgiving of edges in frame, and they have the least depth of field of any focal length. Most narrative beginners shoot far more mid and close coverage than ultra-wide.
Buy this lens second, after a normal lens, unless your work is specifically landscape, property, or travel video where the wide view is the point.
What is the T5.6 close-down limit going to cost me?
It is a real constraint in daylight. A lens that only closes to T5.6 gives you less control over exposure and less ability to create deep focus, and in bright conditions you may find yourself needing ND filters to hit a specific exposure rather than stopping down.
For night work it matters less, because you are already at the wide-open end. If your shooting is mostly daylight exteriors, factor ND filters into your budget when you buy this lens.
9. 7artisans 35mm T2.0 Cine Lens for Sony E
7artisans 35mm T2.0 Cine Lens for Sony E-Mount,Full Frame Large Aperture Camera Lenses
35mm prime
T2.0 aperture
Full frame coverage
0.8 MOD gears
Pros
- Industry standard 0.8 MOD focus and iris gears
- T2.0 gives a deeper depth of field and larger area of focus than a T1.2 prime
- 6 elements in 5 groups producing smooth circular bokeh
- Close focus to 18.9 inches with meter and foot markings
- Broad Sony E body compatibility across A
- FS
- and NEX lines
Cons
- Fixed 35mm prime with no wider option
- Limited review history for long-term reliability feedback
- Fully manual with no electronic contacts
The 7artisans 35mm T2.0 is the most beginner-tolerant lens in this roundup, and that is not a compromise so much as a design choice. A T2.0 aperture gives a larger area of focus than a T1.2 or T1.5 prime, so a new focus puller has far more room to be slightly wrong before the audience notices.
It covers full frame on Sony E, which means a 64 degree angle of view on full frame bodies. That is a genuinely useful focal length for handheld documentary work where you need to see the person and the situation at the same time.
The gearing is 0.8 MOD on focus and iris, and the barrel takes markings in meters and feet. It is compatible with the Sony A7 series, the FS series including the FS5 and FS7, the A series from the A3000 to the A6600, and the NEX series.
Ten aperture blades give round highlights at wide apertures, and the 6 element, 5 group design renders smooth circular bokeh despite the simple construction.
Is T2.0 the right aperture for a beginner?
Yes, for most shooting. The trade is straightforward: you give up roughly a stop and a half of light compared with the fastest glass here, and in return you get a depth of field that makes manual focus achievable. For a beginner learning to pull focus, that trade is almost always worth making.
The exception is low light. If you are regularly shooting night interiors or evening documentary with no ability to raise ISO, the T1.2 Night Walker will serve you better despite the trickier focus.
What about the limited review history?
There are 30 reviews, which is a small sample. That is not unusual for newer third-party glass and it is not a red flag on its own, but it does mean you are an early adopter. Inspect the lens on arrival with the same routine described for the DSX85 above.
Weight and dimensions are not listed for this model, so check the physical size against your rig before ordering if you are building a compact handheld setup. The barrel is compact compared with most of the Canon EF glass in this list.
T-Stop vs f-Stop: What Beginners Actually Need to Know
A T-stop is a measured light transmission value, and an f-number is a ratio of focal length to aperture diameter. A T2.2 lens passes less light than a lens marked f2.2, and the difference is usually around a third of a stop on budget cine glass.
Why it matters: an f-number is calculated, so a stills f2.0 lens might actually transmit what a different lens marked f2.0 transmits, and the two will not match. T-stops are measured, so two lenses set to T2.2 expose the same brightness. That is the whole argument for T-stops, and it only matters once you have more than one lens.
Worked example: you shoot a wide open at T2.2 on one lens, then cut to a 50mm at T2.2. With T-stops the cut is invisible. With f-numbers the two lenses may differ by a third of a stop, which looks like an accidental exposure shift in the grade.
One more thing about T-stops: they are actual transmission, so a T1.5 is not the same as an f1.5 in either brightness or depth of field, and the two numbers do not convert cleanly. Do not try to translate a stills aperture to a cine T-stop in your head.
Super 35 or Full Frame: Pick Your Coverage Before You Buy
Super 35 coverage is smaller than full frame, roughly the same area as Super 16 film. It is not a lesser format. It is the format the entry-level cine lens industry has standardised on, and it has real advantages for beginners.
Because S35 glass is smaller, it is smaller and lighter, which is a genuine benefit on a handheld rig. The SIRUI Night Walker 24mm is 500 g and gives a 34mm equivalent view. A full frame 24mm at that weight does not exist at this level.
The catch is the one beginners panic about, and the panic is deserved: S35 glass on a full frame body vignettes. Black corners appear with no warning. You have three options. Use the body crop mode, which gives you roughly a 1.3x or 1.5x tighter view. Stop down until the image circle covers the sensor. Or buy full frame coverage from the start.
Our rule of thumb: if your camera is Micro Four Thirds or APS-C, buy native coverage for that sensor and never think about vignette. If your camera is full frame and you want the S35 look with the S35 price bracket, buy S35 and commit to using the crop mode. If you shoot full frame in crop mode for everything, buy full frame glass.
Full frame coverage on this list comes from the Rokinon Cine DS lenses and the 7artisans T2.0 primes. S35 coverage comes from the SIRUI Night Walker. The Meike Mini Primes are native Micro Four Thirds, which is a different category again because they will not mount on a full frame body at all without an adapter.
Which Mount Do You Need, and What About Adapters?
Buy the mount that matches your camera. This is the single most useful piece of advice in this guide, because mount confusion is the most common question beginners ask and the easiest mistake to avoid.
Sony E: the SIRUI Night Walker and both 7artisans T2.0 primes. Canon EF: the Rokinon Cine DS 35mm, the Rokinon Cine DS 85mm, and the DSX85. Micro Four Thirds: all three Meike Mini Primes, which cover the Blackmagic Pocket 4K, the Z CAM E2, and the Panasonic GH5 among others.
There is nothing in this roundup for Canon RF, Nikon Z, or L-mount. For those bodies you will be adapting, and adaptation has real rules. Check the flange focal distance of your body against the lens. Check whether the adapter passes mechanical gearing through to the lens barrel, because a lot of adapters do not. And check whether the adapter supports infinity focus, which is a common failure point with entry-level adapters.
Adapting a cine lens is easier than adapting a stills lens, because cine glass usually has a long barrel and does not need an electronic aperture ring. If you must adapt, adapt a manual cine lens, not an autofocus stills lens with electronic contacts.
Our cine zoom guide covers the case where you want variable focal length coverage instead of a prime set.
Cine Lens vs Stills Lens With a Gear Ring
A stills lens with a 0.8 MOD gear ring and a follow focus can get you most of the way. You will have a geared focus ring, and a kit of focus pullers can handle the rest. What you will not have is a long focus throw, matched gear positions across lenses, and T-stop consistency.
So when is the cheaper route right? When you are shooting solo, when your work is documentary or run-and-gun, and when you need to move fast without marking focus. This is exactly the argument made repeatedly on r/cinematography and r/Cameras, where the default advice is to start with fast native stills primes and only move to cine glass when the work demands it.
When is cine glass right? When you are shooting scripted narrative work, when more than one person needs to hit the same marks, and when you are changing lenses mid-scene. That is the point where gearing, matched gear position, and T-stops start paying for themselves.
The other answer to the cine glass question is that most of the cinematic look comes from lighting, movement, and colour grading, not from the lens. A well-lit scene shot on an affordable stills lens will beat a badly lit scene shot on cine glass every time. Spend what you saved on light.
How Many Lenses Do You Actually Need?
Three. Wide, normal, portrait. This is the practical minimum for narrative work, and it is the consensus in the forums as much as in the trade press. Most beginners should own three lenses, not ten, and the strong advice is to resist buying a large kit before you have shot a project with the first one.
A working three-lens kit on full frame would be roughly 24mm or 35mm, a 50mm, and an 85mm. On Super 35 it would be roughly 18mm to 24mm, a 35mm, and a 75mm to 85mm. Notice that the short end is much wider on S35 glass, which is one more reason the format suits beginners.
If you can only afford one, buy a normal lens. If you can afford two, buy a wide and a normal. Add the telephoto only when you are shooting enough portrait and interview work to notice its absence.
On mount matching, build the kit within one lens family where you can. The Rokinon Cine DS 35mm and 85mm share gear and aperture positions and colour rendition, so those two plus one wide from the same family gives you a matched three-lens kit with no re-rigging.
The Rig Costs a Cine Lens Forces You To Budget
Here is the part of the budget nobody mentions until after the first shoot. A cine lens is only usable properly with a few supporting pieces, and a three-lens kit plus accessories adds up faster than most beginners expect.
You need a 0.8 MOD follow focus, which is the single most important accessory. Without one you can still pull focus by hand on the scale, but the gearing exists so you do not have to. You need a matte box with a step-up ring matching your front diameter if you want flares and negative fill, and you need a lens support for any lens over about a pound on a handheld rig. A tripod or shoulder rig with a proper plate is the fourth item.
On front diameter specifically: the Rokinon Cine DS 35mm takes a 77mm thread, the Rokinon 85mm lenses take 72mm, the SIRUI Night Walker takes 67mm, and the Meike Mini Primes vary. Mixing front diameters means either a step-up ring or multiple matte box rings, which is a small cost but a real annoyance. Matching front diameters across a set is one of the reasons matched sets cost more.
Budget these before you buy a third lens, not after. A well-supported single lens outperforms three lenses you cannot hold properly.
Beginner Buying Checklist Before You Checkout
Eight checks, in the order that saves you the most money if you get it wrong.
1. Confirm the mount matches your camera, or that your adapter supports gearing and infinity focus. This is the mistake that makes a lens unusable.
2. Confirm the coverage. Full frame, S35, or native Micro Four Thirds. Check what crop mode you will use if it is not full frame.
3. Check the aperture range and the maximum aperture. A lens that only closes to T5.6 limits your daylight control, and a T1.2 buys you little if you never shoot in low light.
4. Check the focus throw and the rotation angle. Roughly 270 degrees is the cine standard. A short throw means a hard, imprecise focus pull.
5. Check that the focus and iris rings carry 0.8 MOD gearing, unless you plan to pull focus entirely by hand.
6. Check the front diameter and filter thread size, so you know which step-up rings and matte box rings to order.
7. Check the minimum focus distance if you need to get close for product or detail work.
8. Check the review count and the recent reviews. A lens with a huge review history and a low rating is telling you something, and so is a new lens with a small history and a high rating.
Two of these eight checks, mount and coverage, account for almost all beginner disappointment. Get those right and the rest is preference.
Frequently Asked Questions
What are the best cine lenses?
For beginners, the best cine lenses are manual-focus primes with 0.8 MOD geared rings, a roughly 270 degree focus throw, and T-stop markings. A 35mm on full frame or Super 35 is the most forgiving first focal length, because depth of field is wide enough that small focus errors are not visible. Look for matched gear and aperture positions across a range if you plan to add lenses later.
Are cine lenses worth the cost for a beginner filmmaker?
Sometimes, and the deciding question is whether you shoot scripted work. If you mark focus, pull focus between subjects, and change lenses mid-scene, cine glass pays for itself through repeatability and T-stop consistency. If you shoot single-camera run-and-gun work or rely on autofocus, a good stills lens is the better first purchase and the money is better spent on lighting.
Can I use a Super 35 cine lens on a full-frame camera?
Yes, but expect vignetting until you deal with it. An S35 lens has a smaller image circle than a full frame sensor, so black corners appear wide open. Use the body crop mode for a roughly 1.3x or 1.5x tighter view, stop down until the image circle covers the sensor, or buy full frame coverage instead. Many filmmakers shoot S35 glass in crop mode permanently.
Is 35mm or 50mm better for a first cine lens?
A 35mm is more forgiving and more flexible, and it is the better general first lens because its depth of field lets a new focus puller make small errors. A 50mm gives the most natural, human-eye view of a face and is the right choice for interviews and dialogue in a controlled space. If you shoot handheld coverage in small rooms, choose 35mm. If you shoot conversations, choose 50mm.
Do I need a follow focus to use a cine lens?
Not strictly. You can pull focus by hand on the engraved scale, and a 270 degree throw makes that workable at slower focal lengths. But a 0.8 MOD follow focus is the single most useful accessory, because every cine lens in this roundup has geared rings built to drive it. Budget for one rather than for a second lens, and budget for a lens support on any lens over about a pound.
Our Verdict on the Best Cine Lenses for Beginners
Our pick for the best cine lenses for beginners in 2026 is the Rokinon 35mm T1.5 Cine DS. It carries the most reviews of any full-frame option here, sits in a range with matched gear and aperture positions so your second lens will fit the same rig, and offers a focal length that hides beginner focus errors instead of exposing them. Its weaknesses, softness wide open and real weight, are both things you can plan around, and both are honest ones.
If your camera is Micro Four Thirds, take the Meike 16mm T2.2 as your first lens and the Meike 35mm T2.2 as your second. If you shoot night interiors on Sony E, the SIRUI Night Walker 24mm T1.2 earns its aperture. If you are starting on full frame and want the easiest manual focus experience, the 7artisans T2.0 primes give you a stop more depth of field than the fastest glass for a very small budget difference.
Buy one, not three. Shoot something with it. Then buy the second. That sequence has served more beginners than any gear list, and it is a much cheaper way to find out what you actually need.