
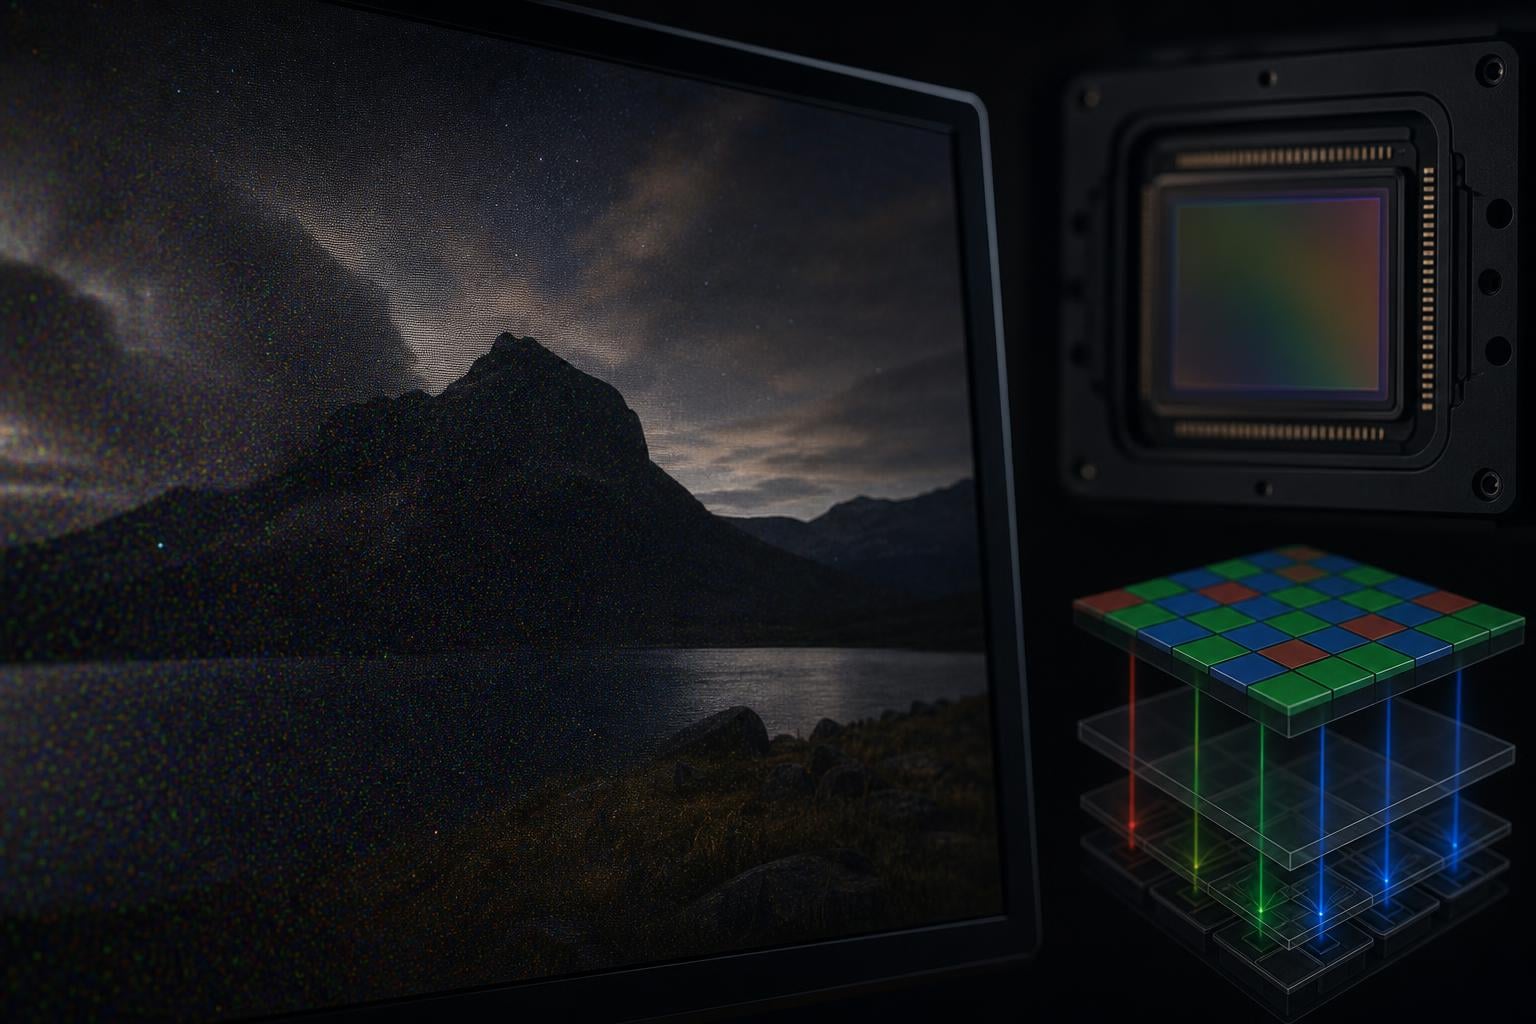
You shoot what looks like a great photo on the back of your camera. But when you open it on your computer and zoom into the shadows, there it is: random red, green, and blue speckles crawling across the dark areas. If you are wondering why there is colored noise in the dark areas of your photos, you are not alone. This is one of the most common questions photographers ask when they start shooting in low light or pushing their cameras beyond base ISO.
The good news is that this is completely normal behavior for any digital camera sensor. Every camera, from a smartphone to a professional full-frame body, produces some level of noise in shadow regions. The better news is that once you understand what causes it, you can dramatically reduce it with the right shooting techniques and post-processing workflow.
In this guide, I will break down exactly why colored noise appears in dark areas, what is happening inside your camera sensor, and how to prevent and fix it. I will cover the technical mechanics in plain language so you can make informed decisions about your camera settings and gear.
Table of Contents
The Short Answer: Why Colored Noise Appears in Shadows?
Colored noise in the dark areas of your photos appears because the camera sensor receives very little light information in shadow regions. When the signal from those dark pixels is weak, random electronic interference from the sensor becomes more visible relative to the actual image data. The camera’s color filter array then misinterprets these random fluctuations as colored speckles during image processing.
This type of noise is called chroma noise, and it shows up as red, green, or blue dots rather than neutral gray grain. It is most visible in dark areas because shadows have the lowest signal-to-noise ratio in any image. When you raise ISO, brighten underexposed shadows, or shoot in low light, you amplify both the signal and the noise, making those colored speckles more prominent.
What Is Image Noise in Photography?
Image noise is random variation in brightness and color information that the camera sensor records alongside the actual image data. Think of it as the visual equivalent of static on a radio. The station is your photo, and the static is noise that the sensor adds to every image it captures.
Every digital camera sensor is made up of millions of individual light-gathering sites called photosites (or photodiodes). When light hits these photosites, it generates an electrical signal that the camera converts into pixel values. But the sensor also generates small amounts of random electrical signal on its own, even in complete darkness. This random signal is noise, and it is always present in every photo you take.
The key factor is the ratio between the actual light signal and the random noise. This is called the signal-to-noise ratio. When plenty of light reaches the sensor, the real signal overwhelms the noise, and your photo looks clean. When very little light reaches the sensor, such as in dark shadow areas or low-light scenes, the noise becomes a much larger percentage of what the sensor records.
This is why noise becomes visible at high ISO settings. ISO does not make your sensor more sensitive to light. Instead, it amplifies the electrical signal after capture. The problem is that amplification boosts both the real signal and the random noise equally. At high ISO values, that amplified noise becomes clearly visible in your images.
Luminance Noise vs Chroma Noise: Understanding the Difference
Digital cameras produce two distinct types of noise, and understanding the difference between them is essential for knowing why your dark areas have colored speckles.
Luminance noise appears as grainy, monochromatic speckles that look similar to traditional film grain. It affects the brightness values of pixels without changing their color. Luminance noise looks like gray or black-and-white dots scattered across the image. Most photographers find luminance noise relatively acceptable because it can resemble natural film grain and is easier on the eye.
Chroma noise (also called color noise) appears as random colored speckles: red, green, blue, or even purple and magenta dots that have no relation to the actual scene colors. This is the type of noise that most photographers find objectionable because it looks unnatural and is harder to remove without degrading image detail.
The two types of noise have different root causes. Luminance noise comes primarily from random photon arrival at the sensor (called shot noise or Poisson noise). Chroma noise comes from random electronic interference in the sensor readout and amplification circuitry combined with how the camera’s color filter array interpolates color data.
Chroma noise is especially noticeable in dark areas for two reasons. First, the signal-to-noise ratio in shadows is already low, so any color errors from noise are proportionally larger. Second, the human eye is very sensitive to color shifts in dark or neutral tones. A faint green or red tint in a shadow region is immediately visible, while the same level of color variation in a bright, colorful area might go completely unnoticed.
Quick Comparison: Luminance vs Chroma Noise
Luminance noise looks like grain, affects brightness only, resembles film, and is relatively easy to reduce in post-processing. Chroma noise looks like colored dots, affects color channels, looks unnatural, and is harder to remove without losing color accuracy and fine detail.
Why Noise Is Worse in Dark Areas: The Technical Explanation
If you have ever wondered why colored noise specifically targets dark areas while bright areas of the same photo look clean, the answer involves the Bayer filter, demosaicing, signal-to-noise ratio, and bit depth. Let me break each of these down.
The Bayer Filter and Demosaicing
Nearly every digital camera uses a color filter array called the Bayer matrix in front of the sensor. This array places tiny red, green, or blue filters over individual photosites so each pixel only captures one color. A typical Bayer pattern has 50 percent green filters, 25 percent red filters, and 25 percent blue filters, because the human eye is most sensitive to green light.
Since each photosite only records one color, the camera must calculate the other two color values for each pixel by looking at neighboring pixels. This process is called demosaicing (or demosaicking), and it works by interpolation. The camera essentially guesses the missing color information based on surrounding pixels.
In bright areas with plenty of light, this interpolation is highly accurate. The neighboring pixels all have strong, consistent signals, so the interpolated color values are reliable. But in dark areas where the signal is weak and noisy, the interpolation process can amplify random fluctuations. If one photosite randomly records a slightly higher or lower value due to electronic noise, the demosaicing algorithm spreads that error across neighboring pixels as a colored artifact.
Signal-to-Noise Ratio in Shadows
The signal-to-noise ratio in a shadow area is fundamentally lower than in a highlight area. A bright sky might produce a signal strength of 12,000 electrons at a photosite with only 15 electrons of read noise, giving a signal-to-noise ratio of 800:1. A deep shadow area might produce only 200 electrons of signal with the same 15 electrons of read noise, giving a ratio of just 13:1.
At a 13:1 ratio, the noise represents about 7.5 percent of the signal. When that noisy signal gets amplified during ISO boost or shadow recovery, the noise becomes very visible. And because each color channel (red, green, blue) has its own independent noise, the random variations create colored speckles rather than uniform gray grain.
Bit Depth and Shadow Tonal Compression
Most cameras capture 12-bit or 14-bit RAW data, which provides 4,096 or 16,384 tonal levels per channel. But those levels are not distributed evenly across the tonal range. Bright areas get the majority of the tonal levels, while dark areas receive far fewer levels. This means shadows are not only noisier but also have less tonal information to work with.
When you brighten shadows in post-processing, you are stretching those few tonal levels across a wider visible range. This stretching magnifies the noise that was already present. That is why an underexposed photo that you try to rescue in Lightroom or Photoshop often shows dramatic colored noise in the shadow areas, even if the photo looked fine on the camera’s LCD.
The Main Causes of Colored Noise in Dark Areas
Several factors contribute to the colored noise you see in shadow regions. Understanding each cause helps you identify which ones apply to your situation and take targeted action.
1. High ISO Settings
High ISO is the single most common cause of colored noise in dark areas. When you raise ISO, you are telling the camera to amplify the sensor signal so you can use a faster shutter speed or smaller aperture in low light. That amplification boosts noise right alongside the real signal.
Every camera has a base ISO (typically ISO 100 or 200) where noise is at its minimum. As you increase ISO, noise increases progressively. Most modern full-frame cameras produce relatively clean images up to ISO 3200 or 6400, while APS-C sensors start showing visible chroma noise around ISO 1600 to 3200. Compact cameras and smartphones with small sensors may show colored noise at ISO 800 or even lower.
2. Low Light Conditions
Shooting in dim environments means less light reaches the sensor, plain and simple. Whether you are doing night photography, indoor event shooting, or astrophotography, the lack of light forces the sensor to work harder to capture detail in shadow areas.
In low light, even properly exposed photos will have shadow regions where the signal is weak. Those weak-signal areas are where chroma noise appears first and most prominently.
3. Underexposure and Shadow Recovery
Underexposure is a major and often overlooked cause of colored noise. Many photographers intentionally underexpose to protect highlights, then brighten shadows in post-processing. But each stop of underexposure effectively doubles the ISO-equivalent noise in the shadow areas.
Multiple forum users on Reddit and Photo Stack Exchange confirm this: underexposing by three stops then brightening shadows in Lightroom produces noise equivalent to shooting at ISO 6400 instead of ISO 800. The colored speckles that appear in those recovered shadows are classic chroma noise from signal amplification.
4. Small Sensor Size
Sensor size directly impacts noise performance because larger sensors have larger photosites. Larger photosites gather more light, which means a stronger signal relative to noise. A full-frame sensor with 24 megapixels has individual photosites that are much larger than those on a smartphone sensor with the same megapixel count.
APS-C sensors, commonly found in entry-level and mid-range cameras from Sony, Canon, Nikon, and Fujifilm, produce more noise in dark areas than full-frame sensors at the same ISO. This is a physical limitation, not a quality issue. Even excellent APS-C cameras like the Sony a6700 will show colored noise in shadows at high ISO because the photosites are smaller.
Compact cameras and smartphone sensors, which are even smaller, show pronounced chroma noise at relatively modest ISO settings. If you shoot with a compact camera or phone in low light, colored noise in dark areas is essentially guaranteed.
5. Long Exposures and Sensor Heating
Long exposure photography introduces a different noise source: thermal noise. As the sensor remains active for extended periods (typically longer than one second), it generates heat. Heat increases the electrical noise in the sensor, which appears as additional colored speckles in dark areas.
This is why astrophotographers and night photographers deal with colored noise even at low ISO settings. A 30-second exposure at ISO 1600 will show more noise than a 1-second exposure at the same ISO because the sensor has heated up during the longer exposure.
Long exposure noise also includes fixed pattern noise, where the same hot pixels appear in the same locations on every long exposure. This is different from random chroma noise but equally visible in dark areas.
How to Prevent and Reduce Colored Noise
Now that you understand why colored noise appears in dark areas, here are the most effective techniques to prevent it at the time of capture and reduce it in post-processing.
1. Shoot at the Lowest ISO Possible
Keep your ISO as close to base (ISO 100 or 200) as your lighting and shutter speed requirements allow. If you need a faster shutter speed, try opening your aperture wider or using a faster lens before raising ISO. Every stop of ISO you avoid saves a noticeable amount of noise in your shadows.
2. Expose to the Right (ETTR)
Exposing to the right is a technique where you deliberately overexpose slightly (without clipping highlights) to push more light data into the shadow areas. This raises the signal-to-noise ratio in shadows before you even take the photo into post-processing.
When you later bring the exposure back down in your RAW editor, the shadow areas retain their cleaner, lower-noise character. ETTR is one of the most effective noise prevention techniques and is widely recommended by professional photographers and community forums alike.
3. Shoot RAW, Not JPEG
RAW files contain all the data captured by the sensor with minimal in-camera processing. This gives you maximum flexibility to adjust exposure, recover shadows, and apply targeted noise reduction. JPEG files apply in-camera noise reduction and compression that can actually make noise worse in some cases, especially if you need to brighten shadows later.
RAW also preserves more bit depth in the shadow areas, giving you more tonal information to work with when you need to recover detail in dark regions.
4. Use a Tripod and Remote Shutter
A tripod lets you use longer shutter speeds at lower ISO settings. Instead of shooting at ISO 6400 with a 1/60 second shutter, you can shoot at ISO 400 with a 1/4 second shutter on a tripod. The lower ISO dramatically reduces colored noise in dark areas.
A remote shutter release or the camera’s self-timer prevents camera shake from pressing the shutter button, ensuring sharp images at those longer exposures.
5. Enable In-Camera Noise Reduction Features
Most cameras offer two noise reduction features. High ISO Noise Reduction applies chroma noise reduction to JPEG files at higher ISO settings. Long Exposure Noise Reduction takes a second dark frame exposure immediately after your photo and subtracts the hot pixels from the image.
Long Exposure Noise Reduction is especially effective for night photography and astrophotography, where thermal noise and hot pixels are major contributors to colored noise in dark areas. Note that it doubles the time each exposure takes, since the camera needs to capture a second reference frame.
6. Apply Noise Reduction in Post-Processing
Both Adobe Lightroom and Photoshop offer powerful noise reduction tools specifically designed to target chroma noise. In Lightroom, the Detail panel has separate sliders for Luminance noise and Color noise reduction. Start with the Color noise slider, since chroma noise is the colored speckles you see in shadows.
In Photoshop, the Reduce Noise filter (Filter > Noise > Reduce Noise) has a dedicated Strength slider and a Remove JPEG Artifact option. For maximum control, you can also use the Camera Raw filter’s Detail panel, which works the same way as Lightroom’s noise reduction.
The key with all post-processing noise reduction is moderation. Pushing the sliders too far will smooth out fine detail and give your image a plastic, overprocessed look. Apply just enough to reduce the most objectionable colored speckles while preserving shadow detail and texture.
FAQs
What causes color noise in photos?
Color noise in photos is caused by random signal fluctuations in the camera sensor when there is insufficient light reaching the sensor. The main causes include high ISO settings, low light conditions, long exposure times, sensor heating, underexposure, and smaller sensor size. These factors all reduce the signal-to-noise ratio, making random electrical interference visible as colored speckles.
How to get rid of noise in dark photos?
To reduce noise in dark photos: shoot at the lowest ISO possible, use a tripod for longer exposures, expose to the right to maximize shadow signal, shoot in RAW format for maximum editing flexibility, enable in-camera noise reduction for high ISO and long exposures, and apply targeted noise reduction in Lightroom or Photoshop during post-processing.
Why is there noise in my photos?
Noise in photos is caused by random electronic variations in the camera sensor signal. It appears as grainy speckles (luminance noise) or colored dots (chroma noise) and is triggered by high ISO amplification, low light conditions, long exposures causing sensor heating, and underexposure that requires shadow recovery in editing.
How to get rid of color noise?
To remove color noise specifically, enable in-camera chroma noise reduction, turn on Long Exposure Noise Reduction for long exposures, use the Color Noise Reduction slider in Lightroom, apply the Reduce Noise filter in Photoshop, and always shoot RAW so you have maximum control over chroma noise during post-processing.
Final Thoughts on Colored Noise in Shadows
Colored noise in the dark areas of your photos is a normal and predictable result of how digital camera sensors work. The weak light signal in shadow regions combined with the camera’s color interpolation process means that random electronic noise gets rendered as colored speckles. By shooting at lower ISO values, exposing to the right, using RAW format, and applying targeted noise reduction in post-processing, you can dramatically reduce this noise and produce cleaner images even in challenging lighting conditions.
The next time you see colored noise in your shadow areas, you will know exactly why it is there and what to do about it. Start with the prevention techniques at the time of capture, then fine-tune with post-processing noise reduction for the cleanest possible results.