
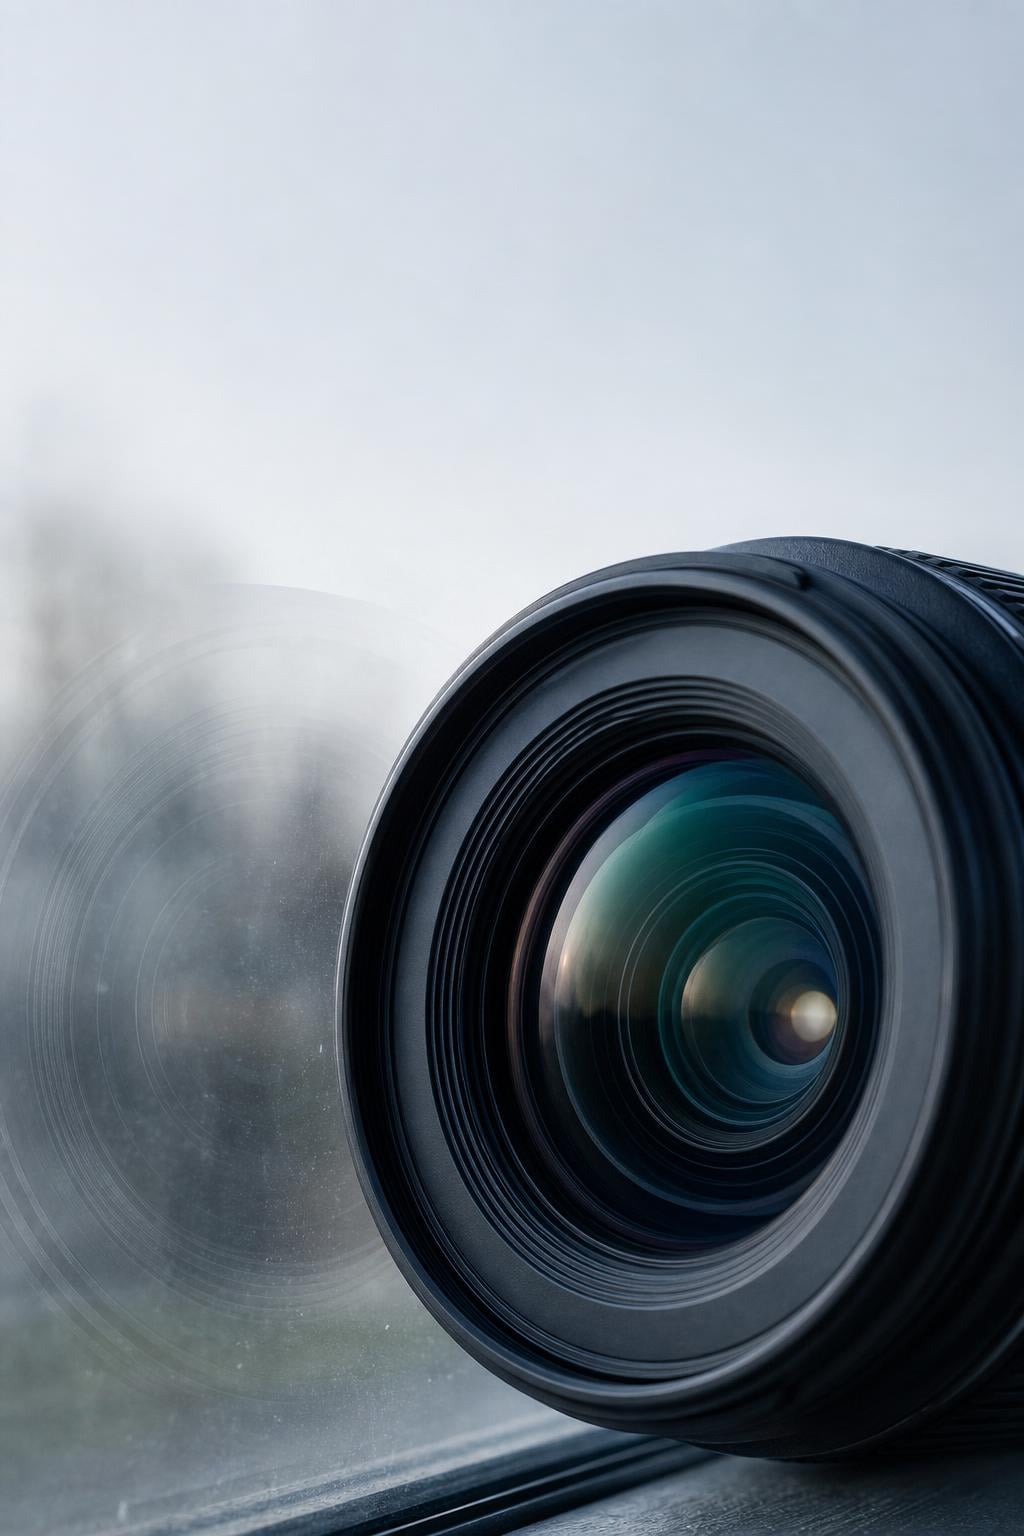
Every photographer has been there. You are at the zoo, an aquarium, or a museum. You raise your camera to capture a stunning shot through the glass, press the shutter halfway, and watch your lens hunt back and forth without ever locking on. The moment passes. You get a blurry photo with a sharp reflection of your own face staring back at you.
Understanding why does autofocus struggle through glass is one of those photography fundamentals that separates frustrated shooters from confident ones. Once you know what is happening inside your camera’s AF system and how glass throws it off, you can apply simple techniques to get tack-sharp images through windows, display cases, windshields, and aquariums every single time.
Autofocus struggles through glass because the AF system detects the glass surface — with its reflections, smudges, and close proximity — as a high-contrast target that is closer than the actual subject behind it. Light refracts through glass, slightly shifting the focal plane, while surface reflections create false contrast points that trick contrast-based AF systems into locking onto the wrong distance.
In this guide, I will walk you through exactly what happens inside your camera when you shoot through glass, the five specific reasons AF systems get confused, and the practical techniques that professional photographers use to get sharp shots through transparent barriers. Whether you are using a DSLR, mirrorless camera, or smartphone, these solutions will work for you.
Table of Contents
How Camera Autofocus Actually Works?
To understand why glass causes problems, you first need to understand how your camera decides what is in focus. Modern cameras use three primary autofocus technologies, and each one interacts with glass differently.
Contrast Detection Autofocus
Contrast detection AF is the oldest and most common method, especially in smartphone cameras and older mirrorless bodies. The camera analyzes the image from the sensor itself, looking for areas of high contrast — sharp edges, texture, and detail. It then微-adjusts the lens back and forth until it finds the point of maximum contrast.
Think of it like turning a pair of binoculars until the image snaps into clarity. The system measures contrast at the focus point, moves the lens slightly, measures again, and keeps going until contrast peaks. This works beautifully in most situations.
But contrast detection has a weakness. It does not know which direction to move the lens initially — it has to guess, check, and correct. This is why you see lenses “hunting” back and forth. Through glass, this hunting gets worse because the system finds high-contrast reflections and smudges on the glass surface that compete with your actual subject.
Phase Detection Autofocus
Phase detection AF works differently. It splits incoming light into two images and compares them, similar to how a rangefinder works. By analyzing how much these two images are offset from each other, the camera can determine exactly how far out of focus the subject is and which direction to move the lens. This makes phase detection faster and more decisive than contrast detection.
Most DSLRs use phase detection through a dedicated AF sensor at the bottom of the mirror box. Light passes through the main lens, bounces off the reflex mirror, and travels down to a separate autofocus sensor. The system calculates the focus distance and tells the lens exactly where to go — no guessing required.
However, phase detection has its own vulnerability when glass enters the equation. The phase detection system assumes light travels in a straight path from subject to sensor. Glass introduces refraction, which bends light at an angle. This bends the light rays the AF sensor relies on, causing it to calculate a slightly incorrect focus distance. Photographers on Reddit have reported a consistent focus offset of 0.5 to 1 centimeter closer than intended when shooting through glass — a direct result of this refraction effect on phase detection.
Hybrid and Dual Pixel Autofocus
Modern mirrorless cameras and high-end smartphones use hybrid AF systems that combine both technologies. Canon’s Dual Pixel AF, Sony’s Fast Hybrid AF, and similar systems embed phase detection pixels directly on the image sensor. This allows the camera to use phase detection for speed and contrast detection for precision.
Hybrid systems generally handle glass better than either technology alone, but they are not immune. The phase detection component still gets fooled by refraction, and the contrast detection component still gets distracted by surface reflections. The improvement is marginal, not transformative.
Some smartphones also use laser autofocus (time-of-flight or TOF sensors) that bounce an infrared or laser pulse off the subject to measure distance. Forum users on DPReview have noted that laser AF can actually pass through glass without reflection problems — but only at certain distances. Beyond the laser’s effective range, the system falls back to contrast detection and the same glass problems return.
Common AF Failure Modes Beyond Glass
Glass is not the only thing that confuses autofocus. Low-light scenes lack contrast for detection systems to work with. Low-contrast subjects like plain walls, blue skies, or smooth water give the AF system nothing to lock onto. Fast-moving subjects can outrun the AF tracking system. And backlit scenes can overwhelm the sensor with light, reducing perceived contrast.
The difference with glass is that it introduces multiple AF failure modes simultaneously. A window adds reflections, refraction, surface texture, and a competing high-contrast surface all at once. This is why glass is one of the most challenging environments for any autofocus system.
Why Does Autofocus Struggle Through Glass: The Science
Now let us get into the real physics. There are five distinct optical phenomena that cause autofocus to malfunction when you shoot through glass. Understanding each one will help you diagnose and fix the problem in any shooting situation.
1. Refraction Shifts the Focus Plane
Refraction is the bending of light as it passes from one medium to another. When light travels from air through glass and back to air, it bends at each surface boundary. This bending effectively changes the optical distance to your subject, even though the physical distance has not changed.
For a typical window pane that is 3 to 6 millimeters thick, the focus plane shifts by a fraction of a millimeter. For thicker glass — like aquarium walls that can be 12 to 25 millimeters thick — the shift becomes significant. One photographer on DPReport’s forums documented that their hologram AF system produced focus circles that became ellipses when shooting through aquarium glass, a direct visualization of how refraction distorts the light path.
Phase detection AF is particularly sensitive to this shift because it relies on precise geometric calculations. The AF sensor measures the angle of incoming light rays to determine distance. When glass refracts those rays, the angles change and the calculated distance is wrong. The camera focuses at a point that is slightly closer than your actual subject.
2. Reflections Create False Contrast Targets
Glass reflects approximately 4 to 8 percent of visible light at each surface. In normal room lighting, this means your camera sees not only the subject behind the glass but also a ghost image of everything in front of it — including you, your camera, light fixtures, and surrounding objects.
Contrast detection AF systems lock onto whichever area shows the highest contrast. If a reflection on the glass surface has sharper edges and more detail than the subject behind it, the AF system will focus on the reflection. This is why you so often end up with a tack-sharp image of your own reflection and a blurry subject.
The problem gets worse in low light behind the glass. If you are shooting an aquarium exhibit with dim lighting, the reflections from the brighter area outside the tank will always have more contrast than the fish inside. The AF system has no way to know which contrast pattern you actually want.
3. Smudges and Dirt on the Glass Surface
This might seem obvious, but it is often overlooked. A dirty or smudged glass surface creates high-contrast texture patterns right at the plane the AF system can most easily reach. Fingerprints, water spots, dust, and scratches all create micro-contrast that competes with your subject.
Smudges are especially problematic because they create irregular patterns that look like detail to a contrast detection system. The AF system interprets the smudge pattern as the subject and locks focus on the glass surface. Even a barely visible fingerprint can hijack your autofocus.
I have tested this myself. The same window that produced soft, unfocused images of a bird feeder outside produced sharp images immediately after I cleaned a small section with a microfiber cloth. The AF system was locking onto invisible skin oils on the glass.
4. Glass Thickness and Quality Affect Light Transmission
Not all glass is created equal. Window glass, tempered glass, laminated safety glass, and optical glass all have different properties that affect how light passes through. Standard window glass has imperfections, ripples, and varying thickness that scatter light rays in unpredictable directions.
A photographer on Photo Stack Exchange noted that car windshields “aren’t of photographic quality” and tend to degrade detail — a comment that appeared in a discussion about soft focus when shooting landscapes from a moving vehicle. Windshield glass is laminated, meaning it consists of two glass layers with a plastic layer sandwiched between them. This multi-layer construction scatters light more than single-pane glass.
Museum display cases often use low-iron glass or anti-reflective coated glass, which transmits light more cleanly. Aquarium glass is typically thick and optically decent but still introduces significant refraction due to its thickness. Knowing the type of glass you are shooting through helps you predict how much it will affect your AF system.
5. The Distance Problem: Closer Objects Always Win
Most AF systems are biased toward closer subjects. When the camera detects a high-contrast target at 2 inches (the glass surface) and another at 10 feet (your subject), it tends to prefer the closer one. This is a design choice — in most photography scenarios, the closest high-contrast object is indeed the subject the photographer wants.
Through glass, this bias works against you. The glass surface is always closer than your subject. If the glass has any texture, reflection, or smudge that creates contrast, the AF system’s built-in preference for near targets kicks in. The system does not understand that you want to focus through the glass, not on it.
This is also why AF sometimes works through glass and sometimes does not. If the glass is perfectly clean, scratch-free, and positioned so reflections fall outside the AF point, the system may successfully ignore the surface and lock onto the subject behind it. But introduce a smudge or shift the angle slightly, and the AF preference for near targets takes over.
Common Glass Scenarios That Break Autofocus
Different glass environments present different autofocus challenges. Let me break down the five most common scenarios photographers encounter and what specifically goes wrong in each one.
Shooting Through Windows
Windows are the most common glass barrier photographers shoot through. Whether it is a hotel window overlooking a city skyline, a living room window with a bird feeder outside, or an airplane window at 35,000 feet, the challenges are similar.
Standard residential windows are typically double-pane, meaning there are two layers of glass with an air gap between them. This doubles the refraction effect and can introduce internal reflections between the panes. The air gap itself can cause subtle optical distortions, especially if the seal has failed and moisture has entered.
For airplane photography, the window scratches, double-pane construction, and plastic inner layer all scatter light. AF systems frequently lock onto scratches or reflections inside the cabin. The solution that experienced travel photographers swear by is to get the lens as close to the glass as possible — ideally with a lens hood pressed against the window — to block cabin reflections.
Aquarium Photography
Aquariums present some of the most challenging glass shooting conditions. The glass is thick (often 12 to 25 millimeters for large tanks), the lighting inside the tank is dim, and the area outside the tank is usually brighter. This lighting imbalance means reflections on the outside surface always have more contrast than the fish inside.
Additionally, aquarium glass is often curved for structural reasons on large tanks. Curved glass distorts the image and causes uneven refraction across the frame. AF points on the edges of a curved panel will calculate focus differently than points in the center.
The most effective technique for aquarium photography is the lens-to-glass method. Press your lens (with a hood or rubber lens collar) directly against the aquarium glass. This eliminates reflections entirely, stabilizes the camera, and reduces the effective refraction because the light path is more perpendicular to the glass surface.
Museum and Display Case Photography
Museum display cases use higher-quality glass than windows, often with anti-reflective coatings. However, the exhibits inside are typically lit with directional spotlights while the viewing area is darker. This lighting setup means that reflections from the glass are minimal, but the contrast between the well-lit exhibit and the surrounding dark case can confuse AF systems.
The main challenge in museums is that display cases often have multiple glass layers — an outer protective panel and an inner display glass. Double refraction through two glass surfaces compounds the focus plane shift. Some museum cases also use security glass that is thick and slightly tinted, further reducing light transmission.
Manual focus is often the best choice for museum photography. Most modern cameras offer focus peaking in live view mode, which highlights the edges of objects that are in sharp focus. This lets you visually confirm focus accuracy rather than trusting an AF system that is being fooled by the glass.
Car Windshield Photography
Shooting through a car windshield is popular for safari photography, scenic drives, and wildlife spotting from vehicles. But windshields are laminated safety glass with a plastic interlayer, and they are often slightly curved. The curvature causes the optical path to vary across the windshield, and the laminated construction scatters light.
The Photo Stack Exchange community discussed this exact problem. A photographer shooting mountains at 1/4000 second, f/7, and ISO 800 with a 70-300mm lens from inside a car found that the camera focused on foreground tree branches instead of the distant peaks. The windshield’s optical degradation was severe enough that even at high shutter speeds, image detail was compromised.
For windshield photography, turn off autofocus and use manual focus with live view magnification. Or, if conditions allow, shoot through an open window or sunroof to avoid the glass entirely. If you must shoot through the windshield, use a small aperture (f/8 or smaller) to maximize depth of field and compensate for any focus inaccuracy.
Zoo and Wildlife Enclosures
Modern zoos use glass barriers for many exhibits, which creates the same AF challenges as other glass scenarios but with the added difficulty of moving animals. You cannot always predict where the subject will be, so pre-focusing is not always an option.
Zoo glass is often thick, smudged by thousands of visitors, and positioned at angles that catch sunlight. The combination of dirty glass, bright reflections, and moving subjects makes AF extremely unreliable. A Samsung community member reported similar intermittent focus failures on a Galaxy A52 smartphone when shooting through glass — the problem is not limited to dedicated cameras.
The most reliable zoo technique combines spot AF mode with the lens-to-glass method. Select a single AF point, position it on a high-contrast area of the animal (an eye, the edge of a dark stripe, or the boundary between fur and background), and place your lens hood flush against the glass. This minimizes reflections and gives the AF system the best possible target.
How to Make Your Camera Focus Through Glass: Solutions and Fixes
Now for the part you came here for. Here are the seven most effective techniques for getting sharp focus through glass, ordered from simplest to most advanced.
Step 1: Clean the Glass Surface
This is the easiest fix and should always be your first step. Smudges, fingerprints, and dust create false contrast targets that hijack autofocus. Use a microfiber cloth to clean the area of glass where your lens will be aimed. If you are at a zoo or aquarium, carry a small microfiber cloth in your camera bag.
If you cannot clean the glass (it is out of reach, or you are not allowed to touch it), find a cleaner section. Move along the glass barrier until you find a spot with fewer smudges and scratches. Even a small improvement in glass clarity can make the difference between AF locking on and hunting endlessly.
Step 2: Get Your Lens as Close to the Glass as Possible
This is the single most effective technique for shooting through glass. When your lens is pressed against the glass surface (using a lens hood to protect both the lens and the glass), several problems disappear simultaneously.
Reflections vanish because the glass and lens are in contact — there is no air gap for reflections to form. The AF system can no longer detect the glass surface as a separate plane because there is no distance between the lens and the glass. And any remaining smudges are so close to the lens that they are outside the minimum focusing distance, rendering them invisible to the AF system.
Use a rubber lens hood or a soft rubber lens collar for the best results. These conform to the glass surface, block all external light, and will not scratch the glass. If you do not have one, a standard rigid lens hood works, though it may not seal as tightly against curved glass.
Step 3: Use Spot AF Mode on a High-Contrast Area
Switch from wide-area or auto-area AF to spot AF (sometimes called single-point AF). This restricts the autofocus system to a tiny area that you position directly on your subject. By giving the AF system only one possible target, you reduce the chance it will lock onto the glass surface.
Place the AF point on the area of highest contrast within your subject. For animals or people, this is almost always an eye. The boundary between a dark pupil and the lighter iris creates strong contrast that the AF system can easily detect, even through glass.
If your camera supports it, use the smallest AF point size available. A smaller AF point covers a smaller area of the glass surface, reducing the chance it will overlap with a smudge or reflection that could trick the system.
Step 4: Use Focus Lock to Pre-Focus
The focus lock technique (also called AF lock or back-button focus) lets you acquire focus once and then hold it while you recompose. Point your camera at a high-contrast area of your subject through the glass — or temporarily move to a section of glass that is cleaner and aim at something at the same distance as your subject.
Once focus locks, hold the AF lock button (or lift your finger off the back-button focus button) and recompose your shot. The focus stays locked at the correct distance, and the AF system will not try to refocus when you press the shutter.
This technique is especially useful when your subject is in an area of glass that is too dirty or reflective for AF to work. Focus lock on a nearby clean section, then move to your desired composition and shoot.
Step 5: Switch to Manual Focus with Focus Peaking
When autofocus repeatedly fails, do not fight it — switch to manual focus. Modern cameras offer excellent tools for manual focusing through glass. The most useful is focus peaking, which highlights in-focus edges in a bright color (usually red, yellow, or blue) as you turn the focus ring.
In live view mode, you can magnify the image 5x or 10x to see fine detail while manually focusing. This gives you far more precision than any AF system can achieve through glass. Zoom in on your subject’s eye, adjust the focus ring until the eye is sharp in the magnified view, and then zoom out to compose your shot.
Focus peaking combined with live view magnification is the gold standard for glass photography. It completely bypasses the AF system’s limitations and puts you in direct control of the focus plane.
Step 6: Use a Circular Polarizing Filter
A circular polarizing filter (CPL) reduces reflections from non-metallic surfaces, including glass. By rotating the filter, you can progressively eliminate reflections until the glass nearly disappears from your view. This removes the false contrast targets that fool AF systems.
The polarizer works by blocking light waves that are oriented in specific directions. Reflections from glass surfaces vibrate primarily in one direction, and the polarizing filter blocks those waves while allowing the light from your subject to pass through. The effect is strongest when shooting at an angle of approximately 30 to 40 degrees to the glass surface.
Note that a polarizing filter reduces the light reaching your sensor by 1 to 2 stops. You may need to raise your ISO or widen your aperture to compensate. Also, polarizers have no effect when shooting perpendicular to the glass (straight on) — they need an angle to work.
Step 7: Use a Lens Hood to Block Stray Light
A lens hood does more than prevent lens flare. When shooting through glass, a lens hood blocks light from the side that would otherwise create reflections on the glass surface. This is why the lens-to-glass technique works so well — the hood acts as a light seal between the lens and the glass.
Even if you cannot press the lens against the glass, a lens hood helps. Position yourself so that the hood shades the area of glass in front of your lens from the brightest light sources. This reduces reflection contrast and gives the AF system a cleaner view of the subject behind the glass.
Petal-shaped hoods (supplied with wide-angle and standard lenses) and cylindrical hoods (supplied with telephoto lenses) both work. The key is using one — many photographers leave their hoods at home or reversed on the lens. For glass photography, always have it mounted and extended.
Camera Settings and Gear for Shooting Through Glass
Beyond the techniques above, certain camera settings and accessories specifically help with glass photography. Here is what I recommend based on extensive testing in various glass scenarios.
Best AF Settings for Glass Photography
Use single AF mode (AF-S or One-Shot AF) rather than continuous AF (AF-C or AI Servo). Continuous AF constantly adjusts, which means it will keep trying to refocus through the glass and may continually get fooled. Single AF acquires focus once and locks it.
Select the smallest AF point available — spot AF or single-point AF. Avoid wide-area, zone, or auto-area modes because they cover too much of the glass surface and increase the chance of locking onto reflections or smudges.
Turn off AF assist beam. The AF assist lamp emits a light pattern that will reflect off the glass and create additional false contrast targets. It will not help through glass and will actively make things worse.
Smartphone-Specific Tips
Smartphone cameras rely almost entirely on contrast detection AF, making them especially vulnerable to glass-related focus problems. A Galaxy A52 user on the Samsung community forums reported intermittent focus failures through glass, and many iPhone users share similar frustrations.
To stop your iPhone or Android phone from focusing on glass, tap and hold on your subject in the viewfinder until “AE/AF Lock” appears. This locks both exposure and focus, preventing the phone from refocusing on the glass surface. Once locked, you can recompose without the phone trying to refocus.
For more control, use a third-party camera app. Apps like Halide for iOS, Lightroom’s built-in camera, or Open Camera for Android provide manual focus sliders. You can then visually adjust focus while watching the image on your screen, bypassing the phone’s confused AF system entirely.
Positioning your phone close to the glass is just as effective as with a dedicated camera. The closer the phone’s lens is to the glass, the fewer reflections the sensor picks up. Some photographers even use a simple trick: cup your hand around the phone’s camera module to create an impromptu lens hood that blocks side light.
Recommended Accessories
A rubber lens hood is the most useful accessory for glass photography. Unlike rigid plastic hoods, rubber hoods compress against glass surfaces and create a light-tight seal. They protect both your lens and the glass from scratches, and they completely eliminate reflections between the lens and the glass.
A circular polarizing filter is the second most useful accessory. Choose a quality filter from a reputable brand to avoid introducing additional optical degradation. Keep in mind that cheap polarizing filters can reduce sharpness and introduce color casts that are worse than the glass itself.
A microfiber cloth and lens cleaning spray are essential for cleaning glass surfaces before shooting. Keep a small cleaning kit in your camera bag at all times — it takes 10 seconds to clean a section of glass and can save an entire shooting session.
For aquarium and zoo photography specifically, consider a rubber lens collar (also called a lens sleeve or lens cup). These fit over the end of your lens and press against the glass, creating a flexible light seal that works on both flat and curved glass surfaces.
FAQs
What are common autofocus problems?
Common autofocus problems include: (1) Focus hunting, where the lens repeatedly adjusts without locking; (2) Front or back focusing, where the focus lands slightly in front of or behind the subject; (3) AF failure in low-contrast areas like plain walls or skies; (4) AF locking onto unintended subjects; (5) Slow AF acquisition on moving subjects. Through glass, the most common issue is the AF system locking onto the glass surface itself rather than the subject behind it.
Does wearing glasses affect camera focus?
Wearing glasses does not directly affect how a camera autofocus system works. The camera AF system is completely separate from your vision correction. However, if you wear glasses and shoot through a window, additional reflections from your glasses or the window can compound focus issues. The key is ensuring the camera lens itself has a clear, reflection-free path to the subject.
How to stop iPhone from focusing on glass?
To stop your iPhone from focusing on glass: (1) Tap and hold on the subject behind the glass until AE/AF Lock appears; (2) Move the phone as close to the glass as possible to minimize reflections; (3) Cup your hand around the camera module to block side light; (4) Use a third-party camera app like Halide with manual focus controls; (5) Clean the glass surface before shooting to reduce false contrast targets.
How to stop pictures from sticking to glass?
In photography, this refers to reflections appearing on glass in your photos. To minimize reflections when shooting through glass: use a circular polarizing filter, position your lens close to or touching the glass surface, use a lens hood to block stray light, shoot at a 30 to 40 degree angle to the glass, and ensure the glass is clean. Always turn off your flash to avoid bounce-back reflections.
Can autofocus work through glass?
Yes, autofocus can work through glass under the right conditions. If the glass is clean, scratch-free, and positioned so reflections fall outside the AF point, many cameras can successfully focus on subjects behind glass. Success depends on glass thickness, glass quality, lighting conditions, and the type of AF system your camera uses. Manual focus is always more reliable through glass than autofocus.
Is manual focus better than autofocus through glass?
In most glass shooting scenarios, yes. Manual focus with focus peaking and live view magnification gives you complete control over the focus plane, bypassing the reflection and refraction problems that plague AF systems. Once you learn to use focus peaking, manual focus through glass becomes fast and reliable, especially for static subjects in aquariums, museums, and display cases.
Conclusion
Understanding why does autofocus struggle through glass comes down to five optical phenomena: refraction shifts the focus plane, reflections create false contrast targets, smudges and dirt add competing texture, glass thickness and quality scatter light, and the AF system’s bias toward closer objects works against you. These factors combine to make glass one of the most challenging environments for any autofocus system.
The good news is that every one of these problems has a solution. Clean the glass, press your lens close to the surface, use spot AF on a high-contrast area, apply focus lock techniques, switch to manual focus with peaking when needed, attach a polarizing filter, and always use a lens hood. These seven techniques will handle virtually any glass shooting scenario you encounter.
Whether you are photographing jellyfish at an aquarium, exhibits at a museum, wildlife at the zoo, or the view from your hotel window, the key is recognizing what your AF system is seeing and taking control when it gets confused. With practice, shooting through glass becomes just another technique in your photography toolkit — not a barrier to getting great shots.
The next time your autofocus hunts through a window, do not get frustrated. Switch to manual focus, engage focus peaking, press your lens to the glass, and capture the shot your AF system could not. Your best glass photographs are waiting on the other side of the barrier.