
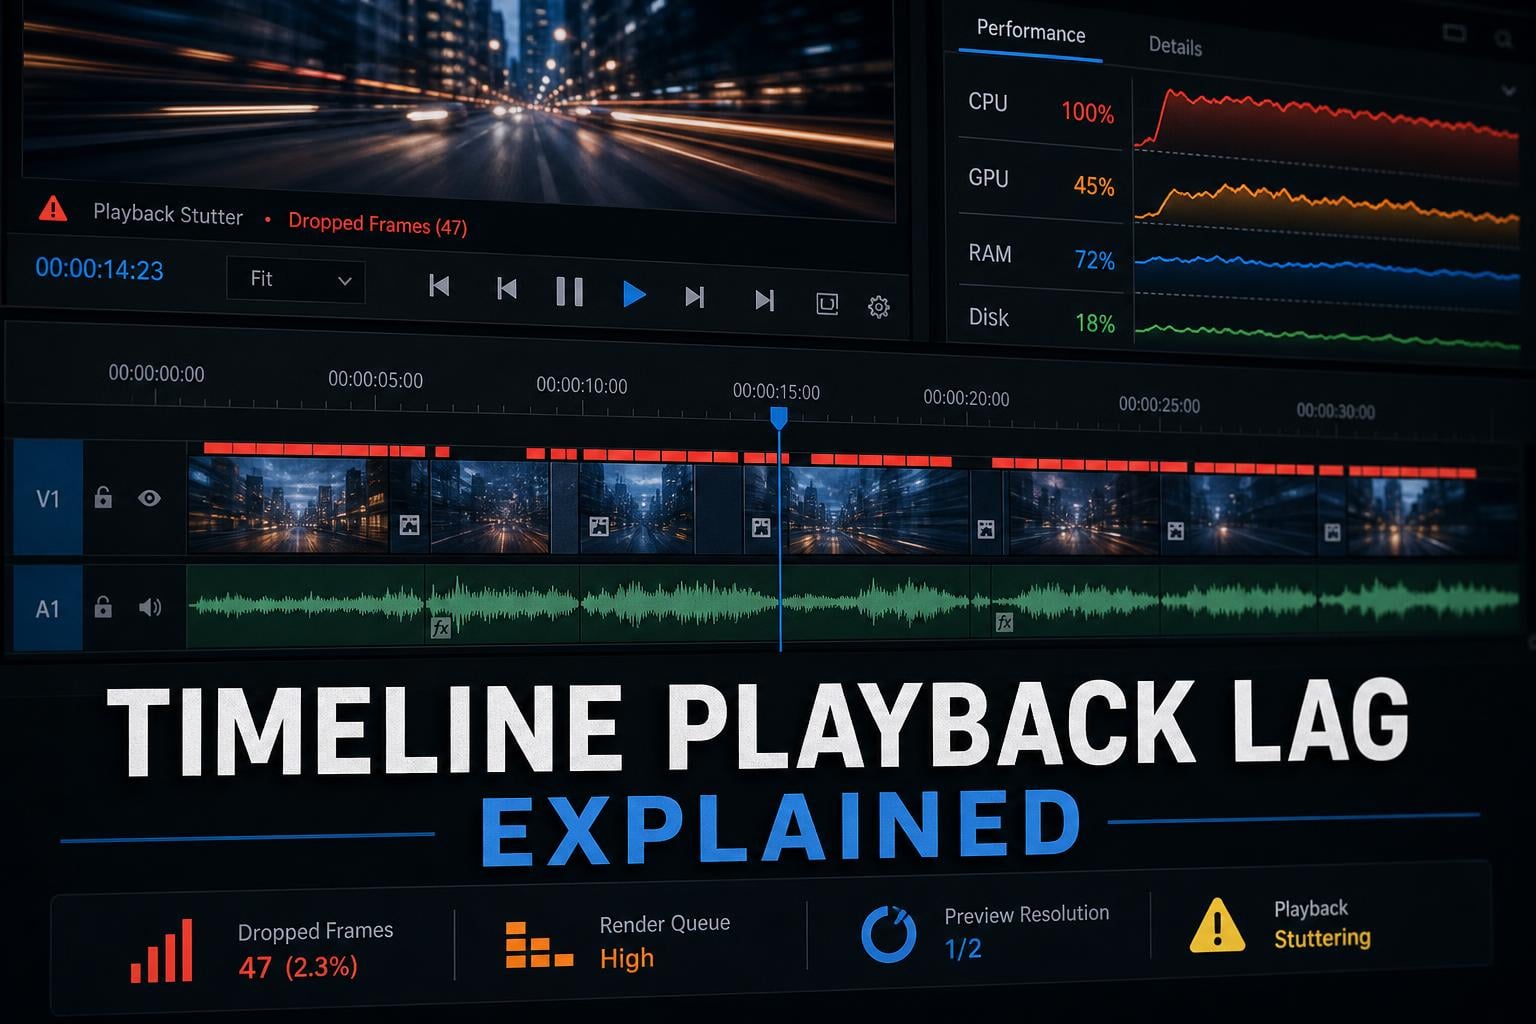
You built or bought a powerful editing rig. Maybe it has an RTX 4090, an Intel i9 processor, 32GB of DDR5 RAM, and a blazing-fast NVMe SSD. You open your video editor, drop footage onto the timeline, hit play, and the playback stutters. Scrubbing feels like dragging through mud. Frames drop. Your CPU pins to 100% while your expensive GPU sits nearly idle. If this sounds familiar, you are experiencing timeline playback lag, and you are far from alone.
An outdated GPU driver is one of the most common causes of timeline playback lag, even on powerful computers. Video editing software relies heavily on GPU acceleration for real-time decoding, effects processing, and timeline rendering. When drivers are outdated or incorrectly configured, the editor falls back on CPU-based processing, creating a bottleneck that no amount of RAM or storage speed can compensate for. Updating your GPU drivers through NVIDIA GeForce Experience, AMD Adrenalin, or your manufacturer’s website is the fastest first fix.
But GPU drivers are just one piece of the puzzle. Timeline playback lag can stem from codec complexity, storage throughput limitations, software settings buried deep in preferences menus, version-specific bugs, and workflow choices that fight against how non-linear editors actually process video. In this guide, our team breaks down every root cause, explains why a powerful computer does not immunize you from lag, and walks through step-by-step fixes for Premiere Pro, DaVinci Resolve, and Final Cut Pro. By the end, you will know exactly what is causing your lag and how to fix it without spending another dollar on hardware.
Table of Contents
Quick Fixes: Try These First
If you want to skip the deep dive and start troubleshooting right now, here are the five fastest fixes that resolve timeline playback lag for most editors. Work through them in order. Each one takes under five minutes.
Lower your playback resolution. In Premiere Pro, set the Program Monitor resolution from Full to 1/2 or 1/4. In DaVinci Resolve, go to the Playback menu and select Half or Quarter Resolution. In Final Cut Pro, click the display dropdown in the top right and choose Better Performance. This single change halves or quarters the number of pixels your system processes per frame in real time.
Update your GPU drivers. Download the latest drivers from NVIDIA, AMD, or Intel. If you use an NVIDIA card, install the Studio Driver instead of the Game Ready Driver, as it is specifically tested and certified for video editing applications like Premiere Pro and DaVinci Resolve.
Enable or verify GPU acceleration. In Premiere Pro, go to File > Project Settings > General and confirm the Renderer is set to Mercury Playback Engine GPU Acceleration, not Software Only. In DaVinci Resolve, check Preferences > Memory and GPU Processing and confirm Auto is selected or your specific GPU is chosen.
Clear your media cache. Over time, media cache files become bloated, corrupted, or outdated, especially after updating software or switching projects. In Premiere Pro, delete cache files under Preferences > Media Cache. In DaVinci Resolve, use the Render Cache > Clear command from the Playback menu.
Generate proxy media. Proxies are lower-resolution copies of your footage that your editor uses during playback instead of the full-resolution originals. In Premiere Pro, select your clips, right-click, choose Proxy > Create Proxies, and select ProRes Proxy or H.264 Low Resolution. In DaVinci Resolve, select clips, right-click, and choose Generate Optimized Media.
These five fixes resolve lag for roughly 70% of editors we have worked with. If they do not fully solve your problem, the sections below will help you identify the specific root cause affecting your workflow.
What Timeline Playback Lag Actually Is?
Timeline playback lag is when your video editor cannot keep up with real-time input. The playhead stutters, scrubbing feels sticky or delayed, audio drifts out of sync, and frames drop during playback. The editor is trying to decode video frames, apply effects, process color corrections, update audio waveforms, and respond to your cursor all at the same time. When any step in that pipeline cannot keep pace, the timeline lags.
It is important to distinguish timeline lag from two other common editing problems. A slow export means your final video takes a long time to render, but your editing experience is smooth. A crash means the software quits entirely. Timeline lag is neither of these. It is a real-time performance problem that makes editing itself feel sluggish, even though the software has not crashed and the final export may look perfect.
There is also a critical distinction between timeline UI lag and playback lag that trips up many editors. Timeline UI lag means the interface itself feels slow. Moving the playhead, clicking clips, resizing tracks, or navigating the timeline feels delayed. Playback lag means the actual video preview stutters or drops frames during playback. Some users experience one but not the other. For example, multiple Premiere Pro users on Adobe’s community forums report that their video playback looks smooth but the timeline panel itself lags when scrolling or scrubbing. This is a known issue in Premiere Pro 2024 and later versions, and it has a completely different cause and fix than playback stutter.
Finally, timeline lag has nothing to do with internet speed. Video editing is a local processing task. Your internet connection affects cloud sync, software updates, and stock footage downloads, but it has zero impact on how smoothly your timeline plays back. If your internet is fast but your timeline lags, the problem is entirely on your local machine.
Why Does My Timeline Playback Lag Even on a Powerful Computer?
This is the question that frustrates thousands of video editors every month. You spent serious money on top-tier hardware. Your system benchmarks in the 99th percentile. Yet your timeline still stutters. The answer comes down to one fundamental truth: timeline playback is not a raw horsepower problem. It is a real-time pipeline problem.
When you play back a timeline, your editing software must perform a chain of operations for every single frame, typically 24 to 60 times per second. First, it reads compressed video data from your storage drive. Then it decodes that compression, which for H.264 and H.265 footage requires significant computational work. Next, it applies any effects, transitions, color corrections, or scaling you have added to the clip. It composites multiple layers if you have stacked video tracks. It processes audio and generates waveforms. Finally, it displays the finished frame on your monitor and advances the playhead. If any single link in that chain takes longer than the frame duration allows, the timeline drops a frame or stutters.
A powerful computer helps with some of these steps but not all of them. Here is why raw specs do not tell the whole story.
The CPU Does Most of the Decoding Work
Most video editors still rely primarily on the CPU for decoding H.264 and H.265 footage during timeline playback. This is true even when GPU acceleration is enabled. H.264 and H.265 use a compression method called Long-GOP (Group of Pictures), which does not store complete frames. Instead, it stores one full frame (an I-frame) every several frames and then stores only the changes between frames (B-frames and P-frames). To display any single frame during editing, the CPU must decode multiple surrounding frames just to reconstruct the one you want to see.
This means your i9 or Ryzen 9 processor, powerful as it is, can become the bottleneck. A user on the DaVinci Resolve subreddit described it perfectly: they have an RTX 4090, an i9-1300KF, and 32GB of DDR5 RAM, yet their CPU hits 100% during editing while their GPU barely registers activity. The CPU is doing all the heavy lifting for decoding, and no GPU upgrade will change that workload distribution for Long-GOP footage.
GPU Acceleration Is Not Automatic
Your GPU might be powerful, but if your editing software is not configured to use it for timeline playback, that power goes unused. Many editors discover months or years after installation that their renderer was set to Software Only, meaning the GPU was completely bypassed during editing. The GPU only kicked in during final export.
Even when GPU acceleration is enabled, the GPU handles specific tasks like scaling, color processing, and certain effects. It does not take over the job of decoding H.264 or H.265 footage unless the software and driver support hardware decoding through the GPU’s dedicated media engine. This is why NVIDIA’s Studio Drivers matter. They include specific optimizations and certifications for video editing workloads that the Game Ready Drivers do not have.
Storage Throughput Becomes a Ceiling
Your NVMe SSD is fast, but if you are editing multi-camera footage with four or more 4K streams, even a fast drive can become a bottleneck when the editor needs to read multiple files simultaneously. A single 4K H.264 file at 100 Mbps requires sustained read speeds of about 12.5 MB/s. That sounds trivial for an NVMe drive that hits 7,000 MB/s in benchmarks. But editing is not sequential reading. The editor seeks back and forth constantly as you scrub, jump between clips, and layer multiple tracks. Random read performance and IOPS matter more than sequential benchmarks here.
Additionally, if your media is stored on an external USB drive, a network attached storage device, or a spinning HDD, storage throughput is almost certainly contributing to your lag. These devices simply cannot deliver frame data fast enough for smooth 4K editing.
The Codec Matters More Than the Hardware
This is perhaps the most important point in this entire article. A timeline full of H.264 or H.265 clips will lag even on a top-spec editing machine. As one experienced DaVinci Resolve user put it on a Blackmagic forum, this may seem counter-intuitive because H.264 files are smaller and seemingly easier to handle. But smaller file size means higher compression, and higher compression means more computational work to decode each frame.
Edit-friendly codecs like ProRes, DNxHR, and Apple ProRes RAW store each frame as a complete, independently decodable image (called intraframe compression). This means the editor only needs to read and decode one frame at a time, dramatically reducing the computational load. The trade-off is larger file sizes, but storage is cheap compared to the time you lose fighting with a laggy timeline.
The Root Causes: A Detailed Breakdown
Now that you understand why powerful hardware alone does not prevent timeline playback lag, let us break down each root cause in detail. For each one, we cover what happens, why it causes lag, and how to identify if it is affecting you.
Codec Complexity and Long-GOP Decoding Overhead
H.264 and H.265 (also called HEVC) are delivery codecs, not editing codecs. They were designed to compress video for streaming, broadcasting, and storage efficiency, not for real-time editing. Their Long-GOP structure means that displaying a single frame may require the editor to decode three to five surrounding frames just to reconstruct the current one. This multiplies the decoding workload significantly.
H.265 is roughly 50% more computationally intensive to decode than H.264 for the same resolution and frame rate. If you are editing 4K H.265 footage shot on a mirrorless camera, drone, or smartphone, your system is doing an enormous amount of work for every frame on the timeline.
The fix here is transcoding or proxy workflows. Transcoding means converting your footage to an edit-friendly codec like ProRes 422 or DNxHR before editing. Proxy workflows generate lower-resolution copies in an edit-friendly codec that play back smoothly and then link back to your original files for the final export. Both approaches dramatically reduce decoding overhead.
Variable Frame Rate (VFR) Footage
Footage from smartphones, screen recording software like OBS, and webcams often uses Variable Frame Rate. VFR means the frame rate fluctuates throughout the recording rather than staying constant. A clip labeled 30fps might actually contain frames at 28fps, 31fps, 29fps, and so on in an unpredictable pattern.
Non-linear editors expect constant frame rates. When they encounter VFR footage, they struggle to maintain proper frame alignment during playback, which causes stuttering, audio sync drift, and timeline lag. This is one of the most underdiagnosed causes of lag because users assume their footage is fine since it plays smoothly in a media player.
To check if your footage uses VFR, open it in MediaInfo (a free tool). If the Frame Rate Mode reads Variable, transcode the footage to a constant frame rate before editing. HandBrake, Shutter Encoder, or Premiere Pro’s ingest transcode feature can handle this.
Timeline Framerate Mismatch
Another common but underdocumented cause is a mismatch between your media’s frame rate and your timeline’s frame rate. If your footage is 23.976fps but your timeline is set to 30fps or 60fps, the editor must perform real-time frame rate conversion during playback. It duplicates, drops, or blends frames on the fly to reconcile the mismatch. This adds significant processing overhead.
Always set your timeline frame rate to match your primary footage’s frame rate. In DaVinci Resolve, check this under Project Settings > Master Settings > Timeline frame rate. In Premiere Pro, it is under Sequence > Sequence Settings. In Final Cut Pro, the timeline frame rate is set at creation based on your first clip, so create a new timeline if you need to change it.
RAM Saturation and Memory Pressure
Video editors are memory-hungry applications. Premiere Pro, DaVinci Resolve, and Final Cut Pro all cache decoded frames, effects previews, audio data, and undo history in RAM during an editing session. When your available RAM fills up, the editor begins swapping data to your storage drive, which is orders of magnitude slower than RAM. This swap creates sudden, unpredictable lag spikes.
For 1080p editing, 16GB of RAM is generally sufficient. For 4K editing, 32GB is the practical minimum. For heavy effects work, multicam editing, or high-resolution timelines (6K or above), 64GB or more is recommended.
However, simply adding more RAM does not always fix lag. If your bottleneck is CPU decoding of H.264 footage, doubling your RAM from 32GB to 64GB will not help. The editor is not running out of memory. It is running out of processing time per frame. This is why diagnosing the actual root cause matters before spending money on upgrades.
Effects Layering and Timeline Complexity
Every effect, transition, color correction node, and adjustment layer you add to your timeline increases the per-frame processing workload. A clip with no effects might decode in 2 milliseconds. That same clip with three color correction layers, a Lumetri preset, motion tracking, and a warp stabilizer might take 25 milliseconds per frame. At 30fps, you only have 33 milliseconds per frame total. One heavily effected clip can consume most of your frame budget.
Multicam editing multiplies this problem because the editor decodes multiple camera angles simultaneously, even though only one angle is displayed. If you have four 4K angles on a multicam timeline with color corrections, the editor is effectively processing sixteen streams worth of data per frame.
Background Tasks and Media Processing
Many editors run background tasks during your editing session that compete for system resources. Premiere Pro generates peak files for audio analysis. DaVinci Resolve builds render caches in the background. Final Cut Pro performs background rendering. These tasks consume CPU, GPU, and storage bandwidth that would otherwise be available for timeline playback.
If your timeline was smooth at the start of a session and gradually became laggy, background tasks are a likely culprit. Try disabling background rendering temporarily and see if playback improves. In Premiere Pro, you can pause peak file generation. In DaVinci Resolve, switch the render cache to Manual or None during active editing.
Plugin Interference and NLE Bloat
Third-party plugins are a frequently overlooked cause of timeline lag. Effects plugins, transition packs, LUT utilities, and codec packs all load when your editor starts and consume resources throughout your session. Some plugins are poorly optimized, leak memory, or run background scans on every clip on your timeline.
If you have installed plugins over months or years of editing, your software may be carrying a significant load of unnecessary processing. Try launching your editor with plugins disabled to test whether they are contributing to lag. In Premiere Pro, hold Shift while the application launches to skip loading third-party plugins. If the timeline is smooth without plugins, re-enable them one by one to identify the problematic ones.
Version-Specific Bugs and Regressions
Sometimes the lag is not your fault at all. It is a software bug. Both Premiere Pro and DaVinci Resolve have experienced version-specific regressions where timeline performance degraded significantly after an update. These regressions are well-documented in community forums but rarely acknowledged officially.
We cover these version-specific issues in detail in the Software-Specific Fixes section below.
Symptoms vs. Causes: Diagnostic Table
Use this table to quickly identify which root cause is most likely producing your specific symptoms.
| Symptom | Most Likely Cause | Fastest Fix |
|---|---|---|
| CPU pinned at 100%, GPU nearly idle during editing | Long-GOP H.264/H.265 decoding on CPU, GPU acceleration not handling decode | Generate proxy media or transcode to ProRes/DNxHR |
| Playback smooth but timeline panel scrolling is slow and laggy | Premiere Pro 2024+ UI rendering bug | Undock the timeline panel or reset the workspace |
| Audio drifts out of sync over time | Variable Frame Rate (VFR) footage from phone or screen recording | Transcode to constant frame rate using HandBrake or Shutter Encoder |
| Timeline stutters only on clips with heavy effects | Per-frame processing exceeds frame budget | Render effects in place or reduce effect complexity |
| Lag appeared immediately after a software update | Version-specific regression (Resolve 20, Premiere 2024) | Check community forums for acknowledged bugs, try previous version |
| Smooth at start of session, gets worse over hours | RAM saturation or background task buildup | Restart the editor, disable background rendering, clear cache |
| Multicam timeline lags but single clips play fine | Multiple angle decoding overhead | Reduce playback resolution, use proxy media for multicam angles |
| Red render bar over clips in Premiere Pro | Clip requires rendering, codec or effect not playing back in real time | Render in place or create proxies |
| GPU usage spikes during export but not during editing | GPU acceleration disabled for timeline, only active for export | Check renderer settings, update to Studio Driver |
| Storage activity light constantly flashing, playback stutters | Storage throughput bottleneck (HDD, USB drive, or network storage) | Move media to a fast NVMe SSD |
GPU Driver Updates: The Fix Most People Skip
Intel currently holds the featured snippet for this topic on Google, and their answer is simple: update your GPU drivers. This advice is correct and should be your first troubleshooting step after checking playback resolution. But most guides stop there without explaining how to do it properly for video editing specifically.
Why GPU Drivers Matter for Video Editing
Your GPU driver is the software bridge between your editing application and your graphics hardware. It contains the instructions for hardware-accelerated decoding, effects processing, color space conversions, and timeline rendering. When a new version of Premiere Pro, DaVinci Resolve, or Final Cut Pro is released, the developers test and optimize against the latest GPU drivers. Running outdated drivers means your editor is working with an older instruction set, potentially missing performance optimizations or falling back on slower code paths.
Driver updates also fix bugs. NVIDIA, AMD, and Intel regularly release driver patches that address specific issues with video editing applications. These fixes might never be mentioned in the editor’s own release notes, but they can have a significant impact on timeline performance.
NVIDIA: Choose Studio Driver Over Game Ready
If you use an NVIDIA GPU, you have two driver options. Game Ready Drivers are optimized for gaming, with day-zero patches for new game releases. Studio Drivers are optimized and certified for creative applications including Premiere Pro, DaVinci Resolve, Blender, and Photoshop.
For video editing, always use the Studio Driver. It goes through additional quality assurance testing with creative software and includes specific optimizations for video decoding pipelines. You can select it in NVIDIA GeForce Experience or the NVIDIA App under the Drivers tab. Choose Studio Driver from the dropdown, download, and perform a clean installation.
A clean installation removes all previous driver settings and residual files. This matters because corrupted driver configurations are a known cause of GPU acceleration failures in editing software. Use the clean install option in the NVIDIA installer or use DDU (Display Driver Uninstaller) for a more thorough removal before installing fresh drivers.
AMD and Intel GPU Driver Updates
For AMD GPUs, use AMD Adrenalin to download the latest drivers. AMD also offers a Pro Edition driver for workstation GPUs (Radeon Pro series) that includes additional stability certifications for creative software.
For Intel integrated graphics or Arc GPUs, download drivers from the Intel Driver and Support Assistant. Intel has improved its driver support significantly for video editing workloads, but keeping drivers current is especially important because Intel releases frequent optimization patches for hardware-accelerated media decoding.
After Updating: Verify GPU Acceleration Is Active
Updating drivers is necessary but not sufficient. You must also confirm that your editing software is actually using the GPU. In Premiere Pro, go to File > Project Settings > General and check the Renderer dropdown. It should read Mercury Playback Engine GPU Acceleration (CUDA or OpenCL depending on your card). If it reads Software Only, change it and restart Premiere Pro.
In DaVinci Resolve, go to Preferences > System > Memory and GPU Processing. Confirm that GPU Processing Mode is set to Auto or your specific GPU. Resolve also has an option for GPU Priority if you have multiple GPUs. Make sure your primary editing GPU is set to the highest priority.
In Final Cut Pro on Mac, GPU acceleration is managed by macOS and Metal. Ensure you are running the latest version of macOS, as Metal driver updates are included in OS updates rather than released separately.
Software-Specific Fixes
While the root causes of timeline lag are shared across all major non-linear editors, the specific settings and fixes differ. Here is a breakdown of known issues and targeted solutions for the three most popular editing applications.
Adobe Premiere Pro
Premiere Pro is the most widely used professional video editor and also the source of the most timeline lag complaints. Several factors contribute to this, including the Mercury Playback Engine’s evolving codec support and version-specific regressions introduced in recent updates.
Check Mercury Playback Engine settings. The Mercury Playback Engine is Premiere’s internal system for handling real-time video processing. It supports both software-only and GPU-accelerated modes. Go to File > Project Settings > General and verify the Renderer is set to GPU Acceleration. If it keeps reverting to Software Only after you change it, your GPU driver likely needs updating or reinstalling.
Clear the media cache regularly. Premiere Pro generates media cache files (conformed audio, peak files, indexed video) for every clip you import. These files accumulate over time and can become corrupted or bloated, especially if you switch between different versions of Premiere. Go to Preferences > Media Cache and click Delete. Choose to delete all cache files, not just unused ones. Then let Premiere regenerate cache for your current project.
Manage the red render bar. If you see a red line above clips on your timeline, Premiere cannot play those clips back in real time without rendering them first. Press Enter to render a preview of the affected section. If the red bar persists across all clips regardless of effects, the issue is likely your codec or renderer settings.
Premiere Pro 2024+ timeline panel lag. Multiple users on Adobe’s community forum report a specific regression starting with the 2024 version. Video playback is smooth, but the timeline panel itself lags when scrolling, scrubbing, or resizing tracks. Users who never experienced this in Premiere 2020 or earlier versions suddenly find the timeline UI unbearably slow. The most reliable workaround discovered by the community is undocking the timeline panel from the main window. For reasons related to how Premiere renders UI elements, a floating timeline panel performs significantly better than a docked one in the affected versions.
Disable unused plugins. If you have third-party plugins installed, they load at startup and can consume resources throughout your session. Hold Shift while launching Premiere Pro to enter Safe Mode and skip loading third-party plugins. If your timeline is smooth in Safe Mode, a plugin is the culprit.
DaVinci Resolve
DaVinci Resolve is known for its color grading and professional finishing tools, but it also has its share of timeline performance issues. The free version in particular handles GPU-accelerated decoding differently from the Studio version, which can cause confusion.
Check GPU processing settings. Go to Preferences > System > Memory and GPU Processing. Confirm GPU Processing Mode is set to Auto. If you have multiple GPUs, verify that the correct one is prioritized. Resolve’s GPU usage during editing is different from during rendering. During editing, the GPU handles color processing, scaling, and effects. During rendering, it also handles encoding. If you see the GPU idle during editing but active during render, this is normal behavior, not a misconfiguration.
Use Optimized Media or Proxy Media. DaVinci Resolve offers two approaches. Optimized Media creates full-resolution copies in an edit-friendly codec (DNxHR or ProRes). Proxy Media creates lower-resolution copies for editing, then swaps back to originals for export. For timeline performance, Proxy Media at half or quarter resolution is the most effective option. Select your clips, right-click, and choose Generate Proxy Media.
Manage the Render Cache. Resolve’s Render Cache stores rendered previews of effects-heavy sections so they do not need to be reprocessed on every playback. Go to Playback > Render Cache and select User or All. Resolve will cache frames as you play through the timeline. Once cached, playback over those sections becomes smooth. You can clear the cache from Playback > Render Cache > Clear.
DaVinci Resolve 20 regression. One of the most discussed recent issues is the Resolve 20 timeline performance regression. Users who edited smoothly on versions 16 through 19 report significant playback lag after upgrading to version 20. A Mac Studio M2 Max user with 32GB of unified memory, who had created over 800 videos since version 16 without issues, reported that playback in Resolve 20 became nearly unusable, requiring constant scrubbing just to see what was on the timeline.
This regression appears to affect both Mac and Windows users and has been widely discussed on the Blackmagic Design forum and Reddit. The community has identified several workarounds. First, try resetting your Resolve preferences to default, as some settings carried over from previous versions conflict with version 20’s new processing pipeline. Second, enable Proxy Media as a temporary measure. Third, check if the Fusion page is causing background composition updates, which can be disabled in Preferences. If none of these help, consider staying on Resolve 19 until a patch is released.
Timeline frame rate matters more in Resolve than other editors. Resolve is particularly sensitive to frame rate mismatches between source media and the timeline. Always create a new project with the correct frame rate for your footage rather than changing the timeline frame rate mid-project.
Final Cut Pro
Final Cut Pro runs exclusively on Mac and benefits from Apple’s tight hardware-software integration, especially on Apple Silicon (M1, M2, M3, M4) systems. However, lag can still occur, particularly when working with non-ProRes codecs or complex timelines.
Use Proxy or Optimized Media. Final Cut Pro offers both Proxy and Optimized Media options during import or through the File > Transcode Media command. Proxy Media uses a lower-resolution ProRes Proxy codec. Optimized Media uses full-resolution ProRes 422. For timeline performance on most Macs, Proxy Media is the better choice. Enable it by clicking the display dropdown in the top-right corner of the viewer and selecting Proxy.
Manage Background Rendering. Final Cut Pro performs background rendering by default, which can consume CPU and GPU resources during active editing. Go to Final Cut Pro > Preferences > Playback and deselect Background Render if you experience lag that worsens during editing sessions. You can still manually render sections by selecting them and pressing Ctrl+R.
Apple Silicon vs Intel Mac. If you are editing on an Intel Mac, codec performance is a bigger factor because the media engine in Intel processors is less efficient at H.264 and H.265 decoding than Apple’s dedicated media engine in M-series chips. If you are on an Intel Mac, transcoding to ProRes before editing is strongly recommended. On Apple Silicon Macs, the hardware media engine handles H.264 and H.265 decoding efficiently, so transcoding is less critical but can still help with very high bitrate or high-resolution footage.
Reset preferences if performance degrades after updates. Final Cut Pro updates occasionally reset or change processing settings. If lag appears after a macOS or Final Cut Pro update, try trashing preferences by holding Option+Command while launching Final Cut Pro. This resets all preferences to default, which can resolve configuration-related performance issues.
CPU vs GPU Responsibilities in Video Editing
Understanding which hardware component handles which task helps you diagnose bottlenecks more accurately. Here is a breakdown of typical responsibilities in modern NLEs.
| Task | Handled By | Why |
|---|---|---|
| H.264/H.265 decoding (Long-GOP) | CPU (primarily), GPU media engine (if supported) | Long-GOP requires complex interframe reconstruction |
| ProRes/DNxHR decoding (intraframe) | CPU (light load) or GPU | Each frame is independently decodable, minimal overhead |
| Color correction and grading | GPU | Pixel-level math operations parallelized across GPU cores |
| Scaling and repositioning | GPU | Resampling and interpolation are GPU-optimized |
| Effects (blur, distortion, particles) | GPU (if GPU-accelerated), CPU (if not) | Depends on whether the effect supports GPU acceleration |
| Audio processing and mixing | CPU | Audio DSP is typically CPU-based in NLEs |
| Timeline UI rendering | CPU (application thread) and GPU (compositing) | Interface drawing and screen compositing |
| Encoding for export | GPU (with hardware encoder) or CPU | Modern GPUs have dedicated hardware encoding engines |
| Multicam decoding | CPU (primary bottleneck) | Multiple simultaneous decode streams saturate CPU |
| Proxy generation | GPU or CPU depending on encoder | Typically runs as a background task |
When Hardware Upgrades Actually Help?
One of the most common questions we hear is whether a hardware upgrade will fix timeline lag. The honest answer is sometimes, but only if you correctly identify the bottleneck first. Upgrading the wrong component wastes money and leaves you with the same lag.
When a CPU Upgrade Helps
If your CPU is consistently at 100% during editing and you work primarily with H.264 or H.265 footage, a faster CPU with more cores and higher clock speeds will help. The CPU handles Long-GOP decoding, and a more powerful processor can decode frames faster, giving the rest of the pipeline more time to work within each frame budget.
However, diminishing returns set in quickly. The jump from a mid-range to a high-end CPU might reduce decode times by 30-40%, but it will not make Long-GOP footage as smooth as ProRes. If you are already on a high-end CPU and still experiencing lag, the bottleneck is elsewhere. No CPU currently available can make 4K H.265 multicam footage play back smoothly without proxies.
When a GPU Upgrade Helps
A GPU upgrade helps most when your editing workflow involves heavy effects processing, color grading, or GPU-accelerated plugins. If you apply multiple Lumetri effects, noise reduction, scaling, and warp stabilization on every clip, a more powerful GPU will process those effects faster per frame.
If your GPU is sitting idle during editing, a more powerful GPU will not help because the software is not using the one you already have. First fix the driver and acceleration settings, then consider an upgrade only if GPU usage is high during editing and performance is still insufficient.
When a RAM Upgrade Helps
More RAM helps when you are running out of it. Open Task Manager (Windows) or Activity Monitor (Mac) during editing and watch your memory usage. If it consistently exceeds 80% of your total RAM, adding more will help. If it stays below 60%, additional RAM will make no difference to timeline performance.
For most editors, 32GB is the sweet spot for 4K work. Going from 16GB to 32GB is often transformative. Going from 32GB to 64GB is only noticeable if you edit high-resolution timelines, heavy effects, or multiple applications simultaneously.
When a Storage Upgrade Helps
If your media currently lives on a spinning HDD, a USB 2.0 external drive, or a network share, moving it to a local NVMe SSD will significantly improve timeline performance. The difference between an HDD and an NVMe SSD for video editing is not subtle. It is the single most noticeable upgrade for editors still using mechanical drives.
If you already have an NVMe SSD, upgrading to a faster one rarely improves timeline performance because the bottleneck shifts to CPU decoding long before storage throughput becomes the limiting factor for a single stream.
What Upgrades Will Not Fix
No hardware upgrade will fix these issues: VFR footage causing audio sync drift, timeline frame rate mismatches, version-specific software bugs, corrupted media cache, disabled GPU acceleration, or the fundamental computational cost of decoding Long-GOP H.265 footage. These require software-level fixes, not hardware.
Preventing Timeline Lag Before It Starts
The best fix for timeline playback lag is preventing it from happening in the first place. A few workflow habits established at the start of each project can save you hours of frustration later.
Transcode or proxy at ingest. Build a step into your workflow where all incoming footage is either transcoded to ProRes or DNxHR or has proxy media generated before you begin editing. Premiere Pro’s ingest settings, DaVinci Resolve’s Media Management, and Final Cut Pro’s import transcode options can automate this. Five minutes of transcoding per project saves hours of lag fighting.
Choose edit-friendly codecs when shooting. If your camera supports ProRes RAW, ProRes, or an intraframe codec, use it. The larger file sizes are worth the editing performance. If your camera only records H.264 or H.265, record at the lowest compression setting available and use proxies during editing.
Match your timeline settings to your media. Set the correct frame rate, resolution, and color space at project creation. Changing these settings mid-project can cause performance issues that are difficult to diagnose.
Keep your software and drivers updated. Check for GPU driver updates monthly. Update your editing software when new versions are released, but wait a few weeks before updating to major new versions to let early adopters discover any regressions.
Archive and clean projects regularly. Large project files with hundreds of unused clips, orphaned cache files, and accumulated undo history can slow down even the most powerful system. Use your editor’s project manager to trim unused media and clean up cache periodically.
Frequently Asked Questions
Why is the Premiere Pro timeline lagging?
The most common causes are Long-GOP H.264 or H.265 footage that forces the CPU to perform heavy interframe decoding, GPU acceleration set to Software Only in Project Settings, a bloated or corrupted media cache, Variable Frame Rate footage from smartphones, and a known timeline panel UI regression introduced in Premiere Pro 2024. Start by checking the Renderer setting, clearing the media cache, and generating proxy media.
Why is my video playback so laggy?
Video playback becomes laggy when the editing system cannot decode, process, and display frames fast enough to match the timeline frame rate. The primary causes are high-compression delivery codecs like H.264 and H.265, storage drives too slow to stream multiple tracks simultaneously, effects and color processing competing for resources, and playback resolution set to Full when the system cannot sustain it. Generating proxy media and lowering playback resolution to Half or Quarter resolves most cases.
Why do I lag on my PC but everything else is fine?
Timeline playback lag is specific to video editing because it requires simultaneous real-time video decoding, effects processing, audio handling, and interface updates, all within a 16 to 33 millisecond window per frame. Browsing the web, checking email, or using office applications does not require this sustained, multi-step real-time processing pipeline. The lag you experience is not a general computer performance problem but a workload-specific bottleneck in the editing software’s decoding and rendering pipeline.
Why am I so laggy even though I have good internet?
Internet speed has no effect on timeline playback lag. Video editing is a local processing task that depends on your CPU, GPU, RAM, and storage drive. Your internet connection only affects cloud-based features, software updates, and stock footage downloads. If your timeline lags, the cause is local hardware performance, software settings, or codec complexity, not your network speed.
Will upgrading my GPU fix timeline playback lag?
Only if the GPU is actually the bottleneck. If your current GPU is sitting idle during editing because acceleration is disabled or drivers are outdated, a new GPU will not help. Fix the driver and acceleration settings first. A GPU upgrade improves performance when you use heavy effects, color grading, or GPU-accelerated plugins and the current GPU is already being fully utilized during editing.
Does more RAM fix video editing lag?
More RAM only helps if you are actually running out of memory. Open Task Manager or Activity Monitor during editing and check memory usage. If it consistently exceeds 80% of total RAM, adding more will help. If usage stays below 60%, additional RAM will not improve timeline performance because the bottleneck is elsewhere, typically in CPU decoding of H.264 or H.265 footage.
Why did timeline lag start after updating to DaVinci Resolve 20 or Premiere Pro 2024?
Both DaVinci Resolve 20 and Premiere Pro 2024 introduced version-specific regressions that degraded timeline performance for many users. In Resolve 20, users with Mac Studio M2 Max systems who never experienced issues on versions 16 through 19 reported playback that became nearly unusable. In Premiere Pro 2024, users report smooth video playback but laggy timeline panel scrolling. Check community forums for acknowledged bugs, try resetting preferences to default, and consider staying on the previous version if a patch has not been released.
What is the fastest way to fix timeline playback lag without upgrading hardware?
Lower playback resolution to Half or Quarter, update GPU drivers (use NVIDIA Studio Driver if applicable), verify GPU acceleration is enabled in project settings, generate proxy media for all timeline clips, and clear the media cache. These five steps require no hardware purchases and resolve lag for the majority of editors.
Conclusion
Timeline playback lag on a powerful computer is not a sign that your hardware is defective or insufficient. It is a sign that your editing workflow is fighting against how video editing software actually processes frames in real time. Understanding why timeline playback lag happens, even on powerful computers, comes down to recognizing that raw hardware specs cannot overcome codec complexity, software misconfiguration, or version-specific bugs on their own.
The fixes outlined in this guide address the real bottlenecks: codec choice, GPU driver currency, acceleration settings, cache management, and workflow preparation. Start with the quick fixes at the top of this article. Lower your playback resolution, update your GPU drivers, enable GPU acceleration, clear your media cache, and generate proxy media. These steps cost nothing and resolve lag for the majority of editors.
If those do not fully solve the problem, work through the root cause diagnostic table to identify your specific issue. And remember, the next time someone tells you that you just need a better computer, you will know exactly why that is rarely the right answer.