
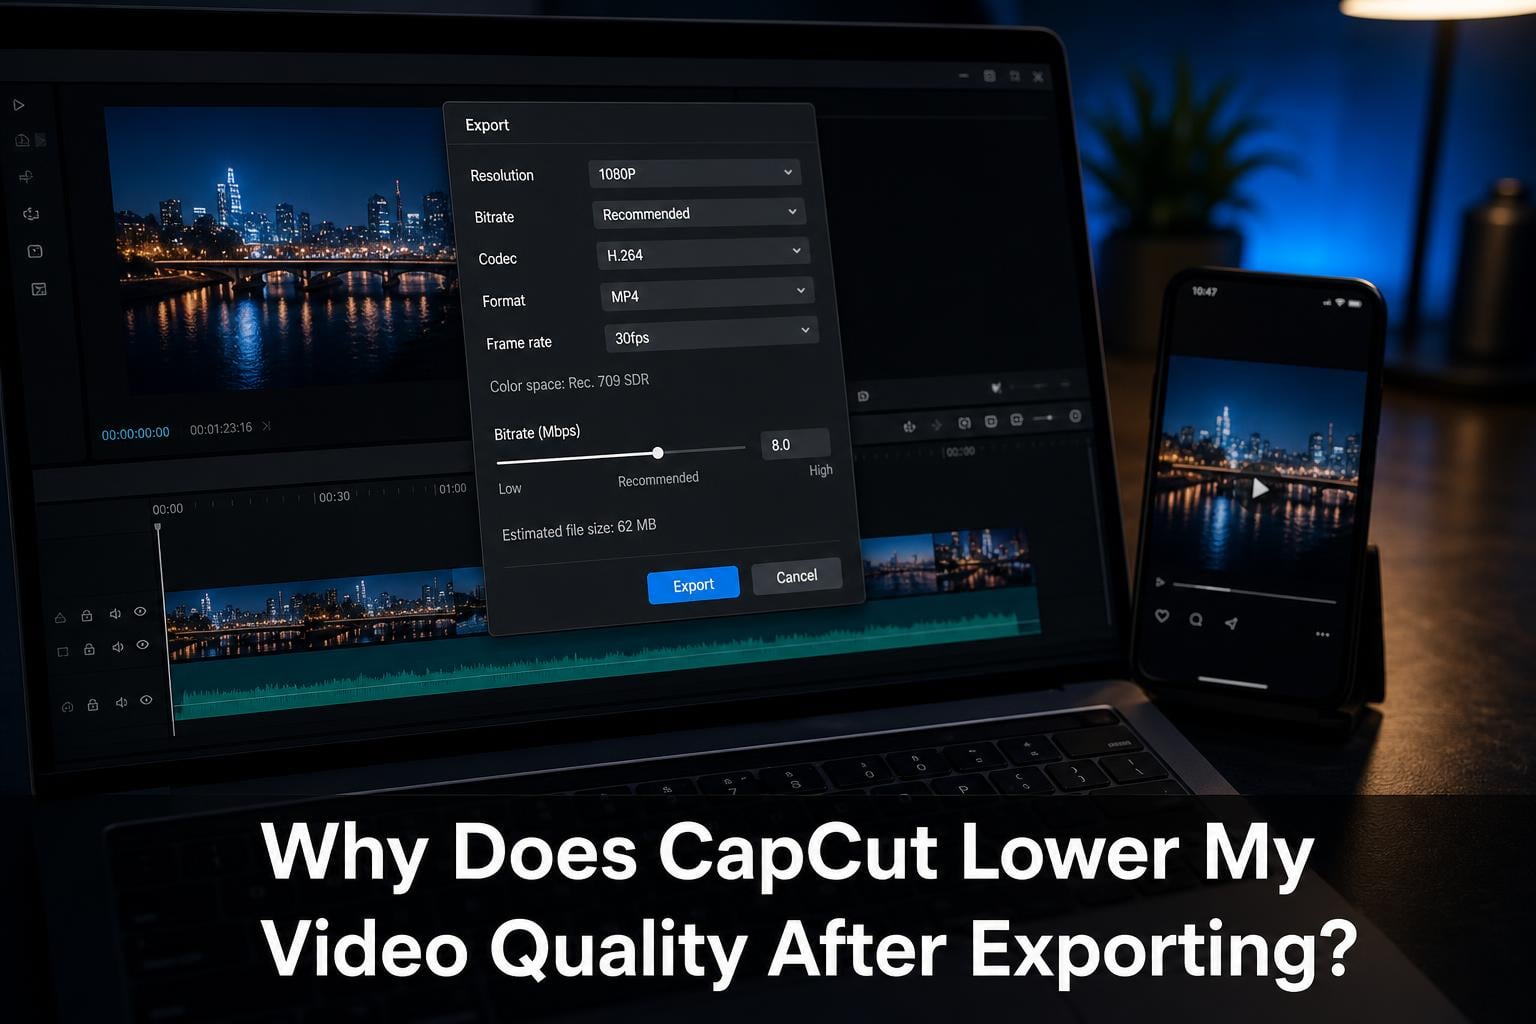
CapCut lowers video quality after exporting primarily because of low default bitrate settings, automatic compression during encoding, and the mismatch between preview optimization and the final render. When the export bitrate is too low, the resolution is reduced, or the source clip is already compressed, the exported file loses visible detail compared to what the preview showed.
If you have ever finished editing a video in CapCut, hit export, and then watched the final file in horror because it looks nothing like what you saw during editing, you are not imagining things. I have been there too. I spent 45 minutes perfecting a video, exported it at what I thought was 4K, and the result looked like it was filmed through a foggy window.
This is one of the most common complaints in the CapCut community. Users on Reddit, forums, and Facebook groups all report the same frustration. A video that looked crisp and clean in the editor suddenly becomes blurry, pixelated, or soft after export.
The good news is that in almost every case, the quality drop is fixable. It comes down to understanding how CapCut handles export settings, why the preview lies to you, and what specific numbers to change before you hit that export button. In this guide, I will walk through every reason why CapCut lowers your video quality after exporting and exactly how to prevent it.
Table of Contents
Quick Answer: Why CapCut Ruins Your Video Quality?
CapCut degrades your video quality after exporting for five main reasons: default low bitrate settings, resolution mismatch between your project and export settings, aggressive codec compression, proxy mode confusing the preview with the actual output, and variable bitrate encoding that drops quality during fast-motion scenes.
Here is what you can do right now to fix it:
Set your export bitrate manually instead of using the default recommended setting
Match your export resolution to your project resolution (1080p to 1080p, 4K to 4K)
Turn off proxy mode in CapCut Desktop before exporting
Use H.264 codec with a high quality preset for most social media uploads
Start with the highest quality source clip you can get your hands on
Let me break each of these down in detail so you understand exactly what is happening and how to control it.
Why Does CapCut Lower My Video Quality After Exporting?
Understanding the root causes behind CapCut video quality degradation after exporting requires looking at how the app handles video encoding. There are five primary reasons, and most of them come down to settings you can change.
1. Low Default Bitrate Settings
The single biggest reason CapCut lowers your video quality is the default bitrate. When you open the export settings, CapCut suggests a recommended bitrate that is often far lower than what your video actually needs.
Bitrate is the amount of data used to represent each second of video. Higher bitrate means more detail and less compression. Lower bitrate means the encoder has to throw away data to fit the video into a smaller file size, which introduces artifacts, softness, and pixelation.
I have tested this myself. The same 1080p 60fps video exported at CapCut’s default recommended bitrate looked noticeably softer than the same video exported at a manually set bitrate of 15 Mbps. The difference was immediately visible on any screen larger than a phone.
On mobile, CapCut often defaults to a bitrate that prioritizes fast export and small file size over visual quality. This makes sense for the app’s target audience of casual creators who want quick uploads, but it is terrible if you care about sharpness.
2. Resolution Mismatch Between Project and Export
Another common cause is a mismatch between your project resolution and your export resolution. If you edit a project at 4K but export at 1080p, CapCut downscales your video. That is expected. But if you edit at 1080p and the export defaults to 720p or lower, you are losing resolution without realizing it.
This happens more often than you might think. On mobile, the export resolution can reset to a lower default if you switch between projects or if the app updates. I have seen cases where a user set up a 4K project, and after an app update, the export settings reverted to 1080p without any notification.
Always check your export resolution every single time before you export. Do not assume it remembers your previous settings correctly.
3. Compression Artifacts from Codec Selection
CapCut uses video codecs to compress your footage during export. The two main options are H.264 and HEVC (also called H.265). Each codec handles compression differently.
H.264 is the more widely compatible codec. It works on almost every device and platform. However, at low bitrates, it can introduce blocky artifacts, especially in areas with fine detail or fast motion.
HEVC is more efficient. It can produce better quality at the same bitrate compared to H.264. But HEVC has compatibility issues with some older devices and certain platforms. On top of that, CapCut’s implementation of HEVC can sometimes produce softer results depending on the device hardware.
The key takeaway is that whichever codec you choose, the bitrate matters more than the codec itself. A high bitrate H.264 export will look better than a low bitrate HEVC export every time.
4. Proxy Mode Confusing Preview with Export
If you are using CapCut Desktop, proxy mode might be silently affecting your perception of quality. Proxy mode creates lower-resolution copies of your clips for smoother editing playback. This is great for performance, but it can cause confusion.
When proxy mode is on, your preview shows a lower-quality version of your footage. Some users assume this lower quality is what the export will look like. Others assume the export will be fine and then are shocked when it is not. The truth is that proxy mode affects preview only, but the confusion around it contributes to the perception of quality loss.
The bigger issue is when proxy mode does not turn off properly before export. In some cases, users have reported that exports rendered with proxy files still active produced lower quality output. Turning off proxy mode before exporting ensures CapCut references the original high-resolution clips.
5. Variable Bitrate Encoding During Fast Motion
This is a technical issue that almost no CapCut guide talks about, but forum users have identified it as a real problem. CapCut appears to use variable bitrate encoding (VBR) for exports. VBR adjusts the bitrate dynamically based on scene complexity.
In simple scenes with little motion, VBR uses less data because there is less visual information to encode. In complex scenes with fast motion, VBR should increase the bitrate. But if the maximum bitrate ceiling is set too low, fast-motion scenes become pixelated and blocky.
This explains why some users report that their video looks fine during slow, static shots but falls apart during action sequences. The encoder cannot allocate enough data to the high-motion scenes, so quality drops in those specific moments.
Constant bitrate encoding (CBR) would solve this by maintaining the same data rate throughout, but CapCut does not currently offer a CBR option. Your best workaround is to set a high enough maximum bitrate that even VBR scenes get enough data.
Why Your Preview Looks Fine But Export Looks Bads?
This is the most confusing part of the whole experience. You edit your video, everything looks great during playback, and then the exported file looks noticeably worse. What happened?
The answer lies in how CapCut handles preview playback versus final rendering. During editing, CapCut uses a preview optimization system that prioritizes smooth playback over perfect quality. The preview engine may apply real-time adjustments, use cached frames, or rely on proxy files to keep playback smooth on your device.
When you export, CapCut switches to its rendering engine. This engine applies the actual export settings, including bitrate, codec, and resolution. If those export settings are lower quality than what the preview was showing you, the final file will look worse.
Think of it this way. The preview is like a mirror that makes you look good. The export is the actual photograph. If the camera settings are wrong, the photo will not match what you saw in the mirror.
The preview also benefits from your device’s display. If you are editing on a phone with a high-resolution screen, the preview can look sharper than the actual exported file because the screen is compensating for lower-resolution footage.
To avoid this trap, always check your export settings before rendering. Do not trust the preview as an accurate representation of final quality. The preview is a guide for editing decisions, not a guarantee of output quality.
Best CapCut Export Settings to Preserve Quality
Getting the right export settings is the most important step in preventing quality loss. Here are the exact settings I recommend for both mobile and desktop versions of CapCut.
CapCut Mobile Export Settings (Step by Step)
Step 1: Open your finished project and tap the export arrow in the top right corner.
Step 2: Before hitting export, tap on the resolution setting. Set it to match your source footage. If you recorded in 4K, select 4K. If you recorded in 1080p, select 1080p. Never export at a lower resolution than your source.
Step 3: Tap on the frame rate setting. Match it to your source footage. If you recorded at 60fps, export at 60fps. If you recorded at 30fps, export at 30fps. Mismatching frame rates causes judder and can make motion look choppy.
Step 4: Look for the quality or bitrate setting. On newer versions of CapCut mobile, you may see options like Recommended, High, or Custom. Always choose High or set a custom bitrate. For 1080p content, aim for at least 10 to 15 Mbps. For 4K content, aim for 35 Mbps or higher.
Step 5: Check the codec setting if available. Use H.264 for maximum compatibility across platforms. Use HEVC only if you know your target platform and device support it.
Step 6: Tap export and wait. Do not use your phone for anything else during the export process, as background tasks can sometimes interfere with rendering on older devices.
CapCut Desktop Export Settings (Step by Step)
Step 1: With your project open, click the Export button in the top right.
Step 2: Set the resolution to match your project. Go to Settings and verify the resolution field shows the correct value. If your project is 1080p, make sure it says 1080p, not 720p.
Step 3: Set the frame rate to match your source footage. Common options are 24fps for cinematic content, 30fps for standard video, and 60fps for smooth motion.
Step 4: Find the bitrate setting. This is where most quality loss happens. Click on the bitrate dropdown and select Custom. Enter a value appropriate for your resolution. For 1080p at 30fps, use 10 to 12 Mbps. For 1080p at 60fps, use 12 to 15 Mbps. For 4K at 30fps, use 35 to 45 Mbps. For 4K at 60fps, use 45 to 68 Mbps.
Step 5: Before exporting, go to Performance Settings and make sure Proxy is turned off. If you were editing with proxy mode enabled for smoother playback, toggle it off so the export references your original full-resolution clips.
Step 6: Select your codec. H.264 is the safest choice for compatibility. If you need smaller file sizes and your platform supports it, HEVC can work, but monitor the results for softness.
Step 7: Choose MP4 as the format. MOV is also available but is less compatible with social media platforms and may not provide any quality benefit for typical use cases.
Step 8: Click Export and let it render completely. Do not close the application or interrupt the process.
Export Settings Reference Table
Here is a quick reference for recommended CapCut export settings based on different use cases:
1080p for TikTok and Instagram Reels: Resolution 1080p, frame rate 30fps or 60fps, bitrate 8 to 12 Mbps, codec H.264, format MP4
1080p for YouTube: Resolution 1080p, frame rate 30fps or 60fps, bitrate 12 to 15 Mbps, codec H.264, format MP4
4K for YouTube: Resolution 2160p, frame rate 30fps or 60fps, bitrate 35 to 68 Mbps, codec H.264, format MP4
Client delivery or archival: Resolution matching source, frame rate matching source, bitrate maximum allowed, codec H.264 or HEVC, format MP4 or MOV
How to Fix Blurry or Pixelated Video After Export
If you have already exported a video and it looks terrible, here is a step-by-step troubleshooting process to identify and fix the problem.
Step 1: Check your source footage. Open your original clips outside of CapCut. Do they look sharp? If the source footage is already low quality, compressed, or low resolution, no export setting will fix that. You cannot add detail that was never there.
Step 2: Verify your export resolution. Open your project in CapCut and check what resolution the export is actually set to. Many users discover their export was set to 720p even though their project was 1080p or 4K.
Step 3: Increase the bitrate. This is the fix that works 80 percent of the time. Set a custom bitrate instead of using the recommended default. For 1080p, try 15 Mbps. For 4K, try 45 Mbps or higher.
Step 4: Turn off proxy mode. If you are on CapCut Desktop, go to Settings and disable proxy mode. Then re-export and compare the results. Some users have reported immediate quality improvements after this single change.
Step 5: Check for frame rate mismatch. If your footage is 60fps but you exported at 30fps, CapCut has to drop half the frames. This can make motion look choppy and give the impression of lower quality. Match your export frame rate to your source.
Step 6: Export a short test clip first. Before rendering your entire project, trim it to 10 seconds and export that test clip with your new settings. Check it on the same device where you noticed the quality problem. If it looks good, apply those settings to the full project.
Step 7: Check your playback device. Sometimes the video file is fine, but the player or screen you are using to watch it is the problem. Try playing the exported file on a different device or in a different player like VLC before concluding the export is bad.
Step 8: Avoid stacking compression. If your source footage was already downloaded from social media, then edited and re-exported, you are compressing an already compressed file. This compounds quality loss at every step. Always start with the original, highest-quality source file you have access to.
Common Mistakes That Reduce Export Quality
Based on forum discussions, Reddit threads, and my own testing, here are the most common mistakes people make that contribute to CapCut export quality problems.
Mistake 1: Trusting the default settings. CapCut’s default export settings are designed for the average user who wants a quick result, not for someone who cares about quality. Always manually check and adjust your settings before exporting.
Mistake 2: Editing downloaded social media clips. If you download a video from TikTok or Instagram, edit it in CapCut, and export it again, you are stacking compression. Each compression pass removes detail. By the time you upload the exported file back to social media, it has been compressed three times.
Mistake 3: Using the Recommended bitrate. The Recommended bitrate setting in CapCut is almost always too low for high quality output. Switch to High or Custom and set your own value.
Mistake 4: Ignoring the codec choice. Using HEVC on a device or platform that does not support it well can cause playback issues that look like quality problems. When in doubt, use H.264.
Mistake 5: Not checking the export after app updates. CapCut updates can reset your export settings or change default values. After every update, do a quick test export to verify your settings are still what you expect.
Mistake 6: Exporting while other apps are running. On mobile especially, having other apps open during export can reduce the processing power available for rendering, potentially affecting quality on older devices.
Mistake 7: Assuming 4K export always means 4K quality. Multiple users have reported selecting the 4K export option but getting output that does not look like true 4K. This can happen when the project resolution, source footage, or bitrate do not support true 4K quality. Always verify your entire pipeline supports the resolution you want.
Does CapCut Compress Videos on Purpose?
This is a question I see asked constantly in forums, and the honest answer is nuanced. CapCut does compress videos, but it is not malicious or intentional quality sabotage. The compression is a natural result of how video encoding works.
Every video editor compresses footage during export. Even professional software like Adobe Premiere Pro and DaVinci Resolve apply compression when exporting to H.264 or HEVC. Compression is how video files become small enough to store, share, and upload.
The issue with CapCut is that its default compression settings lean more aggressively toward smaller file sizes compared to professional editors. This is a design choice aimed at the app’s primary audience of mobile content creators who prioritize quick uploads over pristine quality.
CapCut also optimizes for device performance. On mobile, aggressive compression allows the app to export faster and produce files that are easier to share via messaging apps and social media. On desktop, the compression is less aggressive but still present.
The difference between CapCut mobile and desktop export quality is real. Desktop versions generally have access to more processing power, more encoding options, and higher bitrate ceilings. If you have access to CapCut Desktop, exporting from there typically produces better results than exporting from the mobile app for the same project.
So no, CapCut is not intentionally ruining your videos. It is applying compression that you can control by adjusting your export settings. The defaults are conservative, but the tools to produce high-quality output are there if you know where to look.
How Platform Compression Affects Your Video After Upload
Even if you export a perfect, high-quality video from CapCut, there is one more source of quality loss that trips people up. Every social media platform re-encodes and compresses your video when you upload it.
TikTok compression. TikTok applies aggressive compression to all uploaded videos. Even if you upload a 4K, high-bitrate file, TikTok will re-encode it to their internal specifications before it goes live. This is why your video might look great on your phone but soft after posting. To minimize TikTok compression damage, upload the highest quality file your device can produce. TikTok rewards high-bitrate uploads by preserving more detail in their re-encoding pass.
Instagram Reels compression. Instagram is similarly aggressive with compression. Reels are typically displayed at 1080p regardless of your upload resolution. However, uploading at a higher bitrate gives Instagram more data to work with during their compression, resulting in a better final appearance.
YouTube compression. YouTube is generally the kindest platform for video quality. If you upload a 4K video at a high bitrate, YouTube will display it at 4K and preserve a significant amount of detail. YouTube also supports higher bitrates than TikTok or Instagram, so your CapCut exports will look closer to the original file.
The key strategy across all platforms is to give them the best possible source file. Export from CapCut at the highest quality your project supports, and let the platform handle the rest. Never pre-compress your video to make the file smaller before uploading, as this compounds the quality loss.
CapCut Video Quality: Frequently Asked Questions
How to export video from CapCut without losing quality?
To export from CapCut without losing quality, set your export resolution to match your source footage, choose a custom bitrate of at least 10 to 15 Mbps for 1080p or 35 Mbps or higher for 4K, use the H.264 codec, and turn off proxy mode before exporting. Always export a short test clip first to verify the settings produce the quality you expect.
How to not lose video quality on CapCut?
To prevent quality loss in CapCut, always use custom export settings instead of the recommended defaults. Match your resolution and frame rate to your source footage, set a high bitrate, use H.264 codec for compatibility, start with the highest quality original clips available, and avoid editing footage that has already been downloaded and compressed from social media.
Why is my CapCut video pixelated after export?
Your CapCut video is pixelated after export because the export bitrate is too low for the resolution and motion complexity of your content. Pixelation occurs when the encoder does not have enough data to represent fine details. Increase the bitrate setting to 15 Mbps or higher for 1080p, or 45 Mbps or higher for 4K, and re-export.
Why is CapCut compressing videos?
CapCut compresses videos because all video encoding involves compression. CapCut uses codecs like H.264 and HEVC to reduce file size during export. The default compression settings lean toward smaller files for faster sharing, but you can reduce compression by manually increasing the bitrate in export settings. Compression is not a bug but a setting you can control.
Does CapCut lower video quality on purpose?
CapCut does not lower video quality on purpose. The apparent quality loss comes from conservative default bitrate settings designed for the app’s primary audience of casual mobile creators. By switching to custom export settings with higher bitrates and matching resolutions, you can produce exports that closely match your preview quality.
What is the best bitrate for CapCut export?
The best bitrate for CapCut export depends on your resolution and frame rate. For 1080p at 30fps, use 10 to 12 Mbps. For 1080p at 60fps, use 12 to 15 Mbps. For 4K at 30fps, use 35 to 45 Mbps. For 4K at 60fps, use 45 to 68 Mbps. Higher bitrates produce larger files but preserve more detail.
Should I use H.264 or HEVC in CapCut?
Use H.264 for maximum compatibility across all platforms and devices. Use HEVC only if you need smaller file sizes and your target platform supports it. H.264 works everywhere including TikTok, Instagram, YouTube, and all major video players. At the same bitrate, HEVC can produce slightly better quality, but H.264 at a high bitrate will look great and avoids compatibility issues.
Why does my 4K export from CapCut not look like 4K?
Your 4K export from CapCut may not look like true 4K if the source footage is not actually 4K, the export bitrate is too low to support 4K detail, or the project resolution does not match the export resolution. Verify your source clips are genuinely 4K, set the export bitrate to at least 35 Mbps, and confirm the project resolution matches the export resolution before rendering.
Conclusion
Figuring out why CapCut lowers your video quality after exporting does not have to be a mystery. The problem almost always comes down to five things: low default bitrate, resolution mismatch, codec compression, proxy mode confusion, or variable bitrate limitations during fast motion.
The fix is straightforward once you know what to look for. Set a custom bitrate that matches your resolution, match your export resolution and frame rate to your source footage, turn off proxy mode on desktop, use H.264 for compatibility, and start with the cleanest source clips you can find. Understanding why does CapCut lower my video quality after exporting puts you in control of the export process instead of leaving you guessing at the defaults.
Export a 10-second test clip with your new settings before committing to a full render. That one simple habit will save you from wasting time on bad exports and give you confidence that your final video will look exactly the way you intended.