
There is nothing quite like the anticipation of picking up a freshly developed roll of film. You load the negatives onto the scanner or hold them against the light, and then you see it: a bright orange streak cutting across what should have been your best shot. Light leaks on film are one of the most frustrating problems a film photographer can face. They ruin carefully composed frames, waste expensive film, and leave you wondering what went wrong inside your camera.
A light leak occurs when unintended light enters your camera body and reaches the film before or after the planned exposure. Instead of capturing only the scene you photographed, the film also records stray light that seeped through worn seals, gaps, or damaged components. The result appears as foggy areas, colored streaks, bright spots, or diffused bands across your images.
In this guide, we cover exactly what causes light leaks on film, how to tell a light leak apart from a shutter problem, how to test your camera without wasting a single roll, and how to prevent and fix leaks for good. Whether you shoot 35mm or medium format, understanding light leaks will save you money on ruined film and keep your vintage gear shooting like it should.
Table of Contents
What Causes Light Leaks on Film?
Light leaks on film almost always trace back to one root issue: your camera can no longer fully block external light from reaching the film chamber. This happens for several specific reasons, and identifying the correct one is the first step toward fixing the problem.
Degrading Light Seal Foam
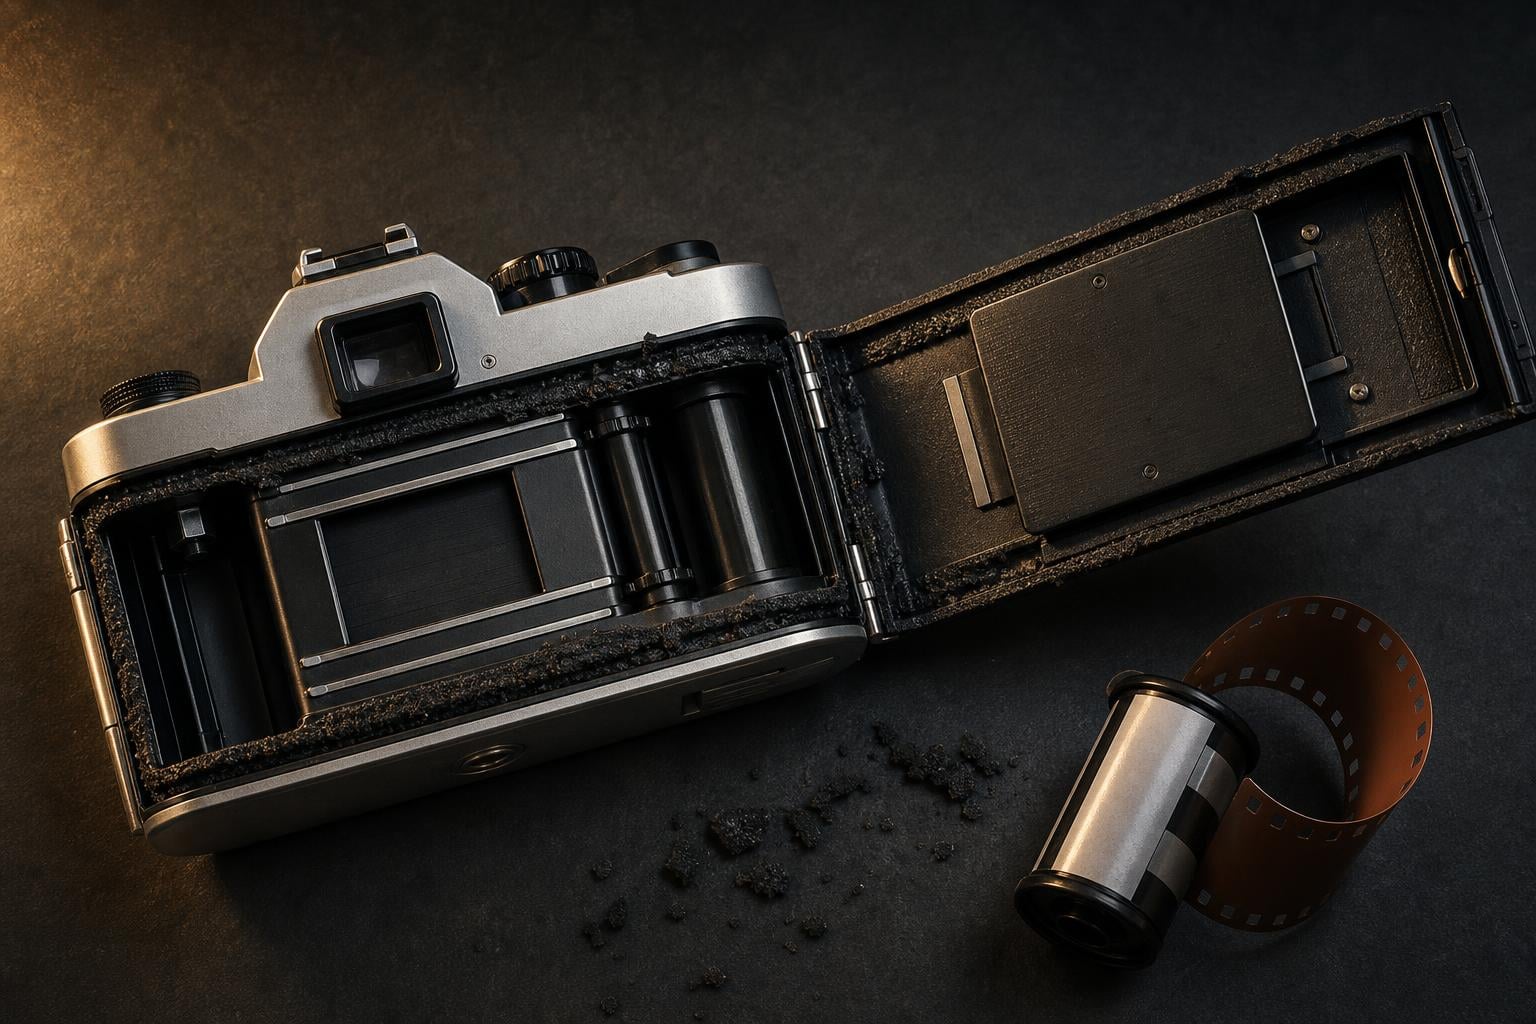
The number one cause of light leaks is degraded light seal foam. Camera manufacturers line the edges of the film door, the back plate, and various internal openings with soft foam strips. These seals compress to form a light-tight barrier when the camera back is closed.
Over decades, that foam breaks down. It turns sticky, then crumbly, then disintegrates into a black tar-like residue. Once the foam loses its shape and density, gaps form where light can slip through. Most cameras manufactured in the 1970s, 1980s, and 1990s are dealing with this issue today because the foam has simply exceeded its lifespan.
If your camera is over 20 years old and has never had its seals replaced, assume the foam is compromised. This applies to popular models like the Canon AE-1, Pentax K1000, Olympus OM series, and many others from that era.
Damaged or Misaligned Camera Back Door
The film door itself can become a source of light leaks if it gets bent, misaligned, or warped. A camera that has been dropped may look fine externally but have a slight gap between the door and the body. Even a gap of less than a millimeter can let in enough light to fog your film.
Hinge areas are particularly vulnerable. The hinge pins can loosen over time, preventing the door from pressing firmly against the seals. If the door has any play or wiggle when closed, light can work its way in during shooting.
Mirror Cushion and Damper Degradation
SLR cameras have a small foam strip called a mirror cushion or mirror damper. This strip sits at the top of the mirror box and cushions the mirror when it flips up during exposure. Like the door seals, this foam also degrades over time.
When the mirror cushion crumbles, two things happen. First, the mirror slaps harder against the top of the mirror box, which can cause vibration blur. Second, gaps open up around the mirror area that can allow light to enter the film chamber from the front of the camera.
Many photographers focus only on the door seals and completely forget the mirror damper. If you replace your door seals but still see white streaks coming from the top of your frames, the mirror cushion is likely the culprit.
Light Piping in Medium Format Film
Medium format photographers face an additional source of light leaks that has nothing to do with the camera body. It is called light piping, and it happens when light enters through the edge of the film roll itself and travels along the base of the film like a fiber optic cable.
This phenomenon is particularly common with 120 film because the film travels across a wider span inside the camera. If the film leader is exposed to bright light while loading, or if the roll sits in direct sunlight after being removed from the camera, light can pipe along the film base and fog the edges of multiple frames.
CineStill Film popularized awareness of this issue. Their YouTube channel explains how even a properly sealed camera can produce edge fog if the film is handled carelessly. Always load and unload medium format film in shaded conditions to prevent light piping.
How to Identify Light Leaks?
Recognizing a light leak is the first step. Once you know what to look for, the patterns become surprisingly easy to spot on developed film.
Visual Signs: Streaks, Fog, and Color Coding
Light leaks appear as bursts of white, red, orange, or yellow on your film, often in a streak or band pattern. The color and position of the leak tell you a lot about where the light is entering the camera.
Here is a practical color guide that most competitors do not cover:
Orange or red streaks typically come from the back of the camera. These appear when light leaks through degraded door seals and fog the film from the rear. The streaks often run parallel to the film edge or appear along the top and bottom of the frame.
White streaks or bright foggy areas usually come from the front of the camera. These indicate light entering through the lens mount, mirror box, or shutter curtain area. The fog tends to be more diffuse and less sharply defined than back-of-camera leaks.
Consistent fog across entire rolls suggests a problem that affects every frame equally, such as a leak at the film canister opening or chronic light piping on medium format film.
Intermittent leaks that only appear on some frames often point to a door that shifts during handling or a shutter curtain that occasionally sticks.
Light Leaks vs Shutter Problems: How to Tell the Difference
One of the most common questions in film photography forums is whether a defect on film is a light leak or a shutter problem. The two can look similar, but they have distinct signatures.
A light leak is caused by continuous ambient light entering the camera. This means the leak gets worse the longer the camera sits between shots. If you leave your camera unused for a week with a roll inside, a light leak will fog that roll even though you never pressed the shutter.
A shutter problem, on the other hand, only affects the moment of exposure. If your shutter is leaking light, it happens during the fraction of a second the shutter is open. The defect appears as a partially exposed frame, a band across the image, or an uneven exposure from one side to the other.
Here is the diagnostic test: shoot a full roll normally, then load a second roll but leave the camera sitting in daylight for 48 hours without shooting. Develop both rolls. If the second roll has heavy fog but the first does not, you have a light leak. If both rolls show identical banding or partial exposures, you have a shutter issue.
Another telltale sign: shutter problems produce consistent, repeatable defects on every frame in the same position. Light leaks are more random and vary in intensity depending on ambient light and camera orientation.
How to Test for Light Leaks Without Wasting Film
You do not need to shoot and develop a roll of film just to find out if your camera has a light leak. Two simple methods let you check your camera at home for free.
The Flashlight Test Method
This method comes from camera repair enthusiasts and works remarkably well. Take your camera into a completely dark room, such as a closet or windowless bathroom at night. Remove the lens and open the camera back. Place a small flashlight inside the film chamber, pointing outward toward the seals and door edges.
Close the camera back with the flashlight still inside. Now examine the outside edges of the camera in the dark. Any spot where you can see light escaping is a gap where light can also enter when you are shooting. Check the hinge side, the latch side, and the top and bottom rails of the film door.
Use a bright LED flashlight or even a keychain light for this test. The brighter the light, the easier it is to spot even tiny gaps. Mark any leaky spots with a piece of tape so you know exactly where to focus your repair.
The Film Edge Inspection Method
If you have already shot a roll and suspect a leak, examine the film edges before looking at the images themselves. Standard 35mm film has unexposed border areas outside the image frame, including the sprocket holes and the edges of the film strip.
If these border areas are clear and transparent, your camera body is likely light-tight. If the borders show fogging, banding, or orange discoloration, light is entering the camera from the sides and fogging areas that should never receive any exposure.
This method gives you a quick diagnostic without needing to scan or print every frame. Just hold the developed negatives up to a light source and check the edges.
How to Prevent Light Leaks on Film Cameras?
Preventing light leaks on film is far easier and cheaper than dealing with ruined rolls. These steps will keep your camera body light-tight for years.
Regular Seal Inspection
Make seal inspection a routine part of your camera maintenance schedule. Open the camera back and visually examine the foam strips around the door edges every three to six months. Healthy foam should be soft, slightly springy, and dark black.
If the foam looks sticky, has a tar-like sheen, crumbles when touched, or has chunks missing, it needs replacement immediately. Do not wait until you see leaks on your film. By the time leaks appear on your photos, several rolls may already be damaged.
Also check the mirror cushion in SLR cameras. Look inside the mirror box at the top where the mirror rests when flipped up. If that strip is gooey or disintegrating, schedule a replacement.
Proper Camera Storage
How you store your camera directly affects how fast the foam seals degrade. Heat and humidity accelerate foam breakdown dramatically. Never leave a camera in a hot car, a sunny windowsill, or a damp basement.
Store cameras in a cool, dry place with silica gel packets to control moisture. Keep the camera in a closed bag or case when not in use. If you have multiple cameras in your collection, rotate through them periodically rather than letting one sit unused for years, because seals that stay compressed under a closed back for too long can develop permanent flat spots.
For long-term storage of six months or more, consider leaving the camera back slightly open. This relieves pressure on the foam seals and extends their usable life.
When to Replace Light Seals
As a general rule, plan to replace light seals every 10 to 15 years on cameras that see regular use. For cameras that sit unused for long stretches, inspect more frequently because inactivity does not stop foam degradation.
If you just bought a used vintage camera, replace the seals before shooting your first roll. You cannot know how the previous owner stored it, and replacement foam kits cost a fraction of what you would spend on ruined film.
Signs that replacement is overdue include sticky residue on the door edges, visible gaps in the seal material, crumbling foam fragments inside the film chamber, and any fogging or streaking on your developed film.
Professional CLA (Clean, Lube, Adjust)
For valuable or complex cameras, a professional CLA is worth the investment. A CLA is a full service where a technician cleans the internal mechanisms, lubricates moving parts, adjusts the shutter for accurate timing, and replaces all light seals and mirror dampers.
Professional CLA services typically cost between $75 and $200 depending on the camera model and the extent of the work. For a camera worth $500 or more, this is a sensible investment that extends the camera’s life by another decade.
For budget cameras worth under $100, a professional CLA may not be cost-effective. In those cases, a DIY seal replacement is the practical choice.
How to Fix Light Leaks: DIY and Professional Options
If your camera already has light leaks, you have two paths forward: fix it yourself or send it to a professional. Both are viable depending on your camera and comfort level.
DIY Foam Seal Replacement
Replacing light seal foam yourself is a manageable project for most film photographers. Pre-cut foam seal kits are available for many popular camera models, and they typically cost between $10 and $25. These kits include pre-measured foam strips for the door channels, the hinge area, and the mirror cushion.
Here is the basic process for replacing door seals:
Step 1: Open the camera back and take photos of the existing seal layout. You want a reference for where each piece goes.
Step 2: Remove all old foam using a wooden toothpick or plastic pick. Avoid metal tools that can scratch the camera body. Use cotton swabs dipped in rubbing alcohol to clean away sticky residue.
Step 3: Measure each channel and cut the replacement foam to size. Most kits include adhesive-backed foam that simply peels and sticks into place.
Step 4: Press the new foam into the channels firmly but without crushing it. The foam should sit flush and compress slightly when the door closes.
Step 5: Let the adhesive set for an hour before closing the camera back. Then run the flashlight test to verify the seals are light-tight before loading film.
Some repair enthusiasts use black knit wool yarn as an alternative to foam for certain seal channels. Wool does not degrade like foam and provides excellent light blocking. This is a lesser-known trick worth exploring if you want a permanent solution.
Temporary Fixes: Tape Solutions
When you need to shoot immediately and cannot wait for a seal replacement, tape can provide a temporary barrier. The question is which tape to use.
Electrical tape is the most commonly suggested quick fix because it is black, opaque, and widely available. However, electrical tape leaves a sticky adhesive residue that is difficult to remove and can attract dust and debris inside the film chamber.
Gaffer tape is the better choice for a temporary repair. It blocks light effectively and removes cleanly without leaving residue. Gaffer tape costs more than electrical tape, but it will not gum up your camera body during the days or weeks until you can do a proper seal replacement.
Apply tape along the exterior edges of the camera back door, covering the seam where the door meets the body. This is a stopgap measure only. Replace the actual foam seals as soon as possible for a reliable, long-term fix.
FAQs
How to prevent light leaks?
To prevent light leaks, inspect your camera’s foam seals every 3 to 6 months and replace them every 10 to 15 years. Store your camera in a cool, dry place away from heat and humidity. Replace seals on any newly purchased vintage camera before shooting. Keep the camera back closed when not actively loading or unloading film, and always handle medium format film in shaded conditions to prevent light piping.
How to fix film camera light leak?
Fix a film camera light leak by replacing the degraded foam seals. Purchase a pre-cut seal kit for your camera model, remove old foam with a wooden pick and rubbing alcohol, clean the channels thoroughly, press new adhesive-backed foam into place, and verify the repair with a flashlight test. For valuable cameras, consider a professional CLA service that replaces all seals and the mirror damper.
What is the best tape for camera light leaks?
Gaffer tape is the best tape for temporarily fixing camera light leaks. It blocks light completely and removes cleanly without leaving sticky residue. Electrical tape also blocks light but leaves a difficult-to-remove adhesive that can attract dust inside the film chamber. Use tape only as a temporary measure until you can replace the foam seals properly.
Why put vaseline on a camera lens?
Photographers put vaseline on a camera lens or a clear filter to create a soft-focus, dreamy effect that mimics the look of vintage portrait lenses. Vaseline diffuses light entering the lens, reducing sharpness and creating a gentle glow around highlights. This technique is unrelated to fixing light leaks and is purely a creative effect for atmospheric photography.
Conclusion
Understanding what causes light leaks on film is the difference between a camera that consistently delivers clean, beautiful images and one that ruins roll after roll. The vast majority of light leaks come from degraded foam seals around the film door and mirror box, which means the fix is usually straightforward and affordable.
The key takeaways are simple: inspect your seals regularly, store your camera properly, use the flashlight test to catch leaks early, and replace foam before it fails completely. Whether you tackle a DIY seal replacement or send your camera in for a professional CLA, taking action before you see orange streaks on your film will save you money and frustration.
Film photography rewards attention to detail. A well-maintained camera with fresh seals will serve you faithfully for years, letting you focus on composition, exposure, and creativity rather than worrying about what surprises might appear when you pick up your developed film.