
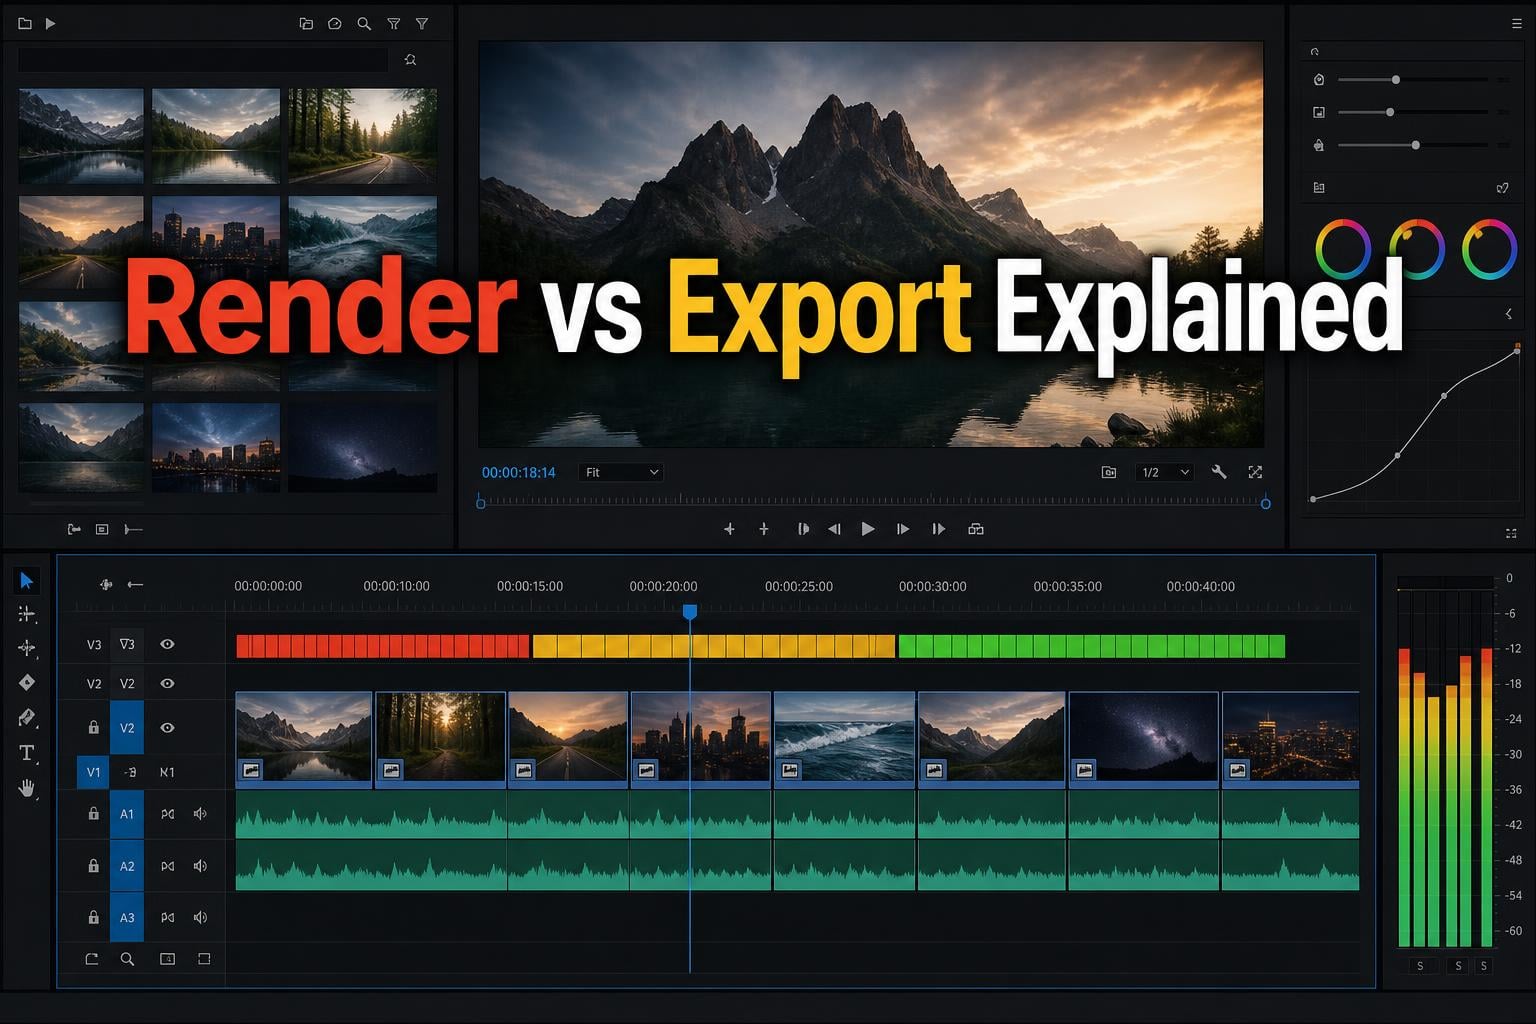
Every video editor has been there. You finish a project, feel good about the cut, and then you see those red bars sitting at the top of your timeline. A nagging question pops into your head: do I really need to render all this before I export? Or can I just hit export and let the software figure it out?
If you have ever wondered why you have to render your timeline vs just exporting, you are far from alone. This is one of the most asked questions in video editing forums, Reddit threads, and Adobe Community panels. Editors spend hours, sometimes days, pre-rendering timelines that did not actually need it.
I have seen this confusion firsthand. Editors coming from Final Cut Pro assume rendering before export is mandatory because that software historically required it. Premiere Pro and DaVinci Resolve users stare at their render bars wondering if those colors mean something urgent. And nobody wants to discover, 20 hours into a render, that they were wasting their time.
In this guide, we will break down exactly what rendering does, what exporting does, and when (if ever) you need to render before exporting. We will cover Premiere Pro, DaVinci Resolve, Final Cut Pro, and After Effects so you get the full picture no matter which editor you use.
By the end, you will understand the difference between rendering and exporting, know what those timeline color bars actually mean, and have a clear workflow that saves you hours on every project.
Table of Contents
Quick Answer: Do You Need to Render Before Exporting?
No, you do not need to render your timeline before exporting. When you export, your video editing software automatically renders every frame of your timeline as part of the export process. Rendering beforehand only creates preview files for smoother playback while you are still editing.
Think of it this way: rendering is for you (the editor) to preview your work smoothly. Exporting is for your audience (the final video file). Exporting always includes rendering as part of its process, whether you pre-rendered or not.
The only time pre-rendering helps your export is if you use smart rendering with matching codecs and check the “Use Previews” box. Even then, the benefit is speed, not quality. We will cover exactly when that applies below.
What Is Rendering? (Timeline Preview Files Explained)
Rendering, in the context of your timeline, is the process where your video editing software processes effects, transitions, color grades, and other compute-heavy operations into temporary preview files. These files let you play back your timeline smoothly without your computer struggling to calculate everything in real time.
When you drop a heavy effect onto a clip, like a lumetri color grade with multiple layers plus a warp stabilizer, your computer has to do serious math to display each frame. If your processor cannot keep up, playback stutters, drops frames, or refuses to play at all. Rendering solves that by doing the math ahead of time and storing the result as a preview file.
In Premiere Pro, this process relies on the Mercury Playback Engine. When you press Enter on your keyboard (or select Sequence > Render In to Out), Premiere processes the sections of your timeline marked with a red or yellow bar and stores the results as preview files on your hard drive. Those files play back smoothly, which is why the bar turns green after rendering.
In DaVinci Resolve, the same concept exists as the Render Cache. Resolve can cache frames in the background or on demand, storing processed frames so playback stays buttery smooth during editing.
Key point: these preview files are temporary. They exist to help you edit faster and more comfortably. They are not your final output.
What Rendering Actually Produces
Rendering produces preview files in a specific preview codec. In Premiere Pro, you can choose your preview codec in the sequence settings. Common options include ProRes, DNxHD, and CineForm for high quality, or I-frame only MPEG for lighter files.
These preview files are stored in a folder on your system drive or a dedicated media drive. In Premiere Pro, they live alongside your project file in a folder called “Adobe Premiere Pro Preview Files.” In DaVinci Resolve, cached files are stored in a directory you specify in your project settings.
The preview codec quality matters. If you render previews in a compressed codec and then use those previews during export, your final video quality may be slightly lower than if the export had rendered directly from your original source files. We will dig into this in the quality section below.
What Is Exporting? (Creating Your Final Video File)
Exporting is the process of encoding your completed timeline into a final video file that you can share, upload, or deliver to a client. This is where your edit becomes a standalone video file like an MP4, MOV, or ProRes file.
Exporting actually combines two processes into one: rendering and encoding. First, your software renders every frame of your timeline (processing all effects, transitions, and color grades). Then it encodes those rendered frames into your chosen output format using your selected codec and settings.
This is why exporting takes time. It is doing the same rendering work that pre-rendering does, plus the additional step of encoding the output. Whether you pre-rendered or not, the export process must render every frame to create your final file.
When you export, you choose your output settings: codec (H.264, H.265, ProRes, DNxHR), resolution (1080p, 4K, 8K), frame rate, bitrate, and audio format. These settings determine the quality and file size of your final video.
The Encoding Step
Encoding is the part of exporting that compresses your rendered frames into a deliverable format. H.264 is the most common codec for web delivery because it balances quality and file size well. ProRes and DNxHR are preferred for archival, post-production handoffs, or high-quality masters.
Encoding happens after rendering during export. Even if you pre-rendered your timeline, the export still needs to encode those rendered frames (or your original source frames) into your final output codec. This is why pre-rendering does not eliminate export time entirely.
One exception: smart rendering. If your preview codec matches your export codec exactly, the software can skip re-rendering and simply copy the preview frames into the output file. This dramatically speeds up exports. We cover smart rendering in detail later.
Rendering vs Exporting: Side-by-Side Comparison
Many editors confuse rendering and exporting because the terms get used loosely. Here is a clear breakdown of how they differ.
| Aspect | Rendering (Timeline Preview) | Exporting (Final Output) |
|---|---|---|
| Purpose | Smooth playback while editing | Create a shareable video file |
| Output | Temporary preview files | Final video file (MP4, MOV, etc.) |
| When Used | During editing, anytime playback is choppy | When the edit is complete and ready to deliver |
| File Location | Hidden preview cache folder | Wherever you choose to save it |
| Quality | Preview codec quality (varies by setting) | Full output quality based on export settings |
| Required? | Optional (only for editing convenience) | Required to produce a video file |
| Reversible | Yes, can delete preview files anytime | No, it creates a new file |
The simplest way to remember the difference: rendering is for you (the editor) to work comfortably. Exporting is for your audience (the final video). They serve completely different purposes in the video editing workflow.
Rendering and exporting are not the same thing. Rendering creates temporary preview files for smooth editing playback. Exporting creates your final deliverable video file, and it includes rendering as part of its process automatically.
Do You Actually Need to Render Before Exporting?
No. You do not need to render your timeline before exporting. This is the answer confirmed by Adobe Community Experts, experienced Reddit editors, and professional colorists across every major forum. When you export, your editing software renders every frame of your timeline automatically as part of the export process.
Whether you pre-rendered or not, the export still has to process every effect, transition, and color grade. The only difference is whether that processing happens during a separate render step or as part of the export.
Here is what actually happens when you export without pre-rendering in Premiere Pro: the software reads your timeline, processes all effects and transitions frame by frame, encodes the result into your chosen format, and writes the output file. The red bars on your timeline do not prevent this from happening.
Multiple experienced editors on the r/premiere subreddit have confirmed this. One user shared that their film professor stopped them mid-render and explained they were wasting time. The professor was right. The export would have rendered everything automatically.
The “Use Previews” Checkbox Explained
In Premiere Pro’s export settings, there is a checkbox labeled “Use Previews.” This is where the confusion often starts.
When checked, the export uses your pre-rendered preview files instead of rendering fresh from your source footage. This can speed up exports significantly if you have already rendered your entire timeline.
However, there is a catch. Your preview files are encoded in your preview codec, which is often lower quality than your source footage. If you check “Use Previews,” your final export will be based on those compressed preview files rather than your original high-quality source.
For most professional workflows, the recommendation is to leave “Use Previews” unchecked. This ensures your export renders directly from the original source files at full quality. The tradeoff is that the export may take slightly longer.
When “Use Previews” Actually Helps
If you are using a high-quality preview codec like ProRes or DNxHD, the quality difference between preview files and source footage is negligible. In that case, using previews during export can save significant time without visible quality loss.
This is the basis of smart rendering, which we cover in detail below.
Understanding Your Timeline Render Bars (Red, Yellow, Green)
The colored bars above your timeline are the most visual indicator of whether your computer can handle real-time playback. They tell you which sections might stutter and which will play smoothly. Understanding these colors is essential for an efficient editing workflow.
Red Bar: Needs Rendering for Smooth Playback
A red bar means your computer cannot play this section of the timeline in real time at full quality. The effects, transitions, or footage specifications are too demanding for your processor to handle on the fly. Playback will likely stutter, drop frames, or show a black screen.
In Premiere Pro, red bars typically appear over clips with heavy effects like warp stabilizer, lumetri color with multiple layers, or nested sequences with compositing. Raw 4K or 6K footage with no effects can also trigger red bars on less powerful machines.
Pressing Enter renders the red bar sections into preview files, turning the bar green and enabling smooth playback.
Yellow Bar: May or May Not Play Smoothly
A yellow bar means your computer might handle real-time playback, but it is not guaranteed. The section is demanding enough that playback quality depends on your specific hardware, the complexity of the effects, and the resolution you are editing at.
Yellow bar sections often play fine on a powerful workstation but stutter on a laptop or older machine. You can choose to render yellow bar sections for guaranteed smooth playback, or leave them unrendered if playback is acceptable.
Lowering your playback resolution (for example, from Full to Half or Quarter) can turn yellow bars into sections that play smoothly without rendering.
Green Bar: Ready for Smooth Playback
A green bar means this section has been rendered and preview files are available. Playback will be smooth because your software is reading from the cached preview files rather than processing effects in real time.
If you see green bars without having manually rendered, it means your computer can handle this section at full quality in real time. Simple cuts, basic transitions, and unprocessed footage often show green bars on capable machines.
Render Bars in DaVinci Resolve
DaVinci Resolve uses a slightly different system. Instead of colored bars, Resolve shows a colored line above the timeline that indicates render cache status. Red means unrendered and likely to stutter, yellow means partially cached, and green means fully cached and ready for smooth playback.
You can enable automatic background rendering in Resolve’s User Preferences. This caches frames while you work, so you do not need to manually trigger renders as often.
Render Bars in Final Cut Pro
Final Cut Pro displays a render status line above clips in the timeline. A gray dot or line indicates the clip needs rendering for smooth playback at your current quality setting. After rendering, the indicator disappears.
Final Cut Pro historically required rendering before export for best quality. Modern versions handle this better, but the culture of pre-rendering before export persists among Final Cut Pro users.
When You SHOULD Render Before Exporting
While pre-rendering is not required, there are specific scenarios where it makes your workflow faster and more efficient. Here is when rendering before exporting actually helps.
1. You need to review your edit at full quality before exporting. If you are delivering to a client, you want to watch the full timeline at full resolution to catch any issues. Pre-rendering ensures smooth playback for your review pass.
2. You are using smart rendering with matching codecs. If your source footage, preview codec, and export codec all match (for example, everything is ProRes 422), smart rendering can dramatically speed up your export. The software simply copies pre-rendered frames into the output file instead of re-rendering them.
3. Your project has extremely heavy effects. If your timeline includes complex compositing, heavy color grading nodes, or multiple nested sequences, the export process may be faster with pre-rendered previews. This is especially true for After Effects compositions linked via Dynamic Link.
4. You need to export multiple versions from the same timeline. If you are creating a YouTube version, a social media cut, and a broadcast master from the same edit, pre-rendering once saves time across multiple exports.
5. Your computer struggles with real-time processing. On older or less powerful machines, the export process itself can crash or hang on extremely complex sections. Pre-rendering those sections can prevent export failures.
When You Can Skip Rendering and Go Straight to Export?
In most cases, you can skip pre-rendering entirely and export directly. Here are the scenarios where skipping the render step is perfectly fine.
1. Simple cuts-only edits. If your timeline is mostly straight cuts with minimal transitions and basic color correction, your computer can handle the export without pre-rendered previews. The export will render everything from source automatically.
2. You are short on time. Pre-rendering adds extra time to your workflow. If you have a deadline, going straight to export gets your file rendered and encoded in one pass.
3. You want maximum export quality. Exporting without “Use Previews” checked means the software renders directly from your original source footage at full quality. No preview codec compression is involved.
4. Your playback is already smooth. If you see green bars across your timeline without manually rendering, your machine handles the effects in real time. Pre-rendering would be redundant.
5. You are using proxy workflows. If you edited with proxies, you will switch back to full-resolution footage for export anyway. Pre-rendering proxy previews adds no value to the final output.
Does Pre-Rendering Affect Export Quality?
This is one of the most debated topics in editing forums, and the answer depends entirely on your preview codec settings.
If you pre-render your timeline using a compressed preview codec (like I-frame only MPEG) and then check “Use Previews” during export, your final video quality will be slightly lower than if you had exported directly from source. The preview codec applies compression to each frame, and that compression gets baked into your export.
For YouTube and social media delivery, this quality difference is usually imperceptible. But for broadcast, archival, or professional post-production handoffs, preview codec compression can introduce subtle artifacts.
How to Preserve Quality When Pre-Rendering
If you want the speed benefits of pre-rendering without quality loss, set your preview codec to a high-quality format. In Premiere Pro, go to Sequence Settings and change the Preview File Format to ProRes 422, DNxHR, or GoPro CineForm. These are visually lossless codecs that preserve quality while still enabling smart rendering.
With a high-quality preview codec, using previews during export produces virtually identical results to rendering from source. The speed improvement comes from skipping the re-render step for already-processed frames.
The “Use Previews” Quality Tradeoff
Here is the simple rule: leave “Use Previews” unchecked unless you specifically set up a smart rendering workflow. When unchecked, your export renders from original source files at full quality regardless of whether you pre-rendered your timeline.
When checked, your export uses whatever preview codec you set in your sequence settings. If that preview codec is low quality, your export suffers. If it is high quality (ProRes, DNxHR), the quality difference is negligible.
Expert consensus across Adobe Community forums is clear: for maximum quality, export without “Use Previews.” For maximum speed with acceptable quality, set up a proper smart rendering pipeline with matching high-quality codecs.
How to Render Your Timeline (Step-by-Step)
If you do decide to pre-render, here is how to do it in each major editing application.
Rendering in Adobe Premiere Pro
To render your entire timeline in Premiere Pro, first set your work area bar to cover the full sequence. Then press Enter on your keyboard, or select Sequence > Render In to Out from the menu bar. Premiere will process all red and yellow bar sections and create preview files.
To render a specific section, move the playhead to the start of the area you want to render and press I to set an in point. Move to the end and press O to set an out point. Then press Enter to render just that section.
Keyboard shortcut: Enter renders in to out. Shift + Enter renders the entire work area. These are the most-used rendering shortcuts in Premiere Pro.
Rendering in DaVinci Resolve
In DaVinci Resolve, you can render the cache by selecting Playback > Render Cache from the menu. Choose “Render All” to cache the entire timeline, or select specific clips to cache individually.
Resolve also offers automatic background rendering. Go to User Preferences > User > Editing and enable “Render Cache” in the background. Resolve will cache frames while you work without interrupting your editing.
To clear the render cache and free up disk space, go to Playback > Render Cache > Delete Render Cache.
Rendering in Final Cut Pro
In Final Cut Pro, select the clips or section you want to render, then choose Modify > Render All (or press Option + R for everything, or Control + R for a selection). Final Cut Pro will process the selected clips and store the preview files.
You can enable background rendering in Final Cut Pro by going to Preferences > Playback and checking “Background Render.” This automatically renders clips after a short idle period.
Rendering in After Effects
After Effects handles rendering differently from NLEs. Instead of timeline preview rendering, After Effects uses the Render Queue to output compositions. You can create previews by pressing 0 on the numeric keypad (RAM preview), which caches frames into RAM for smooth playback.
For final output, add your composition to the Render Queue, choose your output module and render settings, and click Render. After Effects processes every layer, effect, and mask frame by frame.
If you link After Effects compositions to Premiere Pro via Dynamic Link, those comps are rendered during Premiere’s export. This can slow down exports significantly, so pre-rendering complex comps in After Effects and importing them as video files is a common workflow optimization.
How to Speed Up Exports Without Pre-Rendering
If you want to skip pre-rendering but still get fast exports, here are proven strategies that experienced editors use.
Use hardware acceleration. Modern GPUs can dramatically speed up both rendering and encoding. In Premiere Pro, enable hardware-accelerated encoding in your export settings. In DaVinci Resolve, the software leverages your GPU automatically for processing.
Match your codecs for smart rendering. If your source footage and export format use the same codec (for example, ProRes 422 source exported to ProRes 422), smart rendering can skip most of the processing. The software copies frames directly into the output file.
Use proxy workflows for editing, then switch to full resolution for export. Proxies speed up your editing without affecting export quality. When you export, the software automatically uses the full-resolution original files.
Close other applications during export. Free up RAM and CPU by closing browsers, other Adobe apps, and unnecessary background processes. Exporting is resource-intensive, and every bit of available processing power helps.
Export to a fast drive. Write your output file to a fast SSD rather than a spinning hard drive. Disk write speed can be a bottleneck during export, especially for high-bitrate formats.
Use background rendering where available. DaVinci Resolve and Final Cut Pro support background rendering, which pre-caches frames while you continue editing. This way, by the time you are ready to export, much of the processing is already done.
Smart Rendering and Preview Files (Deep Dive)
Smart rendering is a specific workflow where your editing software reuses pre-rendered frames during export instead of processing them again. It is the one scenario where pre-rendering directly benefits your export.
How Smart Rendering Works
For smart rendering to work, your preview codec, source codec, and export codec must all match. For example, if you edit ProRes 422 footage, set your preview codec to ProRes 422, and export to ProRes 422, the software can copy pre-rendered frames directly into the output file.
The result is dramatically faster exports. Instead of re-rendering every frame, the software essentially stitches together preview files into your final output. This can reduce export time by 50% to 80% for codec-matched projects.
Codec Compatibility for Smart Rendering
Not all codecs support smart rendering. Here are the codecs that work reliably across major NLEs.
ProRes (all variants): Full smart rendering support in Premiere Pro, DaVinci Resolve, and Final Cut Pro. This is the most reliable smart rendering codec for Mac users.
DNxHD and DNxHR: Full smart rendering support in Premiere Pro and DaVinci Resolve on Windows. The go-to smart rendering codec for PC-based workflows.
GoPro CineForm: Supports smart rendering in Premiere Pro. A solid intermediate codec option.
H.264 and H.265: Limited or no smart rendering support in most NLEs. These delivery codecs are not designed for intermediate editing workflows.
Setting Up Smart Rendering in Premiere Pro
To set up smart rendering in Premiere Pro, start by changing your sequence preview codec. Go to Sequence > Sequence Settings and set the Preview File Format to match your source footage (ProRes or DNxHR). Then render your timeline.
When exporting, go to the Video tab in your export settings. Check the “Use Previews” box and set your output format to match your preview codec. The software will now reuse your pre-rendered frames.
If your source footage is H.264 (common from DSLRs and mirrorless cameras), smart rendering is not directly possible because H.264 is not an editing-friendly intermediate codec. In this case, consider transcoding your footage to ProRes or DNxHR before editing.
Common Rendering Issues and Fixes
Rendering does not always go smoothly. Here are the most common issues editors encounter and how to fix them.
Render Progress Bar Stuck at 0%
If your render progress bar appears stuck, first check whether there are actually any sections that need rendering. If your entire timeline has green bars, there is nothing to render and the progress bar may show 0% because the operation completes instantly.
If you genuinely have red bar sections and the render is stuck, try clearing your media cache. In Premiere Pro, go to Preferences > Media Cache and click “Delete.” Then restart the application and try rendering again.
Running Out of Disk Space from Preview Files
Preview files accumulate quickly, especially on long-form projects with heavy effects. A 40-minute documentary with extensive color grading and effects can generate hundreds of gigabytes of preview files.
To manage disk space, periodically delete preview files for projects you are not actively editing. In Premiere Pro, select Sequence > Delete Render Files. You can choose to delete all render files or just preview files for the current sequence.
Set your media cache location to a dedicated drive with plenty of free space, not your system drive. A fast SSD is ideal for preview file storage.
Export Crashes or Hangs Mid-Render
If your export crashes partway through, the most common cause is insufficient RAM or a problematic effect. Try exporting a short section of your timeline to isolate the crash point. If a specific clip or effect causes the crash, try rendering that section separately or simplifying the effect.
Updating your GPU drivers and editing software to the latest version can also resolve export crashes. Software bugs are a frequent culprit, and updates often include rendering engine fixes.
Render File Location Confusion
If you move your project to another computer or external drive without moving the preview files, your timeline will show red bars again. Premiere Pro stores preview file paths in the project file, and if the files are missing, you need to re-render.
To avoid this, use the Project Manager in Premiere Pro to consolidate your project, including preview files, before transferring it. Or simply re-render on the new machine if the preview files are not critical.
Proxy Workflow as an Alternative to Pre-Rendering
If your main reason for pre-rendering is choppy playback, consider using proxies instead. Proxies are lower-resolution copies of your footage that play back smoothly during editing. When you export, the software automatically switches back to your full-resolution originals.
Proxy workflows are especially useful for editing 4K and 6K footage on machines that cannot handle real-time playback at full resolution. In Premiere Pro, you can create proxies by right-clicking your footage in the project panel, selecting Proxy > Create Proxies, and choosing a proxy preset like ProRes Proxy or H.264 Low Resolution.
In DaVinci Resolve, proxies are called Optimized Media. Go to File > Media Optimization and choose your settings. Resolve creates optimized versions of your clips for smooth playback.
The advantage of proxies over pre-rendering is that proxies only need to be created once per clip. Pre-rendering must be redone every time you change an effect or transition. Proxies also do not affect export quality because the software always exports from original footage.
FAQs
What happens if I export a video without rendering?
If you export without pre-rendering, your video editing software will render every frame automatically during the export process. The final video quality is identical (or sometimes higher) than if you had pre-rendered first. Pre-rendering only creates preview files for smooth editing playback, not for export quality.
Do I need to render my video before exporting?
No, you do not need to render your video before exporting. All major video editing software (Premiere Pro, DaVinci Resolve, Final Cut Pro) renders every frame of your timeline automatically during the export process. Rendering beforehand is optional and primarily benefits editing playback smoothness.
Is rendering and exporting the same thing?
No, rendering and exporting are not the same thing. Rendering creates temporary preview files so you can play your timeline smoothly while editing. Exporting creates your final deliverable video file by rendering all frames and encoding them into your chosen output format. Exporting always includes rendering as part of its process.
Is it okay to export without rendering in Premiere Pro?
Yes, it is perfectly fine to export without rendering in Premiere Pro. The software automatically renders all effects, transitions, and color grades during the export process. For maximum quality, leave the Use Previews checkbox unchecked so the export renders directly from your original source files.
Does rendering before exporting make the export faster?
Rendering before exporting can speed up your export only if you check the Use Previews checkbox and your preview codec matches your export codec (smart rendering). Otherwise, pre-rendering does not speed up the export because the software still processes everything from source during export. Total time is roughly the same either way.
What do the red, yellow, and green bars mean on my timeline?
Red bars mean your computer cannot play that section in real time at full quality and playback will stutter. Yellow bars mean playback might be smooth depending on your hardware. Green bars mean the section is fully rendered or can play in real time without issues. Pressing Enter in Premiere Pro renders red and yellow sections into preview files.
Conclusion: Rendering vs Exporting Made Simple
Understanding why you have to render your timeline vs just exporting comes down to one core distinction: rendering is for editing convenience, exporting is for final output. Your software handles rendering automatically during export, so pre-rendering is never strictly required.
The key takeaways are straightforward. Rendering creates temporary preview files that make timeline playback smoother while you edit. Exporting processes your entire timeline and encodes it into a final video file. You can skip pre-rendering entirely and still get a high-quality export.
Pre-rendering only speeds up your export if you set up a proper smart rendering workflow with matching codecs and check “Use Previews.” Otherwise, the export time is roughly the same whether you pre-render or not.
For maximum quality, export without “Use Previews” checked so the software renders directly from your original source footage. For maximum speed, set up smart rendering with high-quality intermediate codecs like ProRes or DNxHR.
Now that you understand the difference between rendering and exporting, you can stop wasting hours on unnecessary pre-rendering and focus on what matters: creating great videos. Next time you see those red bars on your timeline, remember that they are there to help you edit smoothly, not to block your export.