
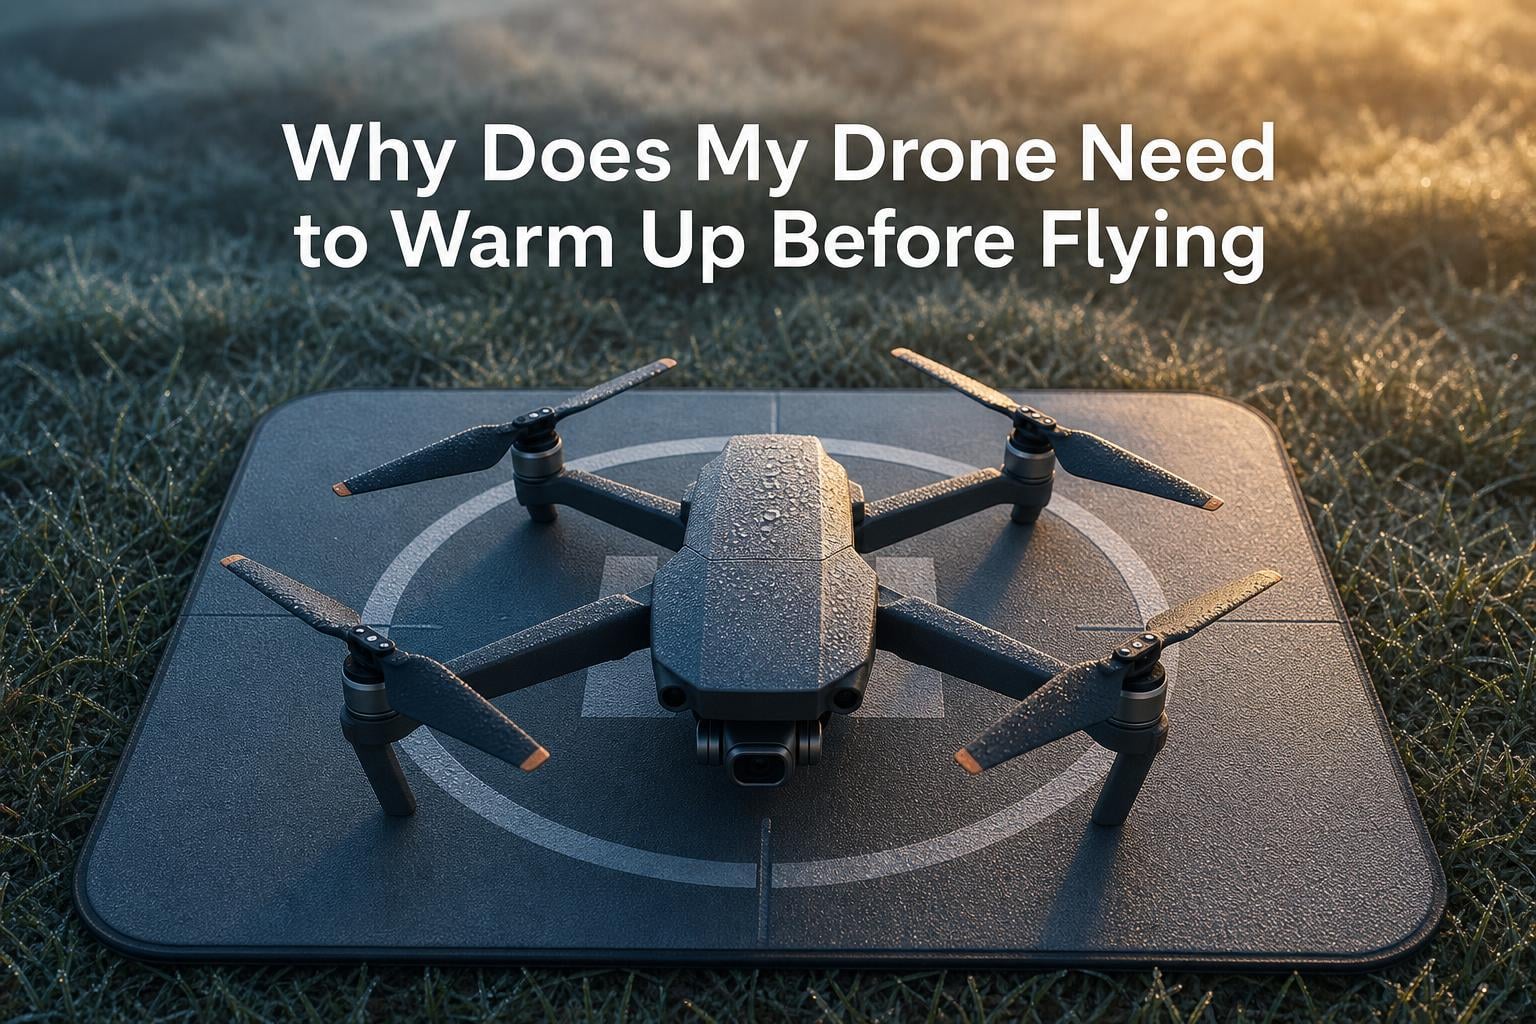
You arrive at your favorite flying spot on a crisp morning. The grass is still wet with dew, and the air has that particular chill that tells you winter is not quite over. You set up your drone, insert the battery, and power it on.
The controller screen lights up with a familiar message: “Aircraft Warming Up.” You wait, tapping your foot, wondering why your drone needs to warm up before flying and whether you could skip this step entirely. Most drone pilots have been in this exact situation at some point. If you have flown in cool weather, early in the morning, or at higher altitudes, you have almost certainly encountered the warm-up process.
Many pilots simply accept it as an unavoidable formality. Others get genuinely frustrated by the delay, especially when battery life is already limited by cold temperatures and every minute of flight time counts. Understanding why your drone needs to warm up before flying will help you fly safer, extend your battery life, and avoid costly mistakes.
This guide covers the science behind drone warm-up, how long you should wait, a detailed step-by-step pre-flight procedure, battery care in cold conditions, and answers to the most common questions drone pilots ask on forums and community groups.
Table of Contents
Quick Answer: Why Does My Drone Need to Warm Up Before Flying?
Your drone needs to warm up before flying because its core electronics and battery perform poorly at cold temperatures. The Inertial Measurement Unit contains temperature-sensitive MEMS sensors that produce inaccurate readings until they reach a stable operating temperature of approximately 20C (68F). The lithium-polymer battery delivers less power when cold because chemical reactions inside each cell slow down significantly.
Motors, the video transmission system, and the barometric altimeter also benefit from reaching their optimal operating range. Warming up your drone ensures stable flight, accurate sensor data, consistent GPS performance, and reliable power delivery from the first moment of takeoff. Skipping warm-up can lead to IMU drift, sudden battery warnings, shortened flight times, and in extreme cases, mid-flight failures.
The Science Behind Drone Warm-Up: IMU, Battery, and Motors
Drone warm-up is not a single process. Three separate components need attention before every flight, and each warms up for a fundamentally different reason. Understanding what is happening inside your drone during those two to five minutes of waiting makes the process feel less like a nuisance and more like an essential safety step.
What Is an IMU and Why Does It Need to Warm Up?
The Inertial Measurement Unit is the drone’s internal compass, balance system, and orientation sensor all combined into one compact module. It contains MEMS sensors, specifically accelerometers and a gyroscope. These are tiny mechanical structures etched onto silicon chips that detect movement and tilt with extreme precision.
The catch is that MEMS sensors are deeply sensitive to temperature changes. Their calibration drifts when they are cold, producing readings that are off by enough to cause noticeable flight instability. Most drones, including the DJI Phantom, Mavic, and Mini series models, require the IMU to reach approximately 20C (68F) before the system considers it fully calibrated and stable.
At cold temperatures, the accelerometers may report incorrect tilt angles, the gyroscope may misread rotation rates, and the barometer may give inaccurate altitude readings. The combined effect is drift, wobble, or worse. The drone may simply refuse to arm its motors until the IMU is within its acceptable temperature range. You might have seen the message “IMU temperature too low” or “Aircraft Warming Up” on your controller screen. That is the drone telling you the IMU is not ready yet.
Community pilots on Mavic Pilots forums note that IMU warm-up typically takes three to five minutes on a cold day. Some experienced pilots have experimented with cold IMU calibration, which involves calibrating the sensor while the drone is stored in a cool environment.
The theory is that calibrating closer to the flight temperature reduces the thermal gap and therefore the warm-up time. One pilot on Phantom Pilots reported reducing warm-up from two and a half minutes down to 15 seconds using this method. However, this technique comes with serious condensation risks and should only be attempted with a clear understanding of the dangers involved.
The IMU also works closely with the drone’s compass module. Both need to agree on orientation for stable flight. When the IMU is cold, the compass reading may drift independently, leading to heading errors that grow worse the longer you fly. This is why warm-up is not just about one sensor. It is about giving the entire navigation stack time to synchronize and stabilize at a consistent temperature.
Battery Chemistry and Cold Temperatures
Your drone’s battery is a lithium-polymer pack, and it is arguably the most temperature-sensitive component on the entire aircraft. Inside each cell, lithium ions shuttle between electrodes through a liquid electrolyte to produce electrical current. Cold temperatures slow down this chemical reaction dramatically.
The result is reduced voltage output under load, often called voltage sag. A battery that delivers 15.4 volts at room temperature might sag to 12.8 volts when cold, even if it reads fully charged on the app screen. That half-volt difference may not sound like much, but it is enough to trigger a low-battery warning or automatic landing.
This voltage sag is dangerous because the drone’s flight controller and four motors draw sudden bursts of current during maneuvers, ascents, and gusts of wind. A cold battery cannot sustain those bursts, which can trigger an automatic return-to-home or emergency landing far from your position. In severe cases, the increased internal resistance from cold cells can generate excess heat inside the battery, potentially leading to cell damage or thermal events. DJI officially recommends not flying when temperatures drop below 0C (32F), and they set a hard limit of minus 10C (14F) for battery operation. Below that threshold, battery failure becomes a real risk regardless of warm-up efforts.
Pilots who regularly fly in winter report dramatic differences in flight time. In temperatures around 20F (minus 6C), a drone that normally delivers 25 minutes of flight time may only manage 10 minutes before the battery cuts power. In some cases, pilots have reported flight times as short as five to six minutes at temperatures near the freezing point. Keeping the battery warm until the very moment of takeoff is the single most impactful thing you can do to preserve flight performance in cold weather. Experienced pilots keep spare batteries in jacket pockets, thermal bags, or alongside hand warmers (never in direct contact) right up to launch.
Motor Warm-Up: Often Overlooked but Essential
Motor bearings and internal bushings are designed to operate within a specific thermal range. The lubricant inside brushless drone motors thickens significantly when cold, increasing friction and reducing efficiency. In extreme cold, the lubricant can become sluggish enough to affect motor response time during the first few seconds of flight.
While most modern brushless motors warm up quickly under load, letting them idle for 30 to 60 seconds before applying full throttle reduces mechanical stress on the bearings and ensures a smoother initial response. The propellers themselves can also benefit from a brief warm-up period. In very cold conditions, propellers made of plastic or composite materials can become slightly more brittle.
A brief hover at low altitude after takeoff allows both the motors and the propellers to reach a more flexible operating temperature before you push the drone to its limits with fast forward flight or rapid altitude changes. The Light Bridge or OcuSync video transmission system is another component that benefits from reaching operating temperature. Cold temperatures can cause temporary signal degradation or increased latency until the radio and video electronics warm up.
If you have ever noticed a fuzzy video feed that clears up after a minute of flying, that is the video system warming up in real time. Together, these three components form the core reason why your drone needs to warm up before flying. Each one has a specific temperature range where it performs optimally, and cold weather pushes all three outside that range simultaneously.
How Long Should Your Drone Warm Up Before Flying?
The warm-up time depends heavily on ambient temperature and how cold the drone was before you powered it on. A drone stored in a warm car on a sunny day may need only 30 seconds to one minute. A drone left outside in 20F (minus 6C) weather may need three to five minutes for the IMU alone to reach a stable reading. The battery takes additional time to bring into its optimal range even after the IMU is ready.
Warm-Up Time Guide by Temperature
Here is a practical reference for how long to wait based on the temperature you are flying in. These times reflect community consensus from experienced pilots across Mavic Pilots, Phantom Pilots, and Reddit drone communities, combined with manufacturer guidance from DJI and other brands.
Above 15C (59F): One to two minutes total. The IMU reaches operating temperature quickly in these conditions, and the battery is already close to its optimal range. A brief hover check after takeoff is all you need. This is ideal flying weather for maximum battery performance and flight time.
5C to 15C (41F to 59F): Two to three minutes total. Battery performance starts to degrade noticeably in this range. Keep the battery warm in your vehicle or bag until the last possible moment. Expect flight times to drop by 10 to 20 percent compared to warm weather. The IMU warm-up is usually complete within two minutes at these temperatures.
Minus 5C to 5C (23F to 41F): Three to five minutes total. IMU calibration becomes critical here, as cold sensor readings become increasingly unreliable. Cold IMU calibration before your flight, performed at a temperature closer to the flight environment, can reduce warm-up time significantly. Expect noticeably shorter flight times, often 40 to 60 percent of normal. Hover time after takeoff should be extended to one to two minutes to allow the battery to warm up in flight.
Minus 10C to Minus 5C (14F to 23F): Five minutes or longer. This is near the minimum operating temperature for many consumer drones. Battery warm-up becomes essential, not optional. Consider keeping the drone and battery in an insulated bag until ready to fly, and plan for flight times that may be only 30 to 40 percent of normal. GPS lock can take longer in these conditions, so factor that into your pre-flight routine.
Below Minus 10C (14F): Do not fly. DJI explicitly warns against operating below this temperature due to battery failure risk. At these temperatures, even the best warm-up methods and battery insulation techniques cannot guarantee safe operation. The chemistry inside a LiPo cell simply cannot function reliably below this threshold.
These times are guidelines, not guarantees. Every drone model is different, and local conditions such as wind, humidity, and altitude also affect warm-up timing. The best approach is always to power on your drone and watch the IMU status indicator in your app. Do not attempt takeoff until the IMU shows as ready and normal.
What Happens If You Skip Warm-Up?
Skipping warm-up is one of the most common mistakes drone pilots make. It is tempting when conditions look good or when you are in a hurry, but the risk of IMU drift and battery voltage sag is real. Always wait for the IMU status to read as fully ready before attempting takeoff.
An uncooled IMU produces sensor drift that compounds over time. The drone may hover unevenly or slowly drift in one direction even with GPS active. Compass calibration becomes unreliable when the IMU is cold, increasing the risk of flyaway incidents. GPS lock may take longer to acquire, leaving you flying on manual stabilization alone for the first few minutes.
A cold battery can experience severe voltage sag under load. The flight controller may interpret the voltage drop as a low-battery condition and trigger an automatic return-to-home or emergency landing. In worst cases, the battery internal resistance spikes can generate excess heat inside the cells, potentially leading to permanent cell damage or thermal events. The voltage sag problem is particularly insidious because the battery may read as fully charged on the app while delivering far less power than the motors need.
Beyond the safety risks, skipping warm-up simply results in poor flight performance. The drone may feel sluggish in response to control inputs. Yaw rotation can be slower. Altitude hold may wobble. Footage from the camera will be shaky. The community consensus across drone forums and pilot communities is clear. Warm-up is not optional. It is a necessary pre-flight step that takes only a few minutes and can prevent problems that are far more time-consuming and expensive to resolve.
Step-by-Step Pre-Flight Warm-Up Procedure
A consistent pre-flight warm-up routine eliminates guesswork and ensures you never accidentally skip this critical step. Follow this procedure every time you fly, especially in cool or cold weather. With practice, this routine becomes second nature and fits seamlessly into your launch preparation.
Keep everything warm before you leave the house or vehicle. Store your drone, batteries, and controller in a heated environment or insulated bag until you are ready to set up. Avoid leaving equipment in a cold car overnight or exposed to freezing temperatures for extended periods.
If you are hiking to a flying location, keep the batteries in an inner jacket pocket close to your body. The goal is to deliver the drone to the field at the warmest possible temperature. Every degree you preserve before power-on is a degree you do not need to recover during warm-up.
Set up the drone and power on. Assemble your drone normally, insert the battery firmly, and power on both the drone and the controller. Wait for the drone to complete its full boot-up sequence before proceeding.
Do not rush this step. A rushed power-on can trigger sensor errors that extend the warm-up time further. Make sure the propellers are securely attached and the drone is sitting on a flat, level surface.
Check the IMU status immediately. Open your drone’s companion app and navigate to the safety or status page. Look for the IMU indicator and read its current status. If it shows a warning icon or reports that it is still warming up, wait without attempting takeoff. On most drones, this process takes two to five minutes depending on temperature. The app may show a progress bar or simply flip from warning to ready when the IMU is stable.
Perform IMU calibration if the app recommends it. If the IMU has not been calibrated at the current temperature, perform a calibration now. For best results, calibrate on a flat, level surface at room temperature if possible, before heading outdoors. If you are already in the field, find the flattest, most level surface available and perform the calibration there. Note that calibrating the IMU in cold conditions can reduce warm-up time on subsequent flights, but this technique requires careful management of condensation risks when transitioning between temperature zones.
Wait for a strong GPS lock. A GPS signal with at least eight satellites confirmed takes time, especially in remote areas or near tree cover. GPS acquisition often coincides with IMU warm-up completion, so you can use this time productively. Do not skip this step even if the IMU shows as ready. A drone with a weak GPS signal and a freshly warmed IMU is still at risk of unstable flight in windy conditions.
Take off and enter a gentle hover. After takeoff, maintain a low altitude hover for 30 seconds to two minutes. This allows the motors, battery, and video transmission system to reach their full operating temperature under actual flight load. Avoid aggressive maneuvers, fast forward flight, or rapid altitude changes during this initial hover period. Keep the drone close and watch for any warning messages on the controller screen.
Verify all systems before expanding your flight. Once the drone is hovering steadily, GPS is locked with good signal strength, the IMU status reads normal, and the battery percentage has stabilized, you are ready to begin your flight. Only then should you push the drone into faster flight patterns or begin your photography mission. This final verification step takes seconds but confirms that the warm-up process was successful.
Signs Your Drone Is Fully Warmed Up and Ready to Fly
Knowing when your drone is truly ready is just as important as the warm-up process itself. A drone that shows “IMU ready” on the screen may still have a battery that is not up to temperature. Here are the key indicators to watch for on your app and controller display.
The IMU status should read as normal or ready, with no warning icons or messages. On most drones, the IMU progress indicator in the safety settings should complete and show a green checkmark. If the IMU continues to show a warning after five minutes in warm ambient conditions, something may be wrong with the sensor or its calibration. Try recalibrating or, if the problem persists, contact the manufacturer.
GPS lock should show at least eight satellites with a signal strength reading above four bars. A weak GPS signal combined with a freshly warmed IMU is still a recipe for unstable flight in windy conditions. If GPS is struggling to acquire satellites, wait longer before taking off or consider moving to a more open location. GPS quality directly affects the performance of the drone’s position hold and return-to-home features.
The battery indicator should stabilize and remain steady for at least 30 seconds. In cold conditions, the initial battery percentage may read higher than what is actually available under load. As the cells warm up during the initial hover, the app may adjust the reading downward slightly. When the percentage stabilizes and stops fluctuating, the cells have reached a more consistent temperature and are ready for sustained flight.
Visual and audio cues matter as well. Listen to the motors during the hover check. They should sound smooth and even without unusual grinding, clicking, or vibration. Watch the propellers. They should spin evenly without wobble. Any wobble during the initial hover suggests the IMU may not be fully ready or that additional calibration is needed. If the drone drifts persistently despite GPS lock, do not continue the flight. Land, troubleshoot, and try again after another minute of warm-up time.
Battery Care During Cold Weather Flying
Battery management in cold weather deserves its own focused section because it is the single biggest factor affecting flight performance, flight time, and overall safety. A cold battery will not just shorten your flight time. It can fail you mid-flight with little or no warning. Taking the time to manage your batteries properly before and during cold weather flights will pay for itself many times over in longer, safer flights.
Keep batteries warm until the last possible moment. Many experienced pilots store batteries in jacket pockets or a thermal insulated bag right up to launch. The goal is to keep the cells at or above 15C (59F) before takeoff, with 25C (77F) being the ideal target.
Some pilots use small hand warmers placed in their bag alongside the batteries to maintain temperature. Never place hand warmers in direct contact with the battery casing. Direct concentrated heat can damage battery cells, degrade their chemistry over time, or in extreme cases, create a fire risk. Always keep heat sources separated from batteries by a cloth layer or insulation material.
Avoid flying on a battery that has been sitting in a cold vehicle or exposed to freezing temperatures all day. If you must use a battery that has been exposed to cold conditions, allow extra warm-up time on the drone before takeoff. Some pilots connect the battery to the drone, power it on, and let it sit on the ground for two to three minutes without taking off. The drone’s own electronics generate enough heat to gradually warm the cells from the inside out. This passive warm-up method is effective and requires no additional equipment.
Landing pads serve a practical purpose in cold weather beyond keeping your drone clean and dry. A dry landing pad prevents moisture from transferring to the motors and battery connectors during landing and takeoff. Moisture that gets on electrical connectors can freeze overnight, causing corrosion or intermittent electrical connections. After each cold-weather flight, inspect the battery connectors, motor mounts, and propeller attachment points for moisture or ice buildup. Wipe everything dry with a clean microfiber cloth before storing your equipment.
DJI official winter flying guidelines recommend preheating batteries using the drone’s own power when temperatures are between 0C and 5C (32F to 41F). Simply power on the drone with the battery installed and let it idle on the ground for a few minutes. The electronics generate enough heat to transfer to the battery cells and bring them into a better operating range. For temperatures below 0C, a dedicated battery heater wrap or keeping the battery in an insulated thermal container is strongly advised. Some commercial drone operators use battery heater blankets designed specifically for LiPo packs, which maintain a consistent temperature without the fire risk associated with hand warmers.
Plan your battery strategy around the cold. Bring more batteries than you think you need, because flight times will be shorter. Keep spare batteries warm in your bag until you need them. Label your batteries so you know which ones have been used and which are still cold. After a battery is depleted, let it cool to room temperature before charging. Never charge a cold battery, as the charging process generates heat and charging a cold cell can cause permanent damage.
Condensation Risks and How to Avoid Them
Condensation is a hidden danger that catches many drone pilots off guard, especially those who experiment with advanced warm-up techniques. It forms when warm, moist air comes into contact with a cold surface, causing water vapor to condense into liquid droplets. In the context of drone warm-up, condensation typically occurs when you move a cold drone into a warm, humid environment or when warm air from your breath or hands hits cold electronics.
The classic example is the freezer or refrigerator trick. Some pilots store their drone in a cool place before IMU calibration, hoping to reduce the temperature gap between calibration and flight conditions. The theory is sound. Calibrating the IMU closer to the expected flight temperature reduces the thermal adjustment the sensor needs to make, which shortens the in-flight warm-up time. One pilot on Phantom Pilots reported reducing warm-up from two and a half minutes down to 15 seconds using this method.
However, the technique has a serious downside. When the cold drone is powered on indoors, moisture from the air condenses on the circuit boards, sensors, motors, and internal connectors. That moisture can cause short circuits, corrosion on sensitive electronics, or erratic sensor behavior that may not appear until you are already in the air.
Similarly, using hand warmers in direct contact with a cold battery can create localized temperature gradients that cause condensation to form on battery contacts and internal cell connections. Always keep heat sources separated from electronics by a cloth barrier or insulation layer. If you use hand warmers to keep batteries warm, place them in a separate pocket or pouch, never directly against the battery surface.
To minimize condensation risk, let your drone acclimate gradually when moving between temperature zones. If you bring a cold drone indoors, place it in a sealed plastic bag first and let it come to room temperature before opening the bag. This allows any moisture to form on the outside of the bag rather than on the sensitive electronics inside. After a cold-weather flight, wipe down the drone body, motors, battery connectors, and camera lens with a dry cloth before storing your equipment. This simple habit prevents moisture from accumulating and freezing overnight.
Avoid flying from humid environments directly into freezing air without letting the drone dry first. Snow, fog, and rain introduce moisture that can freeze on the motors, propellers, and sensors between flights. A quick wipe-down with a clean microfiber cloth between flights in these conditions prevents ice buildup that could throw off propeller balance or jam motor bearings. If you are flying in snow, consider using a propeller guard to keep snow away from the motor housings.
Hot Weather Warm-Up Considerations
Cold weather gets most of the attention in drone warm-up discussions, but heat also affects drone operation in important ways. In summer, a drone stored in a hot vehicle may need a short stabilization period rather than a traditional warm-up. Lithium-polymer batteries degrade faster when consistently exposed to high temperatures, and a hot battery can trigger false low-battery warnings that cut your flight short.
If your drone has been sitting in direct sunlight or inside a hot car, check the battery temperature before flying if your app displays this information. Many drones show battery temperature in the battery settings. Let the drone and battery cool in the shade for 10 to 15 minutes if they feel hot to the touch. Do not place the drone directly on hot surfaces like asphalt or concrete, as these can radiate additional heat into the airframe.
Extreme heat causes the air inside the drone’s housing to expand slightly, which can temporarily affect sensor readings including the barometric altimeter. A brief stabilization period after powering on in very hot conditions helps the flight controller establish a stable baseline before takeoff. The same pre-flight checklist applies in hot weather. Check IMU status, confirm GPS lock, and complete a hover check before committing to a full flight mission.
Manufacturers including Autel Robotics note that excessive heat exposure can permanently reduce battery cycle life. If you regularly fly in temperatures above 40C (104F), store your batteries in a cooler or insulated bag when not in use. Avoid leaving batteries installed in the drone for extended periods on the ground in direct sun. Remove the battery between flights and keep it in a shaded, ventilated area. These habits protect your battery investment and maintain consistent performance over the long term.
Common Warm-Up Mistakes to Avoid
Even experienced drone pilots make warm-up mistakes, especially when conditions change or they are flying in unfamiliar environments. Avoiding these errors will save you time, frustration, and potentially your drone. Here are the most common warm-up mistakes and how to correct them.
Skipping warm-up entirely is the most frequently reported mistake. It is tempting when conditions look good, when you are running late, or when the IMU status seems to flip to ready quickly. The risk of IMU drift and battery voltage sag is real even in moderate temperatures. Always wait for the IMU status to read as fully ready before attempting takeoff. If you are unsure, wait an extra minute rather than risking unstable flight.
Placing hand warmers in direct contact with batteries is a safety hazard. The concentrated heat from a hand warmer can damage individual battery cells, degrade the electrolyte, and in extreme cases, create conditions that increase the risk of a thermal event. Always keep hand warmers in a separate compartment or pocket, separated from the battery by a layer of cloth, foam, or insulation. A safe distance of a few centimeters is enough to provide gentle ambient warming without direct heat transfer.
Flying below the recommended minimum temperature is another common error driven by eagerness to capture specific shots. DJI sets a hard operating limit of minus 10C (14F) for battery operation. Pilots who push below this threshold risk sudden battery failure with little or no warning. No amount of warm-up preparation changes the fundamental chemistry of a LiPo cell at extreme cold. If your drone app warns you about low temperature, respect that warning. Reschedule the flight for a warmer day.
Skipping the hover check after takeoff is a mistake many pilots make once they are airborne. Once the drone is in the air, many pilots immediately push it into fast forward flight or begin their photography mission. Give the drone 30 seconds to two minutes of gentle hovering at a low altitude before putting it through any demanding maneuvers. This allows the battery and motors to finish warming up under actual flight load, which is when the real current demand begins. A battery that was warm enough on the ground may still be too cold to handle a rapid climb or gust of wind.
Neglecting compass calibration after significant temperature changes. Some pilots calibrate the IMU and compass once at the start of the day and assume they are set for every subsequent flight. If you move between locations with different magnetic interference, or if the drone’s internal temperature changes significantly between flights, a fresh compass calibration may be needed for accurate heading. The compass and IMU must agree on orientation for stable flight, and cold temperatures can throw off the compass calibration independently of the IMU.
Storing the drone with the battery installed in cold conditions is a habit that undermines your entire warm-up strategy. When you are not actively flying, remove the battery and store it in a warm, dry place. Leaving the battery connected to a cold drone drains it slowly through parasitic current draw and exposes the cells to damaging low temperatures for extended periods. A battery stored in a cold drone overnight may wake up colder than when you put it in, which defeats your warm-up efforts before you even start.
Frequently Asked Questions
What temperature is too cold to fly a drone?
DJI recommends not flying below 0C (32F) and sets a hard limit of -10C (14F) for battery operation. Below these temperatures, LiPo battery performance degrades severely, increasing the risk of sudden failure. Other drone brands may have slightly different limits, so always check your manufacturer specifications. Battery warm-up can help extend the safe operating range slightly near the upper limit, but it does not eliminate the fundamental risks of extreme cold. When in doubt, postpone the flight.
What do I need to do before flying my drone?
Before every flight, complete a pre-flight checklist that includes checking the IMU status reads as ready, confirming GPS lock with at least eight satellites and good signal strength, verifying the battery percentage is stable, inspecting all four propellers for cracks or damage, ensuring the area is clear of obstacles and people, and checking that firmware is up to date. In cold weather, add a warm-up period of two to five minutes after powering on before attempting takeoff. Calibrate the compass if you have moved to a new location or if the drone has been in extreme temperatures since your last flight. Always perform a brief hover check after takeoff before committing to a full flight mission.
How long should IMU calibration take?
IMU calibration typically takes 30 seconds to two minutes when performed at the correct temperature on a flat, level surface. If calibration takes significantly longer, repeatedly fails, or shows inconsistent progress, the drone may be too cold or the surface may not be level enough. Calibrating at around 20C (68F) produces the most reliable results. If your IMU is already warm from a previous flight and the temperature has not changed dramatically, calibration should complete in under a minute. A failed calibration often means the IMU temperature is outside its acceptable range or there is strong magnetic interference nearby from metal objects, power lines, or electronic devices.
When to calibrate IMU on drone?
Calibrate your IMU whenever the drone has been powered off for an extended period, after flying in extreme temperatures, after a crash or hard landing, after transporting the drone by air, or if the app reports IMU errors. The best practice is to calibrate on a flat, level surface indoors at room temperature before heading to your flying location. Some experienced pilots intentionally calibrate the IMU in cold conditions to reduce in-flight warm-up time, but this technique requires careful management of condensation risks when moving the drone between temperature zones. Always calibrate before your first flight of the day, not during or after a flight when sensors may still be stabilizing.
Why won’t my IMU calibration complete?
IMU calibration fails when the drone is not on a completely flat surface, when there is strong magnetic interference nearby from metal objects or power lines, or when the IMU temperature is outside its operating range. If calibration fails repeatedly, move to a different location away from sources of interference. Make sure the drone is perfectly level using a bubble level or a confirmed flat surface. In cold conditions, the IMU may need to warm up for two to three minutes before calibration can succeed. Power on the drone and let it idle on the ground before attempting calibration. If problems persist after checking all of these factors, look for firmware updates on the manufacturer website or contact the support team for your specific drone model.
Warming up your drone before flying is not a suggestion or a formality. It is a necessary safety step that protects your investment, ensures stable and accurate flight, and keeps everyone on the ground safe. The three components that need attention are the Inertial Measurement Unit, the battery, and the motors.
Each has its own temperature sensitivity, and each warms up at a different rate. Taking three to five minutes for a proper warm-up before every flight will save you from unexpected flight issues, shortened battery life, and the frustration of a drone that does not respond the way you expect it to.
Keep your batteries warm until the moment of takeoff. Watch for the IMU status to read as fully ready. Always do a hover check after leaving the ground. These habits take only a few minutes but make a significant difference in flight quality, stability, and safety. If conditions are too cold for your drone’s specifications, do not push it. No shot is worth the risk of a mid-flight failure.
Fly within your drone’s operating temperature range. Respect the warm-up process. You will get the most out of every battery and every flight session.