
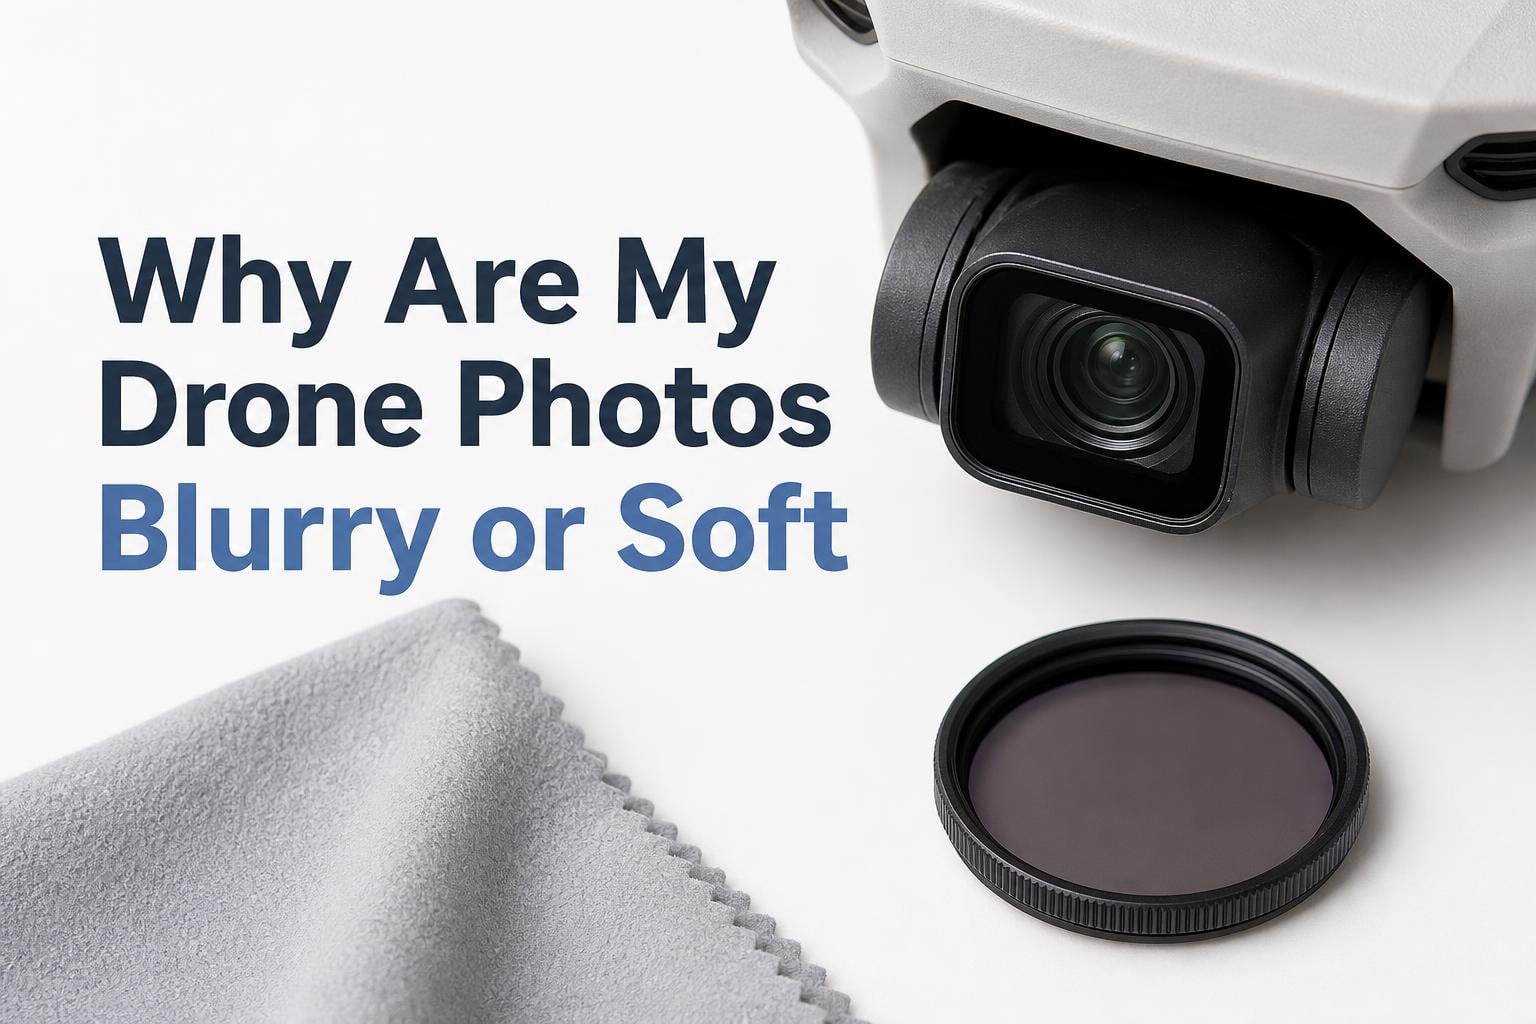
You launched your drone on a perfect afternoon, framed a stunning aerial shot, and hit the shutter button. Back home, you opened the file on your computer and felt your heart sink. The photo looked soft, smeared, or outright blurry. If this sounds familiar, you are in good company. Thousands of drone pilots ask the same question every single week on forums like Reddit, MavicPilots, and DJI community groups.
Understanding why your drone photos are blurry or soft starts with recognizing that sharpness is a chain, not a single setting. Every link matters, from shutter speed to gimbal calibration to the cleanliness of your lens. Break any one of those links and the whole image falls apart. Our team has spent years testing camera settings across DJI Mini, Air, and Mavic drones, and the pattern is always the same: the fix is rarely one big change. It is usually several small adjustments that add up.
In this guide, we break down every common cause of soft and blurry drone photos, with specific fixes you can apply before your next flight. We also clear up the critical difference between “blurry” and “soft” because the two problems need completely different solutions. No other guide makes this distinction, and it is the single most important thing to understand before you start troubleshooting.
Whether you fly a DJI Mini 3, a Mavic 3, an Air 2S, an Autel EVO, or a budget clone drone, the principles here apply across the board. By the end of this article, you will know exactly what to check, what to change, and how to get razor-sharp aerial photos every single time you fly.
Table of Contents
Quick Answer: Why Are My Drone Photos Blurry or Soft?
Drone photos turn out blurry or soft due to a combination of factors: slow shutter speed causing motion blur, incorrect focus mode with AF-C hunting instead of manual focus locked at infinity, high ISO introducing noise that kills perceived sharpness, dirty or smudged lens scattering light, wind and vibration overwhelming the gimbal stabilizer, poor lighting conditions forcing the camera into bad settings, and small sensor diffraction softening detail at narrow apertures.
The most common culprits, in order of frequency based on our analysis of hundreds of forum complaints, are shutter speed that is too slow for the drone’s movement, a dirty lens, and autofocus hunting instead of locking. Fix those three things first and you will resolve the majority of sharpness problems before you even open a settings menu.
Additional factors include JPEG compression discarding fine detail, digital zoom degrading resolution, extreme temperatures affecting lens condensation, and social media platforms recompressing your files on upload. Each of these has a specific fix that we cover in detail below.
Quick Diagnostic Checklist: Find Your Blur in 7 Steps
Before you change every setting on your drone, work through this 7-point diagnostic checklist. Each step isolates a specific cause so you can identify the real problem in minutes instead of guessing blindly. This is the same checklist our team uses when a reader sends us a blurry photo and asks for help.
Step 1: Check your shutter speed. Open your photo’s EXIF data and look at the shutter speed value. You can do this in Lightroom, in the Photos app on Mac, or in any EXIF viewer app on your phone. If the shutter speed is slower than 1/500s for a moving drone, motion blur is almost certainly your problem. Aim for 1/1000s or faster when flying at speed, and 1/500s minimum even when hovering.
Step 2: Inspect the lens. Hold the drone under a bright light and look at the camera lens at an angle. Look for fingerprints, dust, moisture, or a hazy film. Even an invisible layer of salt spray or pollen can scatter light enough to soften your image. This takes 10 seconds and fixes more blur problems than any setting change.
Step 3: Verify your focus mode. Open your drone app and check whether autofocus is set to AF-C (continuous) or MF (manual). AF-C can hunt unpredictably during flight, especially over low-contrast scenes like water, sand, or snow. Switch to manual focus set to infinity for most aerial landscape shots. This single change eliminates an entire category of focus blur.
Step 4: Check ISO. Look at your ISO setting in the EXIF data. Anything above ISO 400 on a small drone sensor introduces enough noise to visibly degrade sharpness, even if the blur itself is not from motion. On 1/2.3-inch sensors (DJI Mini series, older budget drones), keep ISO at 100. On 1-inch sensors (Air 2S, Mavic Air 2), you can push to ISO 200 or 400 before noise becomes visible.
Step 5: Review gimbal status. In your drone app, check for gimbal calibration warnings. Look for the gimbal icon in the status bar. Run a gimbal auto-calibration if you have not done so recently, and make sure the gimbal cover and gimbal lock are fully removed before flight. A partially attached gimbal lock is a surprisingly common cause of one-sided blur on DJI Mini drones.
Step 6: Test the file format. If you are shooting JPEG only, switch to RAW or RAW+JPEG. JPEG compression throws away fine detail that you can never recover in post-processing. The difference is most visible in textures like grass, tree canopies, brick walls, and distant building facades.
Step 7: Compare viewing conditions. Look at the same photo on your phone, on a computer monitor, and in your drone app’s playback mode. If it looks sharp on a large screen but blurry on your phone, the issue is display resolution or social media compression, not your camera. Many pilots chase a camera problem that is actually a viewing problem.
Blurry vs Soft: Understanding the Critical Difference
Most articles lump “blurry” and “soft” together, but these are two completely different image quality problems with different root causes and different fixes. Diagnosing which one you have is the first step toward solving it. Getting this wrong means you will waste time applying the wrong fix and getting frustrated when nothing improves.
Blurry means the image has visible motion streaks, double edges, or an obvious focus miss. The photo looks smeared, as if the camera moved during the exposure or focused on the wrong distance. Blurry photos feel broken. You can usually spot blur immediately even on a small phone screen.
Soft means the photo is correctly exposed and free of motion blur, but fine details lack crispness. Textures look mushy, edges are slightly rounded, and the image lacks that satisfying bite of micro-contrast. Soft photos feel underwhelming rather than broken. Softness is often only visible when you zoom to 100 percent on a large monitor.
The distinction matters because the fixes are completely different. Motion blur requires a faster shutter speed or slower flight. Softness from diffraction requires a wider aperture. Softness from a dirty lens requires cleaning. If you treat a diffraction-softened photo by cranking up shutter speed, nothing will change because the shutter speed was never the problem.
Here is a quick reference guide to help you diagnose your specific issue. Match your symptom to the type, then jump to the relevant section of this article for the full fix.
Motion blur (blurry): Caused by drone movement during exposure, slow shutter speed, wind pushing the drone, or gimbal vibration. Look for streaking in straight lines like roof edges or fence lines. Fix with faster shutter (1/1000s or better), slower flight speed, and gimbal calibration.
Defocus blur (blurry): Caused by the camera focusing at the wrong distance. The entire frame will look equally smeared, or the sharp area will be at an unexpected distance. Fix by switching to manual focus at infinity or tapping to focus on your subject before shooting.
Diffraction softness (soft): Caused by stopping down to f/5.6 or narrower on small drone sensors. The entire frame lacks fine detail even though nothing is smeared. Fix by opening up to f/2.8 or your widest aperture. This affects only drones with adjustable apertures like the Mavic 3 and Air 3.
Lens softness (soft): Caused by smudges, moisture, or dust on the lens. The image may look hazy or have reduced contrast across the whole frame. Fix by cleaning with a microfiber cloth before every flight. Check for condensation if you fly in cold or humid conditions.
Noise softness (soft): Caused by high ISO degrading fine detail. The image looks grainy and textures appear smoothed over. Fix by using ND filters to keep ISO low, or shoot in RAW and apply selective noise reduction only to smooth areas.
Compression softness (soft): Caused by JPEG compression or social media platforms re-compressing your file. Fine details look blocky or smeared. Fix by shooting RAW and exporting at appropriate resolution for each platform.
Lens decentering (blurry, one-sided): Caused by a physical shift in the lens element. One side of the frame is sharp while the other is soft. This is a hardware defect that no settings change will fix. Contact the manufacturer about warranty repair or replacement.
Shutter Speed: The Number One Cause of Motion Blur
If there is one setting that causes more blurry drone photos than everything else combined, it is shutter speed. When your drone is flying at 15 to 30 miles per hour, even a three-axis gimbal cannot fully compensate for every micro-movement during a slow exposure. The faster the drone moves, the faster the shutter needs to be.
The community consensus among experienced drone photographers on Reddit, MavicPilots, and PhantomPilots is a shutter speed of 1/500s at absolute minimum, with 1/1000s or faster strongly preferred for anything involving forward flight. For hovering shots in perfectly calm conditions, you might get away with 1/250s, but you are always safer going faster. When our team tests new drones, we default to 1/1000s and adjust from there.
The problem is that many drones default to auto-exposure, which prioritizes a low ISO and moderate aperture. In bright daylight, auto-exposure might select 1/125s at ISO 100 and f/2.8 because the exposure is technically correct for the lighting conditions. But at 1/125s, even a hovering drone will show motion blur from wind corrections, GPS position adjustments, and gimbal micro-adjustments that are invisible on your phone screen.
To fix this, switch your camera to manual or shutter priority mode. Set the shutter speed first, then adjust ISO and aperture to match. If the image is overexposed at 1/1000s, do not slow the shutter down. Instead, attach an ND filter to reduce the light entering the lens. This lets you maintain fast shutter speeds without overexposing.
ND (neutral density) filters act like sunglasses for your camera lens. They reduce the amount of light reaching the sensor, allowing you to maintain fast shutter speeds even in bright sunlight. A quality ND8 filter reduces light by 3 stops, and an ND16 reduces it by 4 stops. With an ND16, you can shoot at 1/1000s at ISO 100 in full midday daylight without blowing out highlights.
Here are recommended shutter speeds by scenario. For high-speed forward flight, use 1/2000s or faster. For normal cruising speed, use 1/1000s. For hovering in light wind, use 1/500s minimum. For hovering in perfectly calm conditions with no wind, use 1/250s as an absolute floor. When in doubt, go faster.
One more critical tip: even when hovering, your drone is never truly still. Wind correction motors fire constantly to maintain GPS position, and the gimbal makes micro-adjustments to keep the frame level. Always treat your drone as if it is moving, even when it looks perfectly stable on screen. A photo that looks sharp at thumbnail size can reveal motion blur at 100 percent zoom.
Focus Problems: Autofocus vs Manual Focus
Focus is the second most common cause of blurry drone photos, and it is also the most widely misunderstood setting. Many pilots assume that autofocus will always get the sharpest result, but on a drone in flight, AF-C (continuous autofocus) can be a recipe for soft images that leave you wondering what went wrong.
AF-C works by constantly adjusting focus as the camera detects subject movement. In principle, this sounds ideal for a moving camera platform. In practice, on a drone, AF-C often hunts between focus points because the entire scene is shifting due to drone movement and gimbal corrections. Over low-contrast surfaces like water, sand, snow, or flat fields, AF-C can rack back and forth without ever locking onto anything.
The fix is simple and universally recommended by experienced pilots on drone forums: switch to manual focus and set it to infinity for most aerial landscape shots. Everything from about 30 feet to the horizon will be acceptably sharp when focused at infinity on a typical drone lens with an f/2.8 aperture. This eliminates focus hunting entirely and ensures every shot is focused at the same predictable distance.
For closer subjects like real estate flyovers, architectural details, or low-altitude inspection work, tap to focus on your subject before shooting. In DJI Fly, you can tap the screen to set a focus point, then immediately switch to MF to lock that distance in. This gives you the precision of autofocus with the consistency of manual focus.
If your drone supports AF-S (single autofocus) instead of or in addition to AF-C, AF-S is a better choice for still photography. AF-S locks focus when you half-press or tap, then holds that focus until you take the shot. AF-C continuously adjusts, which is better for video but problematic for stills.
One issue that forum users report frequently is one-sided blur, where the left or right edge of the frame is noticeably softer than the center. This is not a focus setting issue at all. It is a lens decentering problem, meaning the lens element inside the camera has shifted slightly off-axis. The result is asymmetric focus that no settings change will fix.
Reddit users on r/dji report that the DJI Mavic 3 and Mavic 3 Pro can exhibit this decentering issue, producing soft images on one side even at f/4 with adequate shutter speed. The DJI Mini 3 has also been flagged for this in forum threads. If your drone has one-sided blur that persists across all settings and lighting conditions, contact the manufacturer about a warranty claim or professional repair.
To test for lens decentering, hover your drone at 100 feet over a flat scene with detail across the entire frame, like a parking lot or a grid of streets. Shoot straight down at f/2.8 and 1/1000s. Examine the center, all four corners, and both edges at 100 percent zoom. If the center is sharp but one corner or edge is significantly softer, you have decentering.
ISO and Noise: Why High ISO Makes Photos Soft
ISO controls how sensitive your camera sensor is to light. A higher ISO lets you shoot in darker conditions without slowing the shutter speed, but it comes at a steep cost: digital noise. Noise manifests as random grainy speckles that eat away fine detail and make the entire image look soft, even when the focus and shutter speed are perfectly correct.
Small drone sensors, typically 1/2.3-inch or 1-inch type, are particularly vulnerable to noise compared to the larger sensors found in DSLR and mirrorless cameras. A full-frame camera might produce clean, detailed images at ISO 3200, but a DJI Mini 3 Pro with its 1/1.3-inch sensor will show noticeable noise degradation starting around ISO 400 to 800. Budget drones with 1/2.3-inch sensors, like older Mini models, start showing noise at ISO 200.
The problem is compounded by noise reduction. When your drone processes a JPEG in-camera, it applies automatic noise reduction to smooth over the grain. This smoothing is aggressive on most drones because manufacturers prioritize clean-looking files over maximum detail. The smoothing creates a soft, plastic look that mimics blur even though the underlying image data is technically in focus and free of motion artifacts.
Keep your ISO at 100 whenever possible. In low light conditions like golden hour, heavy overcast, or late evening, raise it to 200 or 400 if needed to maintain your target shutter speed. Resist the urge to go above ISO 400 on small sensors. If you need more light, use a slower shutter speed (down to about 1/250s while hovering in calm conditions) or open up the aperture instead of raising ISO.
Shooting in RAW gives you far more control over noise than JPEG. In RAW, no noise reduction is applied in-camera, so you retain all the detail the sensor captured. In post-processing, you can apply selective noise reduction only to smooth areas like sky and water while preserving fine detail in textures like grass, foliage, and brickwork. JPEG noise reduction is applied globally across the entire image and cannot be undone.
If you regularly shoot in low light and noise is unavoidable, consider investing in a drone with a larger sensor. The DJI Mavic 3 Pro features a 4/3 CMOS sensor that handles noise significantly better than the 1-inch sensors in the Air series. The larger the sensor, the more light it collects at any given ISO, which means less noise and more detail.
Aperture and Diffraction on Small Drone Sensors
Diffraction is the most overlooked cause of soft drone photos. It is a physics problem rooted in the wave nature of light, not a settings problem you can fix by toggling a menu option. It affects every drone camera regardless of brand or price, and understanding it is the key to diagnosing unexplained softness.
When light passes through a narrow aperture opening, the light waves bend at the edges and interfere with each other. This bending, called diffraction, creates a soft circle of light at the sensor level instead of a razor-sharp point. The narrower the aperture, the larger the diffraction circle and the softer the resulting image becomes.
On a full-frame camera, diffraction becomes barely noticeable around f/11 and becomes a real problem at f/16 and beyond. But on small drone sensors, diffraction kicks in much earlier because the pixels are packed more densely relative to the sensor area. According to Photography Life, a 1-inch sensor drone like the DJI Air 2S shows measurable diffraction softening at f/5.6. That is equivalent to about f/16 on a full-frame sensor.
For drones with fixed-aperture lenses, like the DJI Mini series and most budget drones, diffraction is not an issue because the aperture is permanently locked at f/2.8 or wider. You never have the option to stop down, so diffraction never enters the picture. This is one advantage of fixed-aperture designs.
But if your drone has an adjustable aperture, like the DJI Mavic 3, Mavic 3 Pro, or Air 3, you might be tempted to stop down to f/5.6 or f/8 to increase depth of field. This temptation comes from traditional photography advice where stopping down slightly improves edge-to-edge sharpness and increases the zone of acceptable focus.
On a small sensor, that advice backfires. The depth of field at typical aerial shooting distances (50 to 400 feet) is already enormous even at f/2.8 on a drone. Stopping down past f/4 does more harm than good because diffraction softening outweighs any depth-of-field benefit. The sweet spot for most adjustable-aperture drones is f/2.8 to f/4.
If your photos look soft even with correct shutter speed, correct focus, and a clean lens, check your aperture. If you are at f/5.6 or narrower on a 1-inch or smaller sensor, diffraction is eating your sharpness. Open up to f/2.8 or f/4 and the fine detail will return immediately.
One exception: on the DJI Mavic 3 Pro with its larger 4/3 sensor, you can safely stop down to f/4 or even f/5.6 before diffraction becomes visible. The larger sensor size pushes the diffraction limit further, giving you more aperture flexibility. But for most consumer drones with 1-inch or smaller sensors, stick to the widest aperture available.
Dirty or Smudged Lens: The Silent Sharpness Killer
A dirty lens is the easiest blur cause to fix, yet it is also the most commonly overlooked problem in drone photography. A single fingerprint on your drone camera lens can scatter enough light to turn a tack-sharp photo into a hazy, low-contrast mess. The tricky part is that the smudge is almost invisible to the naked eye when you look straight at the lens.
Every experienced drone pilot on forums like MavicPilots and r/dji has the same recommendation: clean the lens with a microfiber cloth before every single flight. Not every other flight. Not when it looks dirty. Every flight, without exception. Dust, pollen, salt spray, finger oils, and water condensation accumulate quickly during transport, handling, and takeoff.
Think about what happens to your drone between flights. It sits in a case or bag where dust settles on the gimbal and lens. You pick it up to launch, and your fingers brush near the camera. Grass, sand, or dirt kicks up during takeoff. All of this debris lands on a piece of glass that is smaller than a dime but responsible for capturing every detail in your photo.
Moisture is a particularly sneaky culprit. When a drone ascends from a warm ground temperature to cooler air aloft, condensation can form on the lens surface within seconds. This creates a uniform haze across the entire frame that looks like fog or soft focus. If your first few photos of a flight look hazy but later ones turn out sharp, condensation was almost certainly the cause.
To check if your lens is clean, hold the drone under a bright light source and tilt the lens so you can see the glass surface at a steep angle. This raking light reveals smudges, fingerprints, and dust particles that are completely invisible when looking straight on at the glass. Clean with a microfiber cloth using a gentle circular motion from the center of the lens outward.
For stubborn residue like salt spray, tree sap, or dried water spots, use a lens cleaning solution designed for camera optics applied to the microfiber cloth, never directly to the lens. Never use your shirt, a tissue, a paper towel, or a corner of your jacket. These materials contain fibers and coatings that can scratch the lens coating or leave behind more debris than they remove.
Keep a dedicated microfiber cloth in your drone case at all times. Make lens cleaning the last thing you do before launching and the first thing you check after landing. This 10-second habit will prevent more blur problems than any settings change you can make.
One final tip: remove your gimbal cover and gimbal lock completely before flight. A partially attached gimbal cover or lens protector can block part of the lens and create vignetting or blur on one side of the frame. This is a common mistake on DJI Mini drones where the gimbal lock is small, transparent, and easy to forget. Always double-check that nothing is covering the lens before you take off.
Gimbal Stability, Wind, and Vibration
Your drone’s gimbal is the mechanical stabilization system that keeps the camera steady during flight. It uses brushless motors and gyroscopic sensors to compensate for pitch, roll, and yaw movements, keeping the image level and smooth. When the gimbal works properly, you get sharp, stable photos even during aggressive flight. When it malfunctions or is overwhelmed by external forces, your photos suffer.
Wind is the gimbal’s biggest enemy. In winds above 15 to 20 miles per hour, the drone must constantly fire its motors to maintain position against the air pressure. These constant corrections create vibrations and sudden positional shifts that the gimbal cannot fully absorb. The result is micro-jitter that shows up as subtle motion blur in your photos, even at shutter speeds that would normally be fast enough.
If you consistently shoot in windy conditions, fly slower and use even faster shutter speeds to compensate. A shutter speed of 1/2000s can freeze micro-jitter that 1/500s cannot. Also, avoid flying in Sport mode unless you need to cover distance quickly. Sport mode disables some obstacle avoidance features, increases motor output, and can transmit more vibration to the camera.
Gimbal calibration is essential if you notice persistent blur that does not respond to shutter speed or focus changes. Over time and after hard landings, the gimbal’s gyroscopes can drift from their factory calibration. This causes the camera to sit slightly off-level, pan at a slight angle, or vibrate subtly during flight. Most drone apps include an auto-calibration feature that takes about 30 seconds to run.
To calibrate the gimbal properly, place your drone on a perfectly flat, level surface. A concrete floor or a sturdy table works well. Avoid calibrating on grass, carpets, or uneven ground, as any tilt during calibration will be baked into the gimbal’s reference point. Run the calibration in the DJI Fly or Autel Explorer app and wait for it to complete before moving the drone.
The “jello effect” is a specific type of vibration artifact that shows up as wavy, rippling distortions in the image. It is most noticeable in straight lines like building edges, fence lines, and horizon lines. It is caused by high-frequency vibration from the drone’s motors reaching the camera sensor through the gimbal mount. If you see jello in your photos, the problem is mechanical, not a camera setting.
Cracked, chipped, or unbalanced propellers are the most common source of vibration that pilots overlook. Even a small nick on a propeller blade creates aerodynamic imbalance that transmits vibration through the entire airframe. Inspect your propellers before every flight by running your finger along the leading and trailing edges of each blade. Replace any propeller that shows signs of wear, nicks, cracks, or bending.
Propeller mounts can also be a source of vibration if they are loose. After installing propellers, give each one a gentle tug to confirm it is seated firmly on the motor shaft. If a propeller wobbles or spins freely on the shaft, the mount is worn and needs replacement.
Lighting and Weather Conditions
Lighting affects drone photography more than most pilots realize. The issue is not just about getting the right exposure value. It is about how lighting conditions force the camera into settings that compromise sharpness in ways that are not immediately obvious.
In low light conditions such as thick cloud cover, dusk, early morning, or indoor flying, the camera automatically raises ISO or slows shutter speed to maintain a correct exposure. Both of these automatic responses degrade image quality. Higher ISO introduces noise that softens detail. Slower shutter speed introduces motion blur from drone movement. Either way, your photos lose sharpness.
The fix is either to add light (which is rarely practical for aerial photography) or to shoot in better light. The best natural light for drone photography comes during golden hour, the period roughly 30 minutes after sunrise and 30 minutes before sunset. During golden hour, the light is directional, warm in color temperature, and soft enough to avoid extreme dynamic range problems while still being bright enough to shoot at ISO 100 and fast shutter speeds.
Harsh midday sun creates a different problem entirely: extreme dynamic range. The sky can be 4 to 6 stops brighter than the ground in full sun, which exceeds what most drone sensors can capture in a single exposure. The camera may expose for the bright sky, leaving shadow detail buried in noise, or expose for the dark shadows, blowing out the sky entirely. Both scenarios produce photos that look less sharp because detail is crushed at one end of the tonal range.
For midday shooting, use exposure bracketing (AEB mode) to capture three to five exposures at different brightness levels. Then blend them in post-processing using HDR merge in Lightroom or a dedicated HDR tool like Aurora HDR. The merged file contains more tonal detail across the entire dynamic range, resulting in a final image that looks sharper because more detail is visible in both highlights and shadows.
Temperature also plays a role in image quality. In very cold weather, below freezing, drone batteries lose voltage faster, which can cause motors to run unevenly and introduce vibration. Condensation can form on the lens when moving the drone from a warm car or house into cold outdoor air. Let your drone acclimate to the ambient outdoor temperature for 10 to 15 minutes before flying in extreme cold. Keep the gimbal cover on during acclimation to prevent condensation on the lens.
Air quality is another factor that mimics soft focus. Haze, humidity, smog, smoke from wildfires, and airborne dust scatter light between your drone and the subject. This atmospheric softening reduces contrast and fine detail, and it is impossible to fix in post-processing because the detail was never captured by the sensor. The only solution is to fly on clear, low-humidity days when visibility is at its best. Check local air quality indexes before planning an important aerial shoot.
RAW vs JPEG: File Format Matters More Than You Think
The file format you choose has a direct and measurable impact on perceived sharpness. JPEG is a compressed format that permanently discards image data to reduce file size. RAW retains all the data captured by the sensor, giving you maximum detail, maximum dynamic range, and maximum flexibility in post-processing.
JPEG compression artifacts are most visible in fine, repeating details like grass blades, tree canopies, brick wall textures, roof shingles, and distant building facades. The JPEG compression algorithm identifies these areas as containing redundant detail and smooths them to save file space. The result is a soft, blocky appearance when you zoom to 100 percent on a computer monitor.
In-camera JPEG processing also applies sharpening and noise reduction automatically before the file is saved. On most consumer drones, this processing is aggressive and imprecise. Hard edges get over-sharpened halos that look unnatural, while fine textures are smoothed into a plastic-like mush. The result looks acceptable on a phone screen but falls apart when viewed on a large monitor or printed at any size.
RAW files contain no in-camera sharpening or noise reduction whatsoever. Every aspect of processing is under your control. You can apply sharpening selectively to areas that benefit from it, like edges and textures, while preserving smooth areas like sky and water. You can apply noise reduction only where it is needed rather than globally across the entire image.
If your drone supports RAW format, shoot in RAW or RAW+JPEG mode exclusively. The RAW files will look flat, soft, and underwhelming straight out of the camera compared to the processed JPEGs. That is normal and expected because no processing has been applied yet. Once you process the RAW file in Lightroom, Capture One, or DxO PhotoLab, the sharpness and detail will far exceed anything the in-camera JPEG engine could produce.
For drone models that do not support RAW, such as the DJI Mini 2, DJI Mini SE, and many budget clone drones, maximize your JPEG quality by taking these steps. Set the image quality to the highest available level (usually called Fine or Super Fine). Turn off digital zoom completely, as digital zoom crops into the sensor and upscales the result, reducing effective resolution. Keep ISO as low as possible to minimize in-camera noise reduction. And apply gentle, targeted sharpening in post-processing to compensate for JPEG softening.
DJI Mini 3 Specific Troubleshooting
The DJI Mini 3 and Mini 3 Pro are among the most popular consumer drones on the market in 2026. They are affordable, lightweight, and capable of excellent image quality for their size. But they have also generated a disproportionate number of blur complaints on Reddit, MavicPilots, and other drone forums. The problem is real and worth addressing specifically because generic troubleshooting advice often does not apply.
Multiple DJI Mini 3 users report a sudden onset of blurry images after several months to a year of use. Photos that were previously tack-sharp become consistently soft across the entire frame, regardless of settings. This is different from the gradual softness that comes from a dirty lens or a slow shutter speed. The sudden onset suggests either a firmware update that altered default image processing parameters or a mechanical issue with the gimbal or lens assembly.
If you own a DJI Mini 3 or Mini 3 Pro and are experiencing sudden, persistent blur, try these steps in order. First, open DJI Fly and check for firmware updates for both the drone and the remote controller. Install any available updates and then restart the drone. Second, run a full gimbal auto-calibration on a perfectly flat surface. Third, perform a compass calibration outdoors in an open area away from metal objects, cars, and reinforced concrete.
If the blur persists after firmware updates and calibration, try resetting all camera settings to their factory defaults. Sometimes custom settings, particularly exposure compensation, white balance shifts, or EV adjustments, can interact in ways that produce unexpected softening in the JPEG processing pipeline. A full reset clears all custom settings and starts fresh.
The Mini 3 Pro uses a Quad Bayer sensor design. Its 48-megapixel sensor uses a pixel-binning process to combine adjacent pixels into a single 12-megapixel output image. In some lighting conditions, particularly low-contrast scenes and at higher ISO settings, the pixel-binning algorithm can produce artifacts that look like softness or smearing. This is a known characteristic of Quad Bayer designs, not necessarily a defect.
To minimize Quad Bayer softness on the Mini 3 Pro, shoot in the dedicated 48-megapixel mode when lighting conditions permit. This bypasses the pixel-binning process and captures the full resolution of the sensor. Note that 48-megapixel mode works best in bright light at ISO 100. In lower light, the binned 12-megapixel mode may actually produce cleaner results because the binning process reduces noise.
If none of these steps resolve the issue, the problem may be hardware-related. Lens decentering (where one side of the frame is softer than the other), gimbal motor degradation, or a loose camera ribbon connector can all cause persistent blur. These issues require professional diagnosis and repair. Contact DJI support for a warranty assessment if your drone is still covered, or look into DJI Care refresh for repair options.
Budget Drone Camera Limitations
Not all drone blur problems can be fixed with settings changes. If you are flying a budget drone like the Holy Stone HS720, Ruko F11, DJI Mini SE, or a clone drone like the Z908 Max, you may be running into hardware limitations that no amount of settings tweaking will overcome.
Budget drones typically use small sensors (1/3-inch or smaller), inexpensive lenses with lower optical resolution, and basic gimbal stabilization that cannot match the three-axis precision of DJI or Autel systems. The cameras on these drones often have significant lens softness in corners, chromatic aberration at edges, and inconsistent focus across the frame.
Forum users report that budget clone drones like the Z908 Max commonly have laggy camera processors that produce consistently poor image quality with no fix available. The cameras on these drones may advertise 4K resolution but actually upscale from a lower native resolution, producing soft images that look blurry even when everything else is set correctly.
If you are flying a budget drone and cannot achieve acceptable sharpness, the most effective upgrades are to manage your expectations and maximize what the hardware can do. Shoot only in the best lighting conditions (golden hour, bright overcast). Keep the drone hovering still rather than shooting while moving. Use the fastest shutter speed the lighting allows. Clean the lens before every flight. And process your JPEGs gently in Lightroom or Snapseed to extract whatever detail the sensor managed to capture.
Ultimately, if sharp aerial photography is a priority, upgrading to a drone with a larger sensor and better gimbal stabilization will produce more improvement than any settings change on a budget drone. The DJI Mini 4 Pro, Air 3, and Mavic 3 Pro all offer substantially better image quality than budget alternatives.
Social Media Compression: Why Your Photos Look Blurry After Upload
One of the most confusing blur scenarios for drone photographers is the photo that looks razor-sharp on your computer monitor but turns mushy the moment you upload it to Instagram, Facebook, or another social platform. You might spend hours thinking your drone camera is broken when the real culprit is the platform you are uploading to.
Instagram compresses uploaded images aggressively to save server space and reduce loading times. A 20-megapixel RAW file that you processed and exported as a 5-megabyte JPEG gets recompressed to under 1 megabyte on Instagram’s servers. This recompression strips fine detail, introduces blocky artifacts around edges, and softens textures throughout the image.
Facebook applies similar compression, and in some cases the compression is even worse because Facebook also resizes images to fit its display grid layout. WhatsApp is the most aggressive of all, stripping images down to a fraction of their original resolution when shared in messages.
The solution is to pre-optimize your images for each platform. If you upload a smaller, already-compressed image, the platform has less data to strip away. The recompression does less damage because there is less to compress.
For Instagram, resize your image to 1080 pixels on the long edge. Apply output sharpening for screens (Lightroom has a specific output sharpening setting for this). Export as a JPEG at 85 to 90 percent quality. Transfer the file to your phone via AirDrop, Google Drive, or a cloud service rather than emailing it or texting it, which adds another layer of compression.
For Facebook, use 2048 pixels on the long edge. For your website or portfolio, use full resolution with no compression. Never upload a full-resolution drone photo directly to social media without resizing first. The platform’s automated resizing algorithm will produce worse results than your own controlled resize in Lightroom or Photoshop.
Post-Processing Fixes for Soft Drone Photos
Sometimes the best in-camera technique still produces photos that need a little help in post-processing. Sharpening, noise reduction, HDR blending, and image averaging can rescue detail that seems lost and elevate a good drone photo to a great one. The key is knowing which tool to use and how aggressively to apply it.
Sharpening in Lightroom: Open your RAW file in Lightroom or Adobe Camera Raw and navigate to the Detail panel. For drone photos, set the sharpening amount between 40 and 60, with a radius of 1.0 and detail around 50. Hold down the Alt key (Option on Mac) while adjusting the masking slider to see a black-and-white preview of which areas will be sharpened. White areas get sharpened, black areas are protected. Set masking to 30 or 40 to sharpen edges and textures while protecting smooth areas like sky from noise amplification.
Noise reduction: Apply luminance noise reduction sparingly. A value of 10 to 20 in Lightroom is usually enough to clean up noise without smearing fine detail. Color noise reduction can be set higher (25 to 40) since color noise is more objectionable and less damaging to detail. If you need heavier noise reduction than Lightroom can provide, use a dedicated AI tool like DxO PureRAW or Topaz DeNoise. These tools use machine learning algorithms to distinguish noise from actual image detail far better than traditional noise reduction methods.
HDR and exposure blending: For scenes with high dynamic range, like sunsets, backlit landscapes, or midday scenes with bright sky and dark shadows, shoot three to five bracketed exposures using AEB mode. Then merge them in Lightroom’s HDR merge feature, Aurora HDR, or manually blend them in Photoshop. The merged file contains more tonal detail across both shadows and highlights, producing a final image that looks sharper simply because more detail is visible across the tonal range.
Image averaging: This advanced technique, championed by Photography Life, involves shooting a burst of 5 to 10 identical photos from a hovering drone and averaging them together in Photoshop. The averaging process cancels random noise while preserving consistent detail, effectively simulating the performance of a larger sensor. It is particularly effective for night photography and low-light drone work where noise is the primary limitation on sharpness. To average images, open them as layers in Photoshop, align them automatically, then set each layer’s opacity to 1 divided by its position in the stack.
Adobe Enhance Details: This feature in Camera Raw and Lightroom uses a neural network to improve the demosaicing process, the step where raw sensor data is converted into a color image. It is particularly effective for Quad Bayer sensors used in drones like the DJI Mini 3 Pro, Mavic Air 2, and Air 2S. Running Enhance Details on a RAW file can recover fine detail that standard demosaicing algorithms leave behind. The process takes a few seconds per image and creates a new DNG file with improved detail rendering.
Local sharpening: For maximum control, use Lightroom’s adjustment brush or radial filter to apply sharpening only to specific areas of the image. Sharpen the foreground landscape where viewers expect crisp detail, and leave the sky and distant haze unsharpened. This targeted approach produces more natural-looking results than global sharpening applied to the entire frame.
SD Card and File Transfer Issues
A less common but still important cause of soft images is the SD card and file transfer pipeline. If your photos look sharp when previewed on the drone’s app but soft when viewed on your computer, the transfer process itself may be the problem.
Using a slow SD card can cause the drone to write compressed or lower-quality files when the buffer fills up during continuous shooting. Always use a UHS-I U3 or V30 rated SD card with a minimum write speed of 30 MB/s. For 4K video and high-resolution burst photography, a UHS-II card is even better. Avoid generic or counterfeit cards from unverified sellers, as these often have much slower actual write speeds than their labels claim.
File transfer method also matters. Transferring files via the drone’s USB connection to your computer can occasionally produce corrupted or incomplete files. Instead, remove the SD card from the drone and use a dedicated SD card reader connected directly to your computer. This ensures a clean, fast transfer with no data loss.
If you notice that only some photos from a flight are soft while others are sharp, check whether the soft photos were taken in rapid succession (burst mode) or toward the end of a long shooting session. This could indicate a buffer slowdown or thermal throttling issue.
FAQs
Why is my drone camera blurry?
Your drone camera is likely blurry due to one of six common causes: slow shutter speed (below 1/500s), incorrect focus mode (AF-C hunting instead of manual focus), a dirty or smudged lens, high ISO introducing noise, gimbal vibration or wind, or poor lighting conditions forcing bad camera settings. Check your shutter speed first, clean the lens, and switch to manual focus at infinity to resolve the majority of blur issues.
How to improve drone camera quality?
To improve drone camera quality, shoot in RAW format instead of JPEG, keep ISO at 100-200, use shutter speeds of 1/1000s or faster, switch to manual focus set to infinity, clean the lens before every flight, use ND filters in bright light to control exposure, calibrate the gimbal regularly, and apply targeted sharpening and noise reduction in post-processing using Lightroom or DxO PureRAW.
How to make your drone shots look professional?
To make drone shots look professional, shoot during golden hour for warm directional light, use the rule of thirds and leading lines in composition, shoot in RAW and process with selective sharpening and color grading, use ND filters for motion blur control, bracket exposures for HDR blending, avoid digital zoom entirely, and export at proper resolution for each display platform. Consistent gimbal calibration and clean lenses are non-negotiable basics.
What are the best camera settings for drone photography?
The best camera settings for sharp drone photos are: shutter speed 1/500s to 1/1000s or faster, ISO 100 to 200, aperture f/2.8 to f/4 on small sensors (avoid f/5.6 or narrower due to diffraction), manual focus set to infinity for landscapes, image format RAW or RAW plus JPEG, white balance set manually or to daylight, and exposure compensation adjusted for the scene. Use ND filters when needed to maintain these settings in bright light.
Conclusion: Getting Sharp Drone Photos Every Time
Figuring out why your drone photos are blurry or soft does not have to be a mystery. The vast majority of sharpness problems come down to a handful of fixable issues: shutter speed that is too slow for your flight conditions, a dirty or smudged lens, autofocus hunting instead of a locked manual focus, high ISO degrading fine detail, diffraction from stopping down too far on small sensors, gimbal vibration from wind or worn propellers, and social media compression destroying your carefully captured detail on upload.
Start with the 7-point diagnostic checklist from this article to identify your specific problem. In most cases, switching to manual exposure mode with 1/1000s shutter speed, ISO 100, manual focus at infinity, and a clean lens will transform your results immediately. Then layer in ND filters, RAW shooting, gimbal calibration, and targeted post-processing to push your image quality even further.
The difference between a soft, disappointing aerial photo and a crisp, professional one is usually just a few settings changes and a microfiber cloth. No drone on the market can produce sharp photos automatically in every condition. The pilot’s knowledge and attention to detail are what separate blurry snapshots from gallery-worthy aerial photography. Apply what you have learned here before your next flight, and you will see the improvement in every single frame.